10
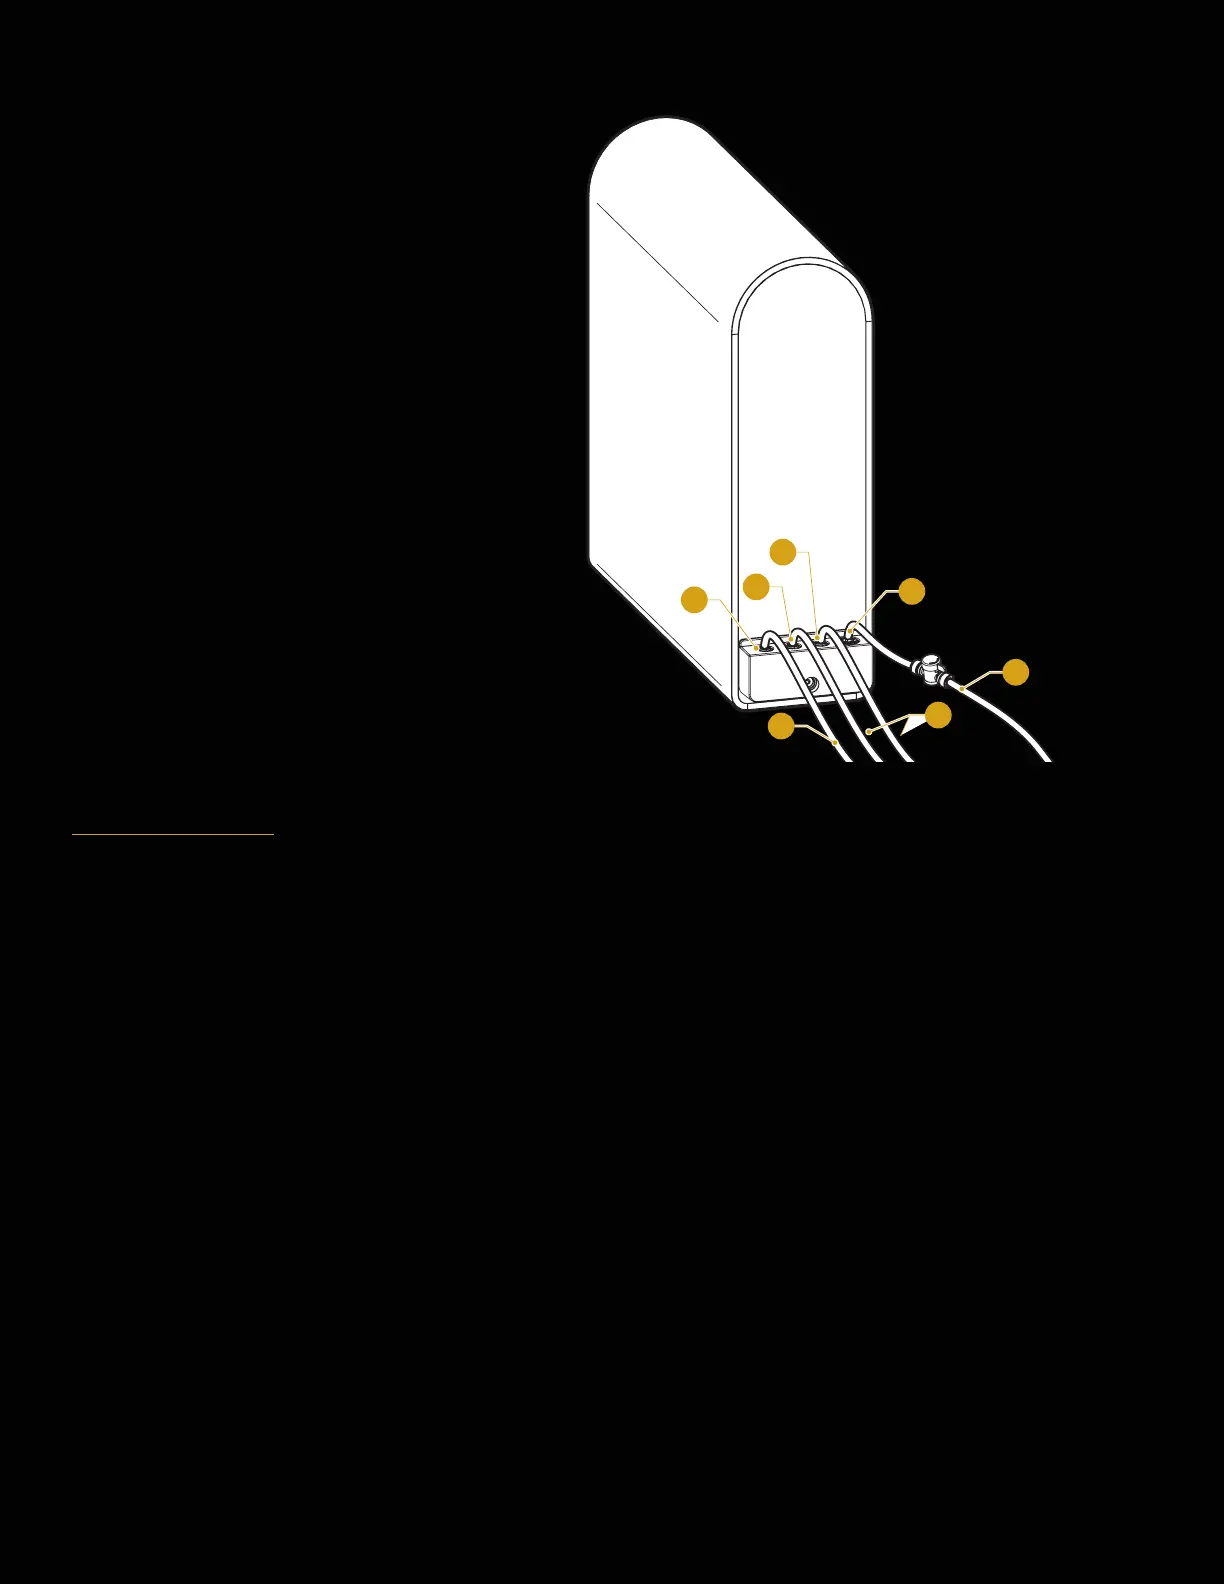
5. Complete the Installation
A. Connect the shut off valve tube (J) to
the inlet water connection (1).
B. Connect the faucet tubing (K)
connected to the 2/8 in. quick connect
(M) to the ltered water connection (2).
C. Connect the faucet tubing (K)
connected to the 2/8 in. quick connect
(M) to the puried water connection (3).
D. Connect the RO water outlet tube (I) to
the waste water connection (4).
E. Ensure all connections are made, and
proceed to the Operation section for
starting for rst time, plugging in, and
ushing.
I
4
3
2
1
K
J
Operation
Start Up the Filtration System
1. Ensure all water connections are completed as described in the Installation section.
2. Connect the power supply to the ltration system and then to an outlet.
The filter indicator panel turns on.
Start Water Purification
Open the faucet and the water purifier starts to produce water.
NOTE: If the faucet runs water for a long time (for 2 hours), the water purifier enters overtime protection mode.
The display screen at the side of the machine flashes, and the device is no longer able to produce water.
Unplug the power plug until the indicator turns o. Plug the device in again to clear the protection mode.
Shut Down
1. Close the shut-off valve on the tube (J).
2. Unplug the power supply.