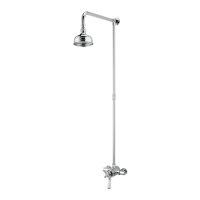
This diverter is intended to be used in conjunction with other products, such as the Shower
valves and/or stopcocks and spray outlets from the Bristan Prism range in order to create a
system to suit your requirements.
WATER PRESSURE
This valve is suitable for use at all supply pressures up to 8.0 bar. However, the minimum
work pressure will depend upon what the diverter will be connected to. Installation should
be in compliance with Water Regulations. For further details contact your Local Water
Authority.
CONTENTS
1. Diverter body 2. Diverter cartridge
3. Retaining nut 4. Concealing plate gasket
5. Concealing plate 6. Shroud
7. Spline adaptor washer 8. Spline adaptor
9. Handle 10. Grub screw
11. Cap 12. Screw (x2)
13. Wall Plug (x2) 14. Olive (x3, 2 outlet)/(x4, 3 outlet)
15. Compression nut (x3, 2 outlet)/(x4, 3 outlet)
INSTALLATION
The diverter is designed to be arranged in your system to alternate a supply of pre-mixed
water between three outlets e.g. a fixed head, adjustable riser kit, bath spout or body jets.
The 2 outlet divert has 3 15mm compression connections 1 inlet and 2 outlets.
The 3 outlet divert has 4 15mm compression connections 1 inlet and 3 outlets
Note:- The inlet to the diverter is marked with an arrow on the underside of the diverter and
the outlets are marked with the letters V and D.
1. Identify all components and check for completeness, particularly before arranging fitting.
Note – any new pipe work should be thoroughly flushed before any connections are made.
2. It is important to measure up the application of the valve so that positioning will allow the
concealing plate (5) to be fitted behind, and held in place against the finished wall by the
shroud (6).
3. Place the diverter into the wall cavity and connect the inlet to the mixed water supply
using nut (15) and olive (14) to the diverter body.
4. Connect outlets to installed fittings using the nuts (15) and olives (14) to the diverter
body. The fixing screws (12), wall plugs (13) can be used where necessary.
5. Fully open water supplies and run for a few minutes to check both correct diverter function
and for leaking from joints / connections by turning the spindle and alternating between the
outlets.
6. Complete wall finish ensuring depth is correct to allow for fitting of concealing plate (5)
and handle (9).
Note – It is important to leave a gap around the retaining nut (3) to allow removal for
servicing.
7. Once dry, fit concealing plate (5) against wall with gaskets (4) in place.
8. Fit handle (9), secure using grub screw (10) and finish with cap (11).
9. See over the page for aftercare instructions.