42 43
Britax Child Safety, Inc. FRONTIER/PINNACLE CLICKTIGHT User Guide
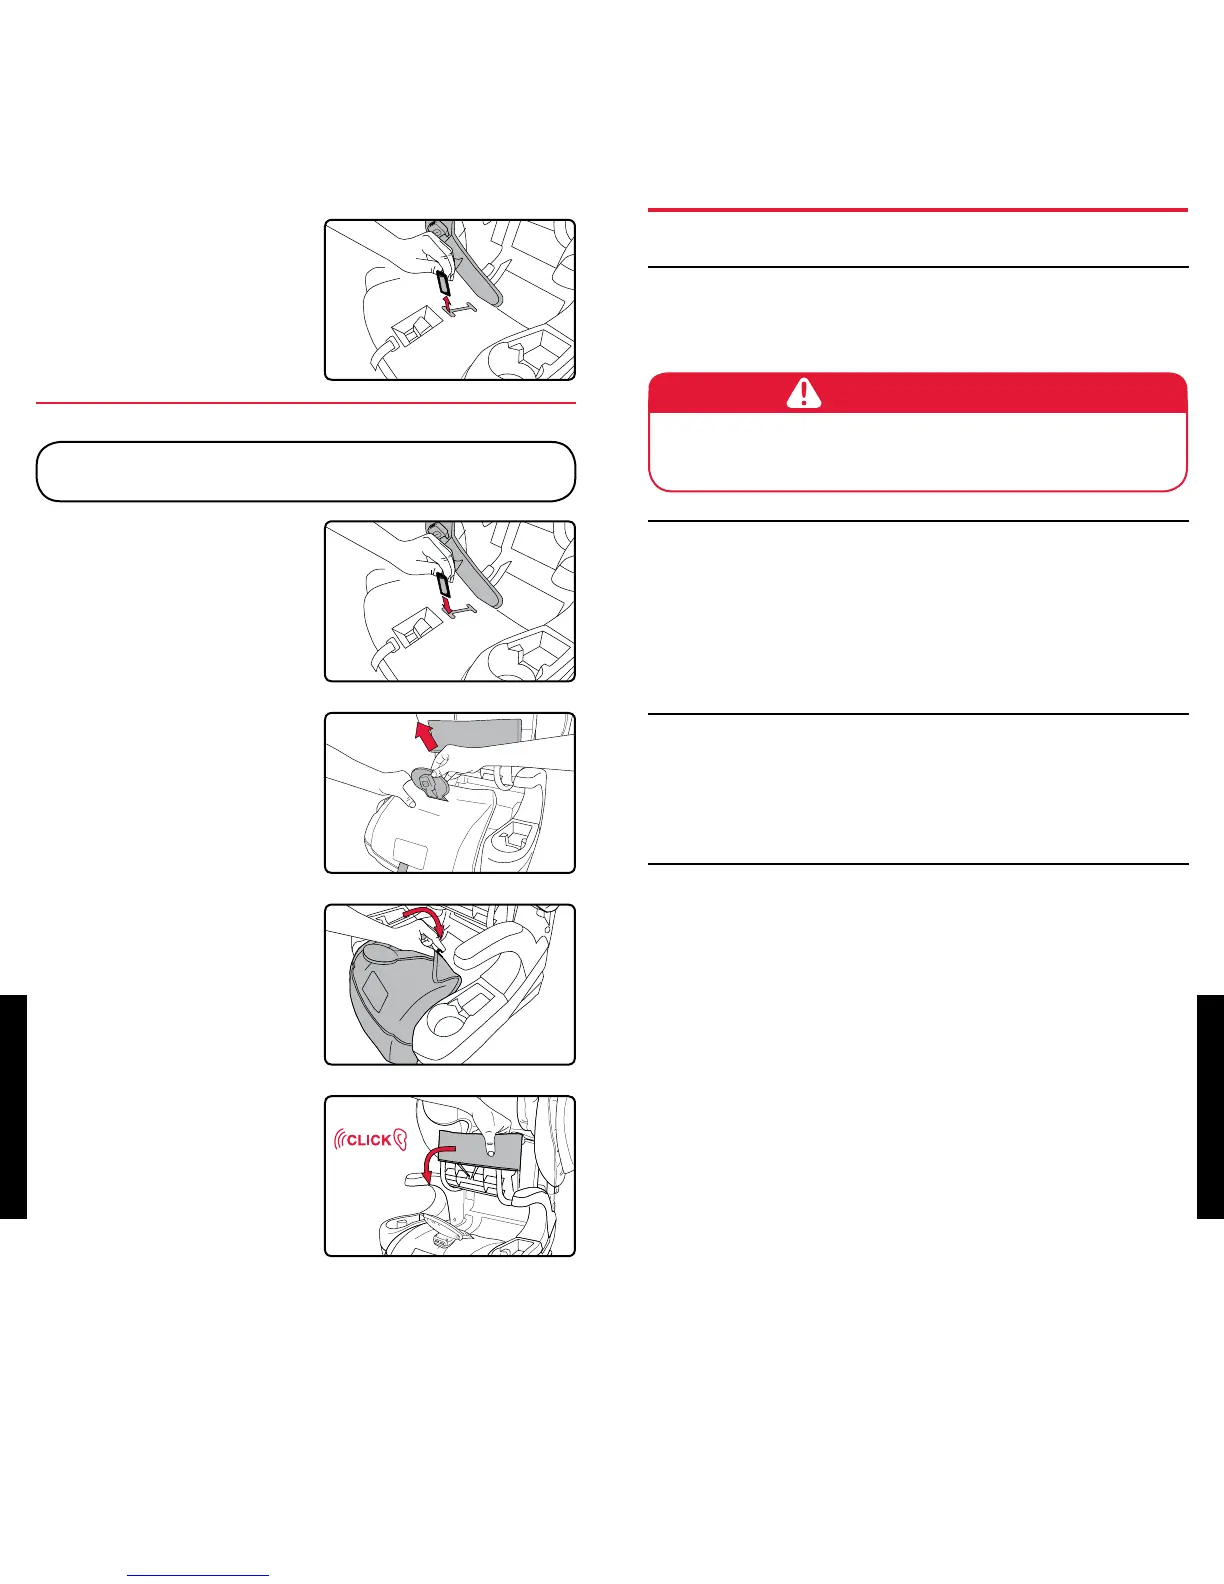
4� Turn and pull the buckle
retainer through the slot in
the child seat shell�
NOTE: Pull the belly pad
over the buckle retainer to
remove.
Replacing the Buckle
IMPORTANT: Select the slot closest to, but not under the
child�
1� Turn and push the buckle
retainer through the slot in
the child seat shell�
2� Pull the EZ-Buckle
belly pad through the
corresponding slot in the
seat cover�
NOTE: Ensure that the
buckle strap is not twisted
and that the button faces
out.
3� Place the seat cover back
in its original position and
attach the retaining clips�
NOTE: Pull the belly pad
over the buckle retainer to
remove.
4� Close the CLICKTIGHT�
A click confirms the
CLICKTIGHT is secure�
Shell • SPONGE CLEAN
the shell using warm
water and mild soap�
• TOWEL DRY
DO NOT
• Use abrasive
cleaners�
Pinnacle ONLY - Prevent the Side Impact Cushions
from being punctured� Puncture damage will cause the
cushions not to perform as intended�
Cover • Refer to product
care label for wash
instructions
• If care label indicates
machine washable,
always refer to
us.britax.com/faqs
for additional care
information
DO NOT
• Bleach
• Iron
Harness • SPONGE CLEAN the
harness using warm
water and mild soap�
• TOWEL DRY
DO NOT
• Disassemble the
harness
• Bleach
• Machine wash
• Machine dry
• Iron
Harness
Buckle
• THOROUGHLY
RINSE the buckle
using warm water�
• TEST THE BUCKLE
by fastening and
unfastening until a
click is heard after
inserting each buckle
tongue� If clicks are
not heard, repeat the
cleaning procedure�
• TOWEL DRY
DO NOT
• Soak
• Lubricate
• Use solvents
• Use soap or
household
detergents
Cleaning
WARNING!
 Loading...