6.2 Pipe-work connection
Sweat connection:
• Locate the suction & liquid pipe service valves in the compressor compartment by removing the service access
panel
• Check that the service valves are tightly closed (Service Ball valves have been provided for suction and liquid
lines)
• Wrap each valve in turn with a wet cloth prior to sweating off its associated blanking plate (Flare nut connection is
fitted on some of the indoor units to avoid brazing)
• Braze the interconnecting liquid and suction pipes from the indoor unit
• Pressurise the indoor unit & pipe-work again with dry nitrogen and check for any brazed joint leaks. Repair as
necessary but ensure the system is not under pressure prior to brazing
• With the indoor unit pressure again released, evacuate to a vacuum pressure of 100 microns minimum
• Disconnect the vacuum pump whilst retaining the system vacuum
• Open the liquid line valve fully first, and then the suction line valve
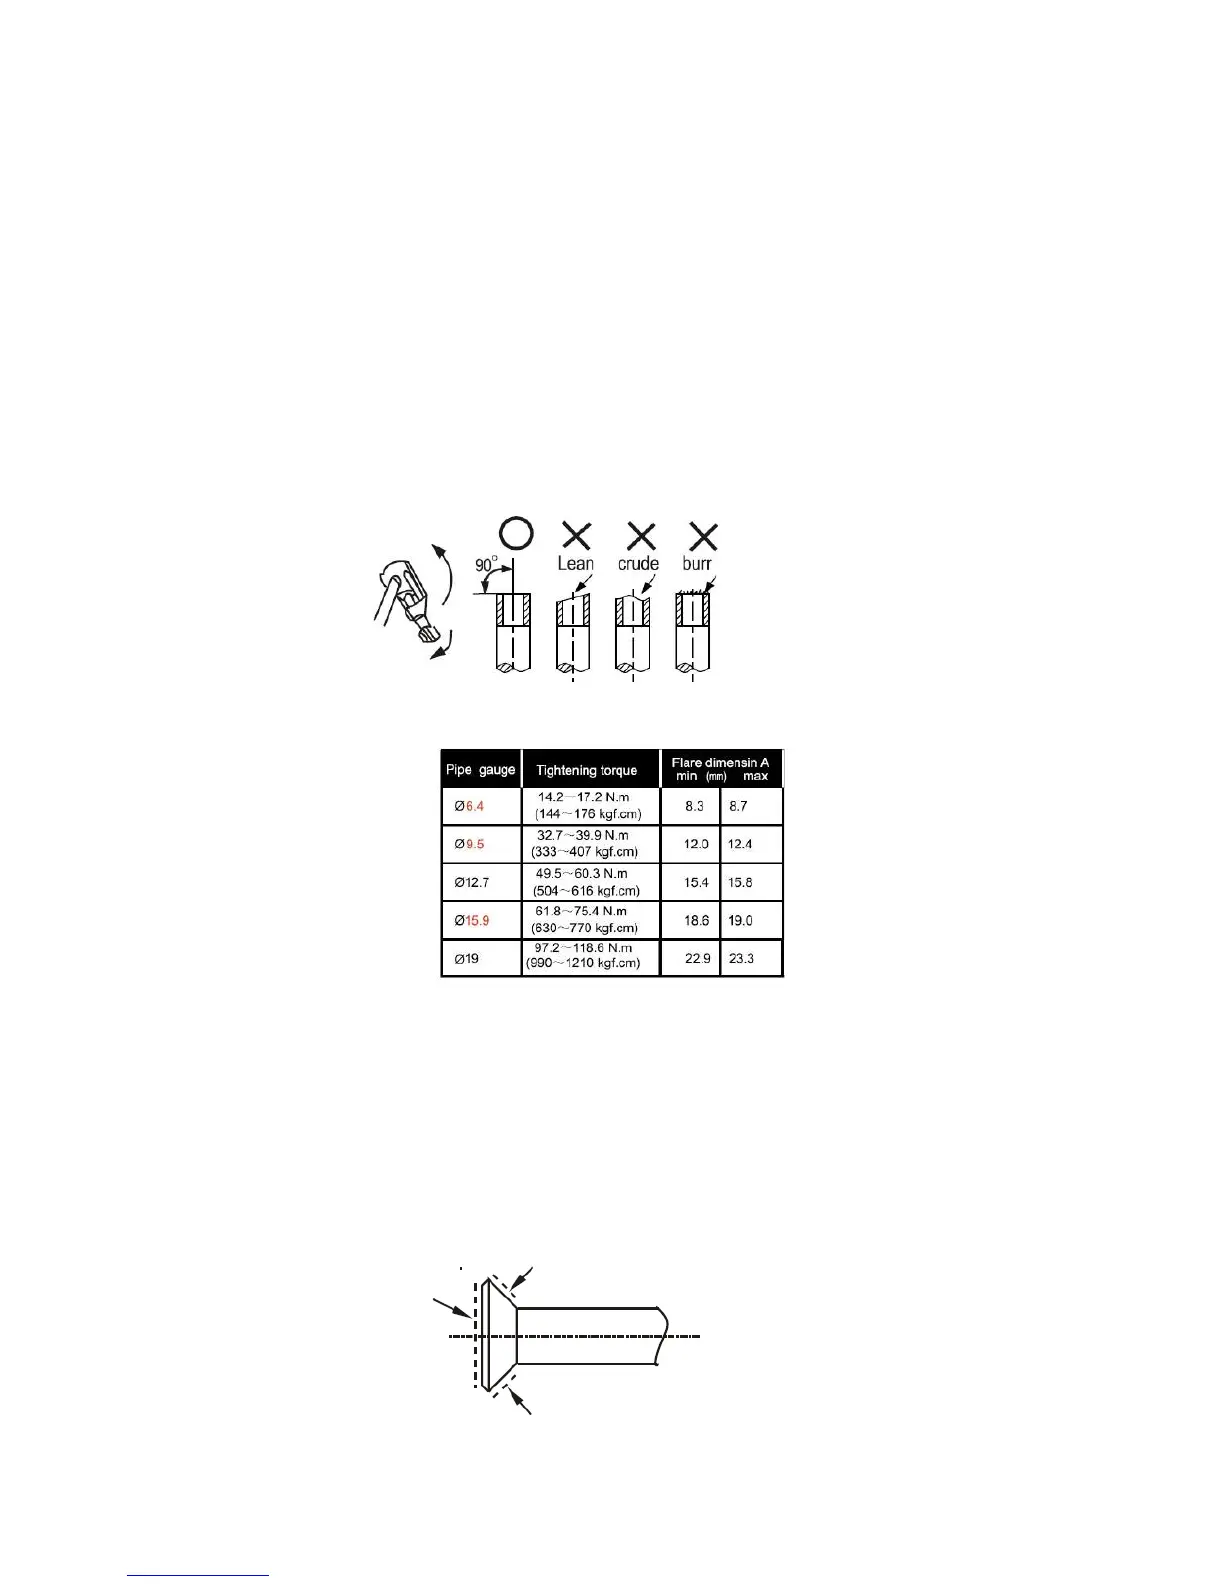
Flare connection:
• Cut the pipe with pipe cutter
• Insert the flare nut into the pipe and flare the end
• Refer to the following table for the dimension of flare nut spaces:
Table 3 – Flare Dimensions and Flare Tightening Torque
• Connect the indoor unit first and then the outdoor unit.
• Bend the refrigerant pipe in the correct way to prevent damage.
• The bending angle should not exceed 90°.
• The preference is to place any b ends in the middle of the pipe. The larger the bending radius the better, as it reduces internal
pressure drop.
• Do not bend pipe more than is necessary.
• When connecting the flare nut, coat the flare both inside and outside with approved oil and initially tight en by
hand 3 or 4 turns before tightening firmly.
 Loading...