Assembly | Brose Display AllroundEN | 26
4. Assembly
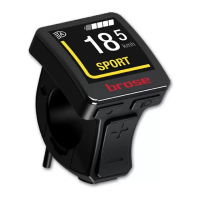
The control unit can be mounted on both the
left and the right side of the handlebar.
NOTE: Brose recommends positioning on the
left side of the handlebar.
NOTE: Check all fixing screws regularly.
Shocks, heat and cold can cause the screws
to become loose. Tighten all screws to the
required torque.
› Carefully remove the grip and open the
brake, gears and all other components
mounted on the selected handlebar side.
› Carefully loosen the hexagon socket screw
with a size 2 wrench (Fig. B-g) on the
control unit.
» NOTE: The screw cannot be removed
from the control unit.
› Now slide the control unit from the side
onto the handlebar.
› Position the control unit close to the grip,
so that all keys can be easily pressed with
the thumb.
› NOTE: Please make sure that the operation
of safety-relevant parts (e.g. brake grips)
is always ensured.
› Make sure that the connection cable is not
crushed or bent.
› Now tighten the hexagon socket screw
slightly with a size 2 wrench. Do not
tighten the screws yet. Check the position
of the control unit.
» Can all keys be reached with the thumb?
» Is the display clearly visible?
› Tighten the hexagon socket screw with the
wrench (Fig. B-g).
» Torque 0.5 Nm
› Connect the control unit cable to the motor
cable connectors (Fig. B-h). This may vary
depending on the features of your e-bike.
5. Operation and Control
5.1. Before First Use
Commissioning of the display and control unit
requires no further steps after installation. The
display/control unit is ready for use as soon
as it has been correctly connected and the
battery is sufficiently charged.
NOTE: A full function is only possible if the
speed sensor and all cables have been
connected correctly and the battery is
sufficiently charged.
NOTE: The display unit does not have its
own battery and therefore cannot be used or
operated outside the e-bike.
NOTE: If the e-bike is switched on, the display
unit remains switched on while riding; even if
the motor assistance is deactivated.
190729_Brose_BDA-Allround-Multi.indd 26 29.07.2019 15:14:30
 Loading...