6. Do one of the following:
• If you are using the ADF, the machine starts scanning and sending the document.
• If you are using the scanner glass and pressed Mono Start, the machine starts scanning the first page.
Go to the next step.
• If you are using the scanner glass and pressed Colour Start, the LCD asks if you want to send a colour
fax.
Press 1 to confirm. The machine starts dialling and sending the document.
7. When the LCD displays [Next Page?], do one of the following:
• Press 1 to scan another page. Place the next page on the scanner glass, and then press OK. The
machine starts scanning the page.
• Press 2 to send a fax (or press Mono Start again) when finished scanning pages.The machine starts
sending the document.
Repeat this step for each additional page.
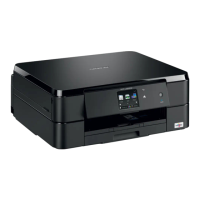
MFC-J680DW/MFC-J880DW
1. Load your document in the ADF or on the scanner glass.
2. Press [Fax].
(MFC-J880DW)
If [Fax Preview] is set to [On], press [Fax] > [Sending Faxes].
The Touchscreen displays:
3. Enter the fax number in one of the following ways:
• Dial Pad (Enter the fax number manually.)
Press all digits of the number using the Touchscreen.
• [Redial] (Redial the last number you dialled.)
Press [Call History] > [Redial].
• [Outgoing Call] (Select a number from the Outgoing Call history.)
Press [Call History] > [Outgoing Call].
Choose the number you want, and then press [Apply].
• [Caller ID history] (Select a number from the Caller ID history.)
Press [Call History] > [Caller ID history].
Choose the number you want, and then press [Apply].
• [Address Book] (Select a number from the Address Book.)
Press [Address Book].
219
 Loading...
