Do you have a question about the Brother DCP-L3517CDW and is the answer not in the manual?
Change the default password 'initpass' to protect the machine from unauthorized access.
For LCD models, press Menu, navigate to Initial Setup, select Local Language, and choose your language.
For touchscreen models, press Settings > All Settings > Initial Setup > Local Language and select your language.
Download the Full Driver & Software Package from support.brother.com for Windows or Mac.
Check wireless/wired network, restart machine/computer, or visit support.brother.com for FAQs.
Find your SSID and Network Key on your wireless access point/router to connect directly or via wizard.
Use AirPrint, Mopria, or Brother iPrint&Scan app for printing and scanning from mobile devices.
This document outlines the setup and initial usage of a Brother multi-function device, covering models such as DCP-L3510CDW, DCP-L3517CDW, DCP-L3550CDW, DCP-L3551CDW, MFC-L3710CW, MFC-L3730CDN, MFC-L3735CDN, MFC-L3745CDW, MFC-L3750CDW, and MFC-L3770CDW. It serves as a Quick Setup Guide, emphasizing the correct installation procedure and directing users to the Product Safety Guide for initial reading. For more detailed information and the latest manuals, users are advised to visit the Brother Solutions Center online.
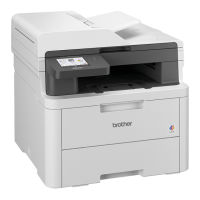
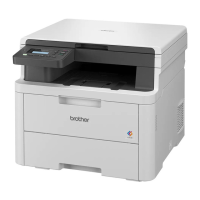
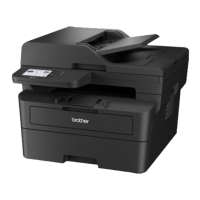
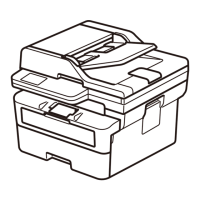
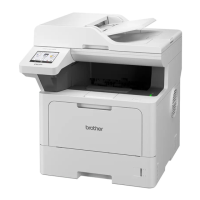
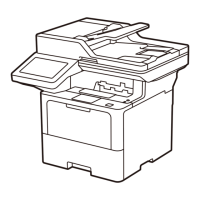
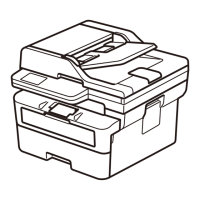
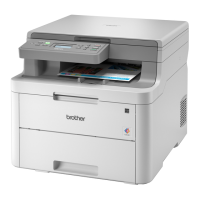
The Brother device is a versatile multi-function machine designed for printing, scanning, and potentially other office tasks, depending on the specific model. It supports various connectivity options, including USB, wired network, and wireless network, making it suitable for both individual and shared environments. The device is capable of handling different paper types and sizes, and some models feature an automatic document feeder (ADF) for efficient multi-page scanning and copying. It integrates with both computer and mobile device ecosystems, offering flexible printing and scanning solutions. The inclusion of drum unit and toner cartridge assemblies indicates its use of laser printing technology, known for its speed and cost-effectiveness for high-volume printing. The device also includes a waste toner box and a belt unit, which are integral to the laser printing process.
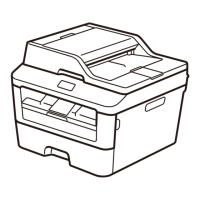
The setup process begins with unpacking the machine and verifying all included components, which may vary by country. These components typically include the drum unit and toner cartridge assemblies (pre-installed), a waste toner box, a belt unit, a telephone line cord (for MFC models), an AC power cord, and a Brother Installation Disc, Quick Setup Guide, Product Safety Guide, and a Reference Guide (for certain models). For MFC models, a telephone line cord adapter may also be included for Australia.
The initial installation involves removing all blue packing tape and sliding eight yellow drum locks to prepare the drum unit. Users then remove orange parts from each cartridge and push them firmly into place. The next step is loading paper into the paper tray, ensuring not to exceed the maximum fill mark and adjusting the paper guides correctly.
After loading paper, the AC power cord is connected, and the machine is turned on. For initial setup, users may be prompted to select their country or language. For LCD models, this is done by pressing Menu, navigating to [Initial Setup] > [Local Language] using the arrow keys, pressing OK, selecting the language, and then pressing OK and Stop/Exit. For touchscreen models, users press [Settings] > [All Settings] > [Initial Setup] > [Local Language] on the touchscreen, select their language, and press OK.
Connecting the device to a computer involves either using the provided installation disc or downloading the Full Driver & Software Package from the Brother support website (support.brother.com/windows for Windows®, support.brother.com/mac for Mac). For Windows®, if the Brother screen doesn't appear automatically, users navigate to Computer (This PC), double-click the CD/DVD-ROM icon, and then double-click start.exe. For Mac, the CUPS driver is recommended for full driver functionality.
For network connectivity, the guide addresses both wired and wireless setups. If a wired connection is chosen, users simply connect the network cable. For wireless setup, users can follow the on-screen instructions from the installation software. If direct wireless setup is preferred, the guide provides an alternative method. Users need to find their SSID (Network Name) and Network Key (Password) on their wireless access point/router. For LCD models, they select [Network] > [WLAN] > [Setup Wizard] from the menu. For touchscreen models, they press WiFi > [Setup Wizard] > [Yes]. They then select their SSID and enter the Network Key. A "Connected" message indicates successful setup.
The device also supports mobile printing and scanning. For iOS devices, AirPrint is available without additional software. For Android™ devices, users can download and install the Mopria® Print Service app. Additionally, Brother offers its free application, Brother iPrint&Scan, available on various app stores (App Store, Google Play™, Microsoft® Store), which allows printing from and scanning to mobile devices.
The guide highlights the importance of regular firmware updates to add features and apply bug fixes, directing users to support.brother.com/up7 to check for the latest firmware. This ensures the device operates with optimal performance and security.
The initial installation process itself involves handling internal components like the drum unit and toner cartridges, which are consumables. The presence of a waste toner box indicates that the device manages toner waste, a common aspect of laser printers requiring periodic emptying or replacement. The belt unit is another component that may require replacement over the device's lifespan.
For network security, the guide explicitly states that the machine's default password is "initpass" and strongly recommends changing it to protect the machine from unauthorized access. This is a crucial maintenance step for data security in a networked environment.
Troubleshooting steps are also provided for connectivity issues. If the wireless network setup is unsuccessful, users are advised to restart their wireless access point/router, then restart their machine and computer, and retry the setup. If problems persist, users are directed to support.brother.com for FAQs and troubleshooting resources. This proactive approach to maintenance and troubleshooting helps users resolve common issues independently. The Brother SupportCenter mobile app also serves as a valuable resource for obtaining the latest support information.
| Functions | Print, Copy, Scan |
|---|---|
| Maximum Paper Size | A4 |
| Print Speed (Black) | Up to 18 ppm |
| Print Speed (Color) | Up to 18 ppm |
| Duplex Printing | Automatic |
| Display | 2-line LCD |
| Print Speed (Black and Colour) | Up to 18 ppm |
| Print Resolution | 2400 x 600 dpi |
| Paper Capacity | 250 sheets |
| Connectivity | USB, Ethernet, Wi-Fi |
| Mobile Printing | Brother iPrint&Scan, AirPrint, Google Cloud Print |