3-87
Confidential
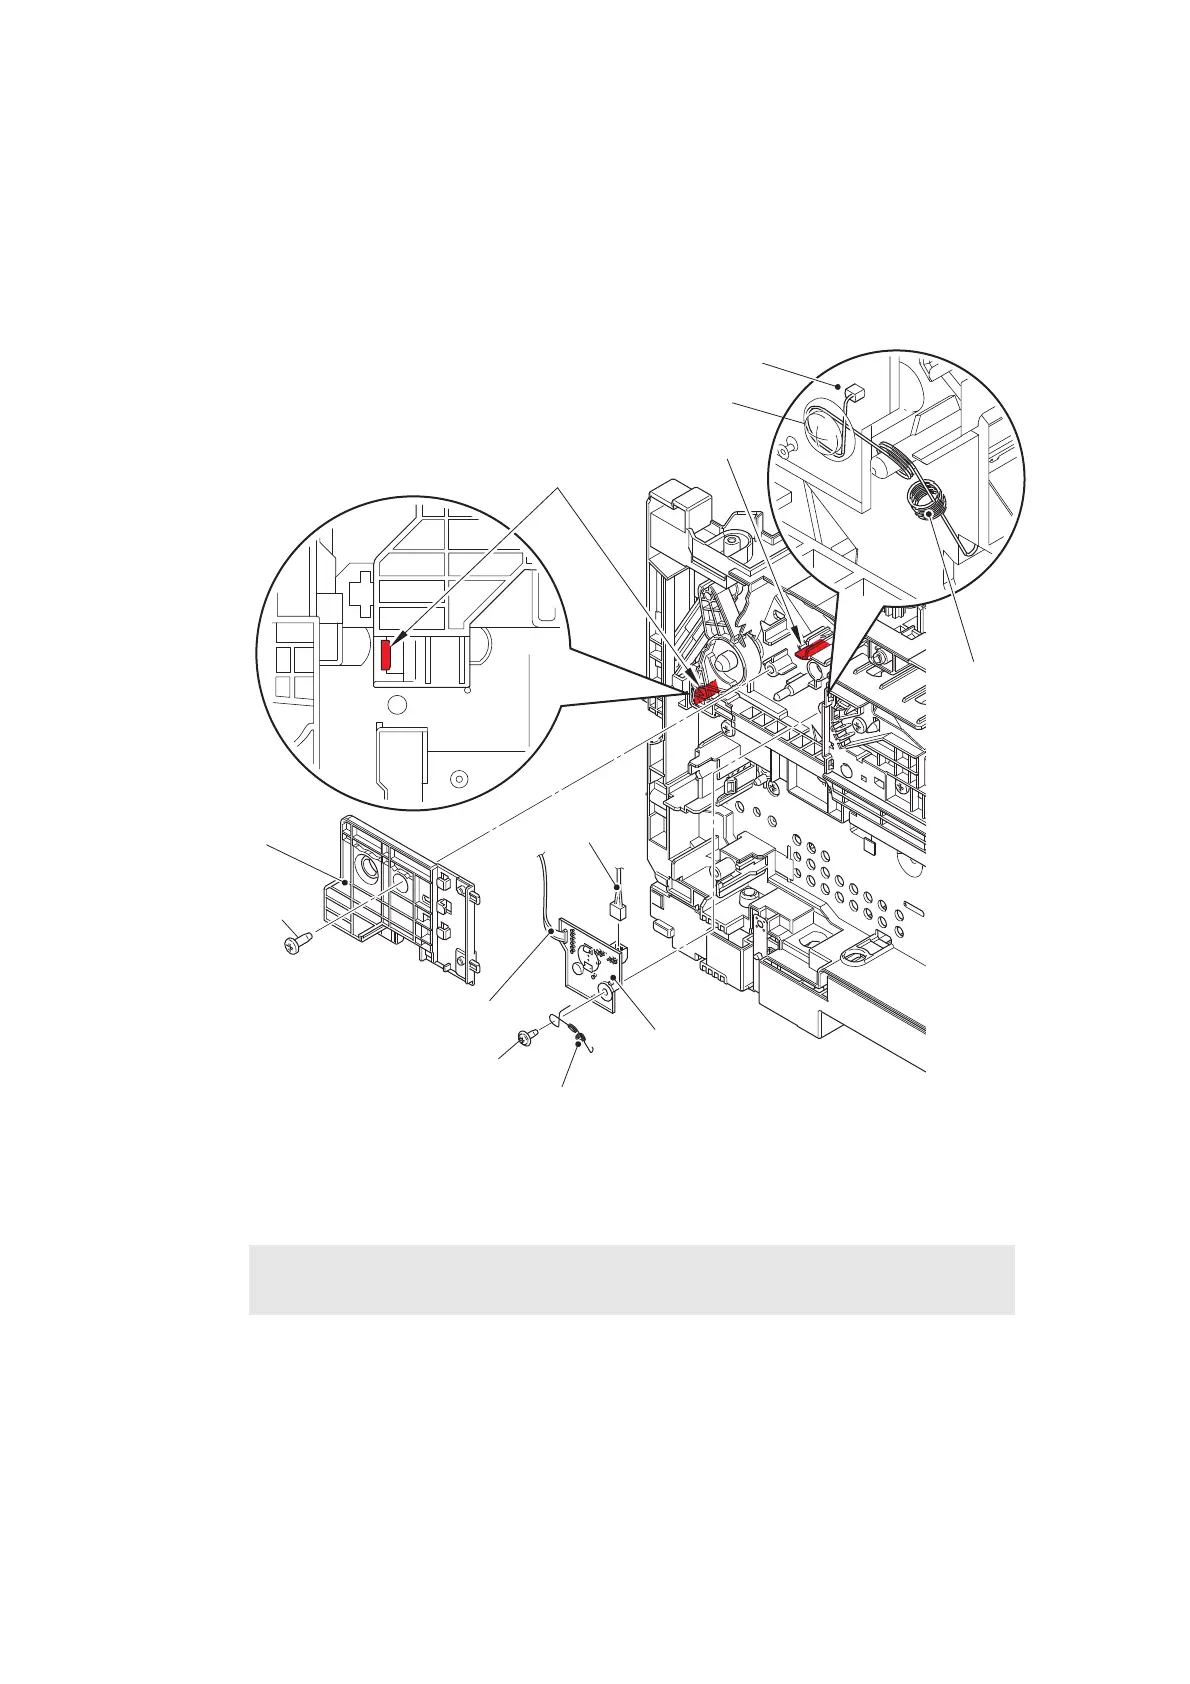
(5) Remove the taptite bind B M4x12 screw. Release the hook and hold cover 1.
(6) Release the toner amount detection sensor PCB harness (light emission) from the
securing fixtures.
(7) Remove the taptite pan B M3x8 screw, and remove the pinch ground spring. Release
the hook, and remove the toner amount detection sensor PCB ASSY (light emission).
Pull out the main fan harness from the toner amount detection sensor PCB ASSY (light
emission).
Fig. 3-87
Harness routing: Refer to “10. Left side of the machine”, “11. Rear side of the machine”.
Assembling Note:
• Hook the pinch ground spring at the position described in the figure above.
Pinch ground spring
Toner amount
detection sensor PCB
ASSY (light emission)
Hold cover 1
Taptite pan B M3x8
Hook
Taptite bind B M4x12
Main fan
harness
Toner amount detection sensor
PCB harness (light emission)
Hook
Toner amount detection sensor PCB ASSY (light emission)
Pinch ground
spring
Taptite pan B M3x8

 Loading...