EasyManua.ls Logo

Brother KE-484C User Manual

Brother KE-484C
68 pages
To Next Page IconTo Next Page
Page #1 background imageLoading...
Page #1 background image
KE-484C
Please read this manual before using the machine.
Please keep this manual within easy reach for quick reference.
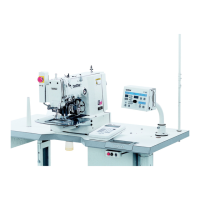
ELECTRONIC LOCKSTITCH PATTERN TACKER WITH TREBLE HOOK
INSTRUCTION MANUAL

Table of Contents

Other manuals for Brother KE-484C

Questions and Answers:

Brother KE-484C Specifications

General IconGeneral
BrandBrother
ModelKE-484C
CategorySewing Machine
LanguageEnglish

Summary

SAFETY INSTRUCTIONS

1. Safety Indications and Their Meanings

Explains DANGER and CAUTION indications and their meanings for safe operation.

2. Notes on Safety

Provides essential safety notes and precautions for operating the machine.

Sewing Safety Precautions

Safety precautions specific to the sewing operation of the machine.

Cleaning Safety Precautions

Safety precautions to be followed during the cleaning process.

Maintenance and Inspection Safety

Safety guidelines for performing maintenance and inspection.

Warning Labels

Identification of Warning Labels

Identifies and explains various warning labels found on the sewing machine.

Machine Parts and Specifications

1. Name of Each Part

Identifies and lists all major parts of the sewing machine.

2. Specifications Overview

Details the technical specifications of the KE-484C sewing machine.

2-1. Detailed Specifications

Provides a detailed list of technical specifications for the machine.

Installation Guide

3. Installation Overview

Guides the user through the process of installing the sewing machine.

3-1. Power Table Setup

Instructions for installing the power table for the sewing machine.

3-2. Control Box Installation

Step-by-step instructions for installing the control box.

3-3. Rubber Cushions Installation

Details how to install the rubber cushions.

3-4. Oil Pan Installation

Instructions for installing the oil pan.

3-5. Cushion Installation

Describes the process of installing the cushions.

3-6. Switching Plate Installation

Guide to installing the switching plate for safety.

3-7. Machine Head Installation

Instructions for mounting the machine head onto the table.

3-8. Head Rest Installation

Steps for installing the head rest.

3-9. Operation Panel Installation

How to install the operation panel on the work table.

3-10. Ground Wire Connection

Proper procedure for connecting the ground wire for safety.

3-11. Cord Connection

Detailed steps for connecting various cords and connectors.

3-12. Piping and Air Unit Installation

How to connect air tubes and install the air unit.

3-12-2. Speed Controller Adjustment

How to adjust the speed controller for various devices.

3-13. Belt Cover Installation

Steps for installing the belt cover.

3-14. Foot Switch Installation

Instructions for installing the foot switch.

3-15. Needle Sub Plate Installation

How to install the needle sub plate.

3-16. Spool Stand Installation

Guide to assembling and installing the spool stand.

3-17. Eye Guard Installation

Instructions for installing the eye guard safety device.

Lubrication Procedures

4. Lubrication Overview

Details the lubrication points and procedures for the machine.

4-1. Lubrication Points Identification

Identifies specific points requiring lubrication.

Operation Guide

5. Operation Overview

General information on operating the sewing machine.

5-1. Operation Panel Functions

Explains the function of each button and indicator on the operation panel.

5-2. Operating Procedure

Outlines the step-by-step procedure for operating the machine.

5-3. Foot Switch Operation

Explains how to use the foot switch to control the machine.

5-4. Emergency Stop Switch Operation

Instructions for using the emergency stop switch.

5-5. Thread Wiper Switch Operation

How to operate the thread wiper switch.

6. Checking the Sewing Pattern

Procedure for checking the sewing pattern using feed mechanism operation.

Correct Use and Threading

7-1. Installing the Needle

Step-by-step guide for correctly installing the needle.

7-2. Threading the Upper Thread

Instructions for threading the upper thread correctly.

7-3. Winding the Lower Thread

Detailed steps for winding the lower thread onto the bobbin.

7-4. Replacing Bobbin Case and Threading

How to replace the bobbin case and thread it properly.

Thread Tension and Adjustment

Guides on setting and adjusting thread tension and related components.

Sewing Operations

8. Sewing Procedure

Instructions and procedures for sewing with the machine.

Maintenance and Inspection

9. Maintenance and Inspection Overview

Guidelines for maintaining and inspecting the sewing machine.

9-1. Needle Check

How to check the needle for damage or bending.

9-2. Rotary Hook Cleaning

Steps for cleaning the rotary hook assembly.

9-3. Lubrication Steps

Details on lubricating different parts of the machine.

9-4. Draining the Oil

Procedure for draining and managing waste oil.

9-5. Control Box Air Inlet Cleaning

How to clean the air inlet port of the control box.

9-6. Air Hole Cleaning

Cleaning air holes in the belt and frame side covers.

9-7. Eye Guard Cleaning

Instructions for cleaning the eye guard.

Standard Adjustments

10. Standard Adjustments Overview

Procedures for standard adjustments on the sewing machine.

10-1. Needle Bar Height Adjustment

How to adjust the height of the needle bar.

10-2. Needle Bar Lift Amount Adjustment

Steps to adjust the needle bar lift amount.

10-3. Needle Clearance Adjustment

How to adjust the clearance between the needle and rotary hook.

10-4. Thread Take-up Amount Adjustment

Procedure for adjusting the thread take-up amount.

10-5. Movable Knife Adjustment

How to adjust the movable knife for proper cutting.

10-5-1. Knife Replacement

Steps for replacing the movable and fixed knives.

10-5-2. Knife Engagement Adjustment

How to adjust the engagement between the movable and fixed knives.

10-6. Work Clamp Lift Amount Adjustment

Procedure to adjust the work clamp lift amount.

10-7. Work Clamp Interchangeability

Information on interchanging different work clamps.

10-8. Needle Up Stop Position Adjustment

How to adjust the needle's stop position.

10-9. Thread Wiper Adjustment

How to adjust the thread wiper mechanism.

10-10. Air Pressure Adjustment

Procedure for adjusting the air pressure.

10-11. Sensor and DIP Switch Check

How to check input sensors and DIP switch settings.

10-12. Input Voltage Check

Procedure to check the input voltage.

10-13. Clearing Memory Settings

How to clear all memory settings and reset the machine.

10-14. Moving Stitch Patterns

How to move stitch patterns for repositioning.

Counters

11. Using the Counters Overview

How to use the bobbin thread and production counters.

11-1. Bobbin Thread Counter Usage

Guide to setting and using the bobbin thread counter.

11-2. Production Counter Usage

How to display and use the production counter.

DIP Switches and User Programs

12. Changing Functions Using DIP Switches

How to change machine functions using DIP switches.

12-1. Operation Panel DIP Switches

Explains DIP switches located on the operation panel.

12-2. Control Box DIP Switches

Details DIP switches found inside the control box.

12-3. Using User Programs

How to record and use custom user programs.

Special Functions and Memory Switches

13. Changing Special Functions Overview

How to modify special functions via memory switches.

Memory Switches 00 - 0F

Details memory switches 00 to 0F and their functions.

Memory Switches 10 - 1F

Explains memory switches 10 to 1F and their effects.

Memory Switches 30 - 4F

Covers memory switches 30 to 4F and their configurable values.

13-1. Cycle Sewing Function

How to program and use the cycle sewing function.

Work Clamp Mode Settings

14. Setting the Work Clamp Mode Overview

How to set and configure work clamp modes.

14-1. Light Work Clamp Mode

Instructions for setting up and using the light work clamp mode.

Error Codes

15. Table of Error Codes

Lists common error codes and their remedies.

Troubleshooting

16. Troubleshooting Guide

General troubleshooting guide for common problems.

Work Clamp Issues

Solutions for work clamp related problems like rising or lift amount.

Thread Winding and Breakage Issues

Troubleshooting for lower thread winding and thread breakage.

Skipped Stitches and Needle Problems

How to fix skipped stitches and needle related issues.

Thread Trimming and Jamming Issues

Troubleshooting for thread trimming and jamming problems.

Seam Finish and Machine Operation Issues

Solutions for poor seam finish and machine operation errors.

Machine Operation When Powered On

Troubleshooting steps for machine not operating after power on.

Optional Parts

17. Optional Parts Overview

Lists optional parts available for the sewing machine.

Three-Pedal Foot Switch

Details the features of the three-pedal foot switch.

Related product manuals