7
5
Check the print quality
a When the preparation process has finished, the
Touchscreen shows Load Paper and
Press Start.
Press Start.
b Check the quality of the four color blocks on the
sheet. (black/yellow/cyan/magenta)
c If all lines are clear and visible, press Yes to
finish the quality check and go to the next step.
If lines are missing, press No and follow the
steps on the Touchscreen.
6
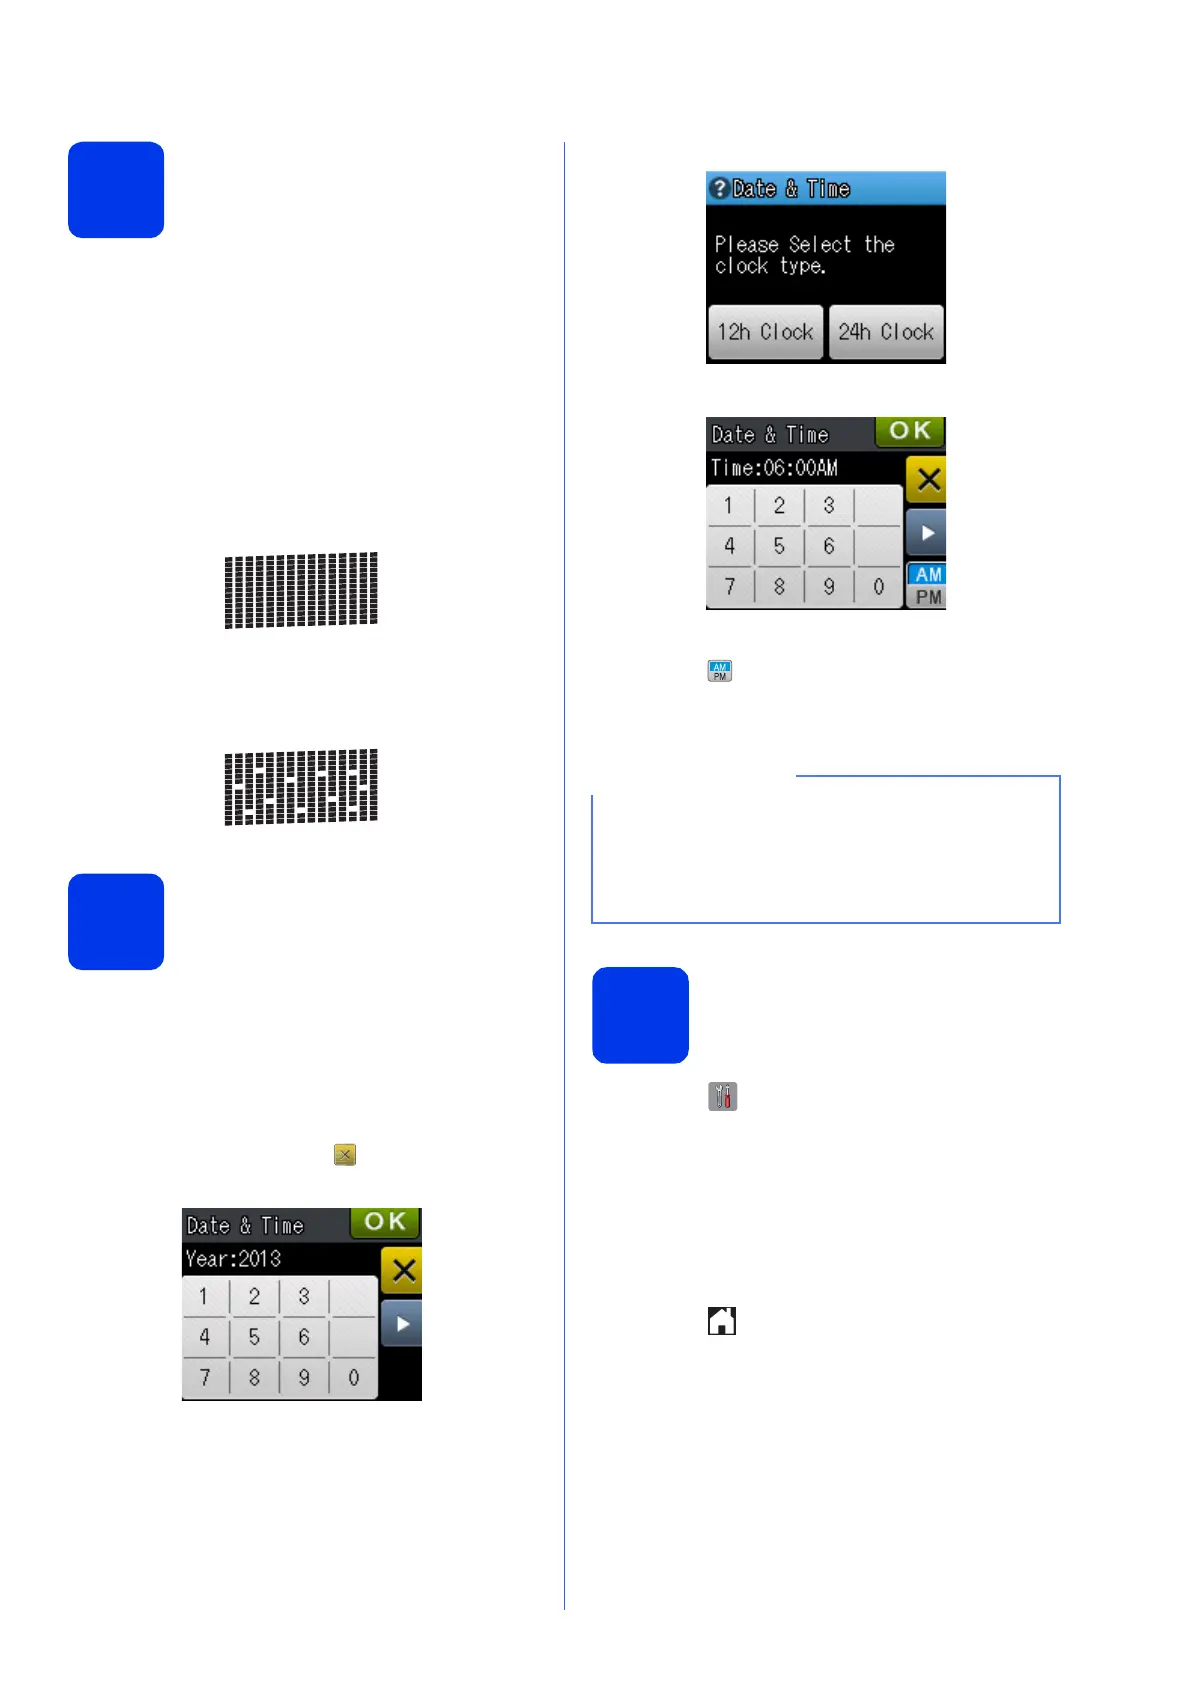
Set the date and time
The Touchscreen displays the date and time. You can
also add the current date and time to each fax you
send by setting your Station ID (see step 9).
a Enter the last two digits of the year on the
Touchscreen, and then press OK.
To delete a digit, press to backspace, and
then enter the correct digit.
b Enter the two digits for the month on the
Touchscreen, and then press OK.
c Enter the two digits for the day on the
Touchscreen, and then press OK.
d Press 12h Clock or 24h Clock.
e Enter the time on the Touchscreen.
•For 12h Clock only:
Press to cycle AM and PM.
f Press OK.
7
Choose your language
(if needed)
a Press (Settings).
b Press s or t to display Initial Setup.
Press Initial Setup.
c Press s or t to display Local Language.
Press Local Language.
d Press your language.
e Press .
OK
Poor
(e.g. Enter 1 3 for 2013.)
• You can change date or time at any time. For
more information, see Setting the date and
time in the Basic User’s Guide.
• If a prompt message appears on the
Touchscreen, read it and press OK to continue.

 Loading...