Do you have a question about the Brother MFC-L5915DW and is the answer not in the manual?
Verify included components, connection interfaces, and cable recommendations for setup.
Remove packing materials and re-install toner and drum unit assemblies.
Load paper into the paper tray and adjust guides.
Connect the power cord and switch on the machine.
Choose country or language during initial machine setup.
Navigate touchscreen settings to select local language for the machine.
Connect the telephone line cord for MFC models if using fax.
Connect your computer or mobile device for printing and scanning.
Manually set up wireless connection using SSID and Network Key.
This document provides a Quick Setup Guide for a range of Brother multifunction printers, including models like the DCP-L5510DN, MFC-L5710DN, MFC-L6915DW, and others. It outlines the essential steps for unpacking, initial setup, and connecting the device to a computer or network.
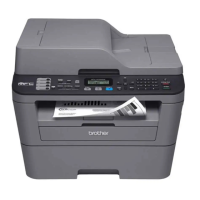
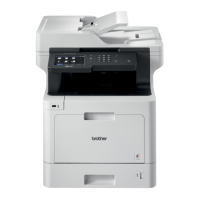
The Brother devices covered by this guide are multifunction printers designed for various office tasks. They are capable of printing, and depending on the specific model, may also offer scanning, copying, and faxing functionalities. These devices are suitable for both individual and small to medium-sized office environments, providing reliable performance for daily document management needs. The guide specifically mentions models with "DCP" (Digital Copier Printer) and "MFC" (Multi-Function Center) prefixes, indicating their core capabilities. The "DN" and "DW" suffixes typically denote duplex (two-sided) printing and wireless connectivity, respectively, enhancing their versatility.
The setup process begins with unpacking the machine and checking the components. Users are instructed to verify the presence of the Toner Cartridge and Drum Unit Assembly (which comes pre-installed), an AC Power Cord, a Quick Setup Guide, and a Product Safety Guide. Some models may also include a USB Port Cover. It's noted that components may vary by country and that interface cables (USB or Network) must be purchased separately if required. The guide recommends a USB 2.0 cable no longer than 2 metres and a straight-through Category 5 (or greater) twisted-pair network cable.
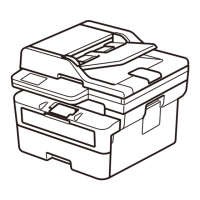
The first operational step is to remove the packing materials and re-install the toner cartridge and drum unit assembly. This involves opening the machine, discarding a silica gel pack, removing an orange protective part, and then re-inserting the assembly. This ensures that the internal components are free from shipping restraints and ready for operation.
Next, users are guided to load paper in the paper tray. This involves opening the paper tray, adjusting the paper guides to fit the paper size, and ensuring that the paper stack does not exceed the maximum fill mark. Proper paper loading is crucial for preventing paper jams and ensuring smooth printing.
After loading paper, the guide instructs users to connect the power cord and turn the machine on. This is a straightforward step, connecting the device to an electrical outlet. Upon initial power-on, the machine may prompt the user to select their country/language. This is an initial setup step, performed via the machine's touchscreen, navigating through [Settings] > [All Settings] > [Initial Setup] > [Local Language] to choose the desired language.
For MFC models, there's an optional step to connect the telephone line cord if the fax feature is to be used. This involves connecting a telephone line to the LINE jack on the machine. If faxing is not intended, users can skip this step.
The primary method for connecting the device to a computer or mobile device is by visiting setup.brother.com. This website provides the necessary software downloads and on-screen instructions to complete the setup. This method is recommended for a guided installation experience, ensuring all drivers and utilities are correctly installed. The guide also mentions that for Windows users, CD installation might be available in some regions.
An important notice regarding network security is provided: the default password for managing the machine's settings is located on the back of the machine, marked "Pwd". Users are strongly advised to change this default password immediately to prevent unauthorized access.
The guide includes a "Can't Connect? Check the following:" section, offering troubleshooting tips for connection issues. This includes restarting the wireless access point/router, restarting the machine and computer, and disconnecting/reconnecting cables.
For wireless models, a manual wireless setup option is provided if the automatic setup via setup.brother.com is unsuccessful. This involves finding the SSID (Network Name) and Network Key (Password) on the wireless access point/router. Users then navigate the machine's touchscreen to [Find Wi-Fi Network], select their SSID, and enter the Network Key. If the setup is successful, the touchscreen displays [Connected]. If not, users are advised to restart the machine and router and try again, or visit support.brother.com for further assistance.
While the guide primarily focuses on initial setup, it implicitly touches upon maintenance aspects through its instructions. The initial removal of packing materials and proper installation of the toner cartridge and drum unit assembly are crucial for the machine's longevity and performance. The instruction to discard the silica gel pack helps prevent moisture-related issues.
The guide also directs users to support.brother.com/up7 to check for the latest firmware, which is a key maintenance activity for ensuring optimal performance, security, and compatibility with new operating systems or software.
For detailed machine information and product specifications, users are directed to the Online User's Guide at support.brother.com/manuals. This resource would contain comprehensive information on routine maintenance, troubleshooting, and care for the device, including instructions on how to replace consumables like toner cartridges and drum units, clean the machine, and resolve common issues. The availability of video setup instructions at support.brother.com/videos further aids in visual guidance for setup and potentially for some basic maintenance tasks.
The troubleshooting section for connection issues can also be seen as a form of user-level maintenance, guiding users to diagnose and resolve common problems without needing professional intervention. The advice to restart network components and the machine itself is a standard first step in resolving many technical glitches.
In summary, this Quick Setup Guide provides a clear, step-by-step approach to getting a Brother multifunction printer operational, covering essential setup, connection, and initial configuration, while also pointing to resources for ongoing support and maintenance.
| Duplex printing | Yes |
|---|---|
| Print technology | Laser |
| Maximum resolution | 1200 x 1200 DPI |
| Print speed (black, normal quality, A4/US Letter) | 52 ppm |
| Internal memory | 512 MB |
| Printing colors | Black |
| Duplex functions | Copy, Fax, Print, Scan |
| Maximum duty cycle | 90000 pages per month |
| Number of print cartridges | 1 |
| Page description languages | BR-Script 3, Epson FX, PCL 6, PDF 1.7, XPS |
| Scan to | Cloud, E-mail, FTP, USB |
| Scan drivers | TWAIN, WIA |
| Scanner type | Flatbed & ADF scanner |
| Image formats supported | BMP, JPEG, PNG, TIF |
| Document formats supported | DOCX, PDF, RTF, TXT, XLSX, XML, XPS |
| Security algorithms | 64-bit WEP, 128-bit WEP, WPA-PSK, WPA-TKIP |
| Ethernet LAN data rates | 10, 100, 1000 Mbit/s |
| Mobile printing technologies | Apple AirPrint, Mopria Print Service |
| Supported network protocols (IPv4) | APIPA (Auto IP), ARP, BOOTP, CIFS Client, Custom Raw Port/Port 9100, DHCP, DNS Resolver, FTP Client and Server, HTTP/HTTPS Server, ICMP, IMAP4, IPP/IPPS, LDAP, LLMNR Responder, LPR/LPD, mDNS, POP3, RARP, SMTP Client, SNMPv1/v2c/v3, SNTP Client, TELNET Server, TFTP Client and Server, Web Services (Print/Scan), WINS/NetBIOS Name Resolution |
| Supported network protocols (IPv6) | NDP, RA, DNS Resolver, mDNS, LLMNR Responder, LPR/LPD, Custom Raw Port/Port 9100, IPP/IPPS, POP3, SMTP Client, FTP Client and Server, CIFS Client, TELNET Server, SNMPv1/v2c/v3, HTTP/HTTPS Server, TFTP Client and Server, ICMPv6, SNTP Client, LDAP, Web Services (Print/Scan), IMAP4 |
| USB 2.0 ports quantity | USB 2.0 ports have a data transmission speed of 480 Mbps, and are backwards compatible with USB 1.1 ports. You can connect all kinds of peripheral devices to them. |
| Copier resize | 25 - 400 % |
| Maximum copy resolution | 1200 x 600 DPI |
| N-in-1 copy function (N=) | 2, 4 |
| Faxing | Mono faxing |
| Fax memory | 500 pages |
| Modem speed | 33.6 Kbit/s |
| Paper tray media types | Envelopes, Labels, Letterhead |
| Non-ISO print media sizes | Executive (184 x 267mm), Folio (media size), Legal (media size), Letter (media size) |
| ISO A-series sizes (A0...A9) | A4, A5, A6 |
| ISO B-series sizes (B0...B9) | B5 |
| Maximum ISO A-series paper size | A4 |
| Total input capacity | 250 sheets |
| Total output capacity | 150 sheets |
| Multi-Purpose tray input capacity | 100 sheets |
| Display | LCD |
| Control type | Touch |
| Product color | Black, Grey |
| Display diagonal | 5 \ |
| Market positioning | Business |
| Power consumption (off) | 0.04 W |
| Power consumption (ready) | 31 W |
| Power consumption (sleep) | 6.2 W |
| Power consumption (printing) | 680 W |
| Cables included | AC |
| Included cartridge capacity (black) | 3000 pages |
| Package depth | 580 mm |
| Package width | 567 mm |
| Package height | 597.5 mm |
| Package weight | 21300 g |
| Depth | 473 mm |
|---|---|
| Width | 495 mm |
| Height | 486 mm |
| Weight | 17400 g |