1
NOTE
• TheReference Guideforthesemodelsisavailableontheenclosed
installationdisc.
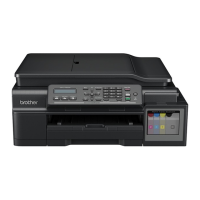
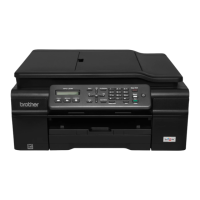
• TheillustrationsinthisQuick Setup GuideshowtheMFC-T810W.
• Saveallpackingmaterialsandtheboxincaseyoumustshipyourmachine.
• For a network connection you must purchase a network interface
cable. A USB cable is included with your machine.
USB cable
WerecommendusingaUSB2.0cable(TypeA/B)thatisnomorethan
2metreslong.
Ethernet (Network) cable (MFC-T810W only)
Useastraight-throughCategory5(orgreater)twisted-paircablefor
10BASE-Tor100BASE-TXFastEthernetNetwork.
2
Load paper in the paper tray
1
Unpack the machine and check the components
Removetheprotectivetapeandfilmcoveringthemachineandtheinktankcover.
Connectthetelephonelinecord.
UsethesocketmarkedLINE.
Connectthepowercord.Themachinewillpower
onautomatically.
NOTE
Ifyouaresharingonetelephonelinewithanexternal
telephone,connectitasshownbelow.
a. Extensiontelephone
b. Externaltelephone
QuickSetupGuide
DCP-T310 / DCP-T510W / DCP-T710W / MFC-T810W
ReadtheProduct Safety Guidefirst,thenreadthisQuick Setup Guide
forthecorrectinstallationprocedure.
3
Connect the power
cord
CHN-ENG
VersionC
Inbox Ink Bottles*
• Black
• Yellow
• Cyan
• Magenta
Quick Setup Guide
Product Safety Guide
Power Cord
USB Interface Cable
Brother Installation Disc
Telephone Line Cord
(MFC-T810W only)
7
Connect the telephone line cord (MFC-T810W only)
Ifyouarenotusingyourmachineasafax,goto
8
.
4
Set the date and
time
For DCP models:
Pressaorbtoselectthenumber,andthenpress
OKtosetthedateandtime.
For MFC model:
FollowthepromptsdisplayedontheLCDtoset
thedateandtime.
Pullthepapertraycompletely
outofthemachine.
Opentheoutputpapertray
covera. Fanthepaperwellandloaditinthetray
withtheprintingsurfacedown.
Closetheoutputpapertraycover,and
thenslowlypushthetraycompletely
intothemachine.
Adjustthepaperguides.
NOTE
Pulloutthepapersupporta,andunfold
thepapersupportapbsothatthe
printedpagesdonotfall.
5
Fill the ink tanks with the inbox ink
Checktheinkbottlemodelnameon
thelabel.Incorrectinkmaycause
damagetothemachine.
BK (Dye)CMY
BTD60BKBT5009CMY
DO NOT USE
BK (Pigment)
BT6009BK
Pointthenozzleupwardso
thattheinkdoesnotspill,
andthenremovethenozzle
fromtheinktank.
Removethetipoftheinkbottle.
Insertthenozzleoftheinkbottle
firmlysothattheinkdoesnot
spill.Filltheinktankbygently
squeezingthebottleasshown.
Emptytheentirebottleintothe
inktank.
Whenthemachinehasfinishedtheinitialcleaningprocess,
followthestepsontheLCDtoconfigurethemachinesettings.
• Checkprintquality
6
Machine settings
Pushdownonthecapofthe
inktanktocloseittightly.
Repeatstep
5
forthethree
otherinktanks.
Closetheinktankcover.The
machinewillpreparetheink
tubesystemforprinting.
NOTE
Refertothesamplebelowtochecktheprintquality.
None A Few About Half Many
Removethecapandprotective
filmfromtheinkbottle,andthen
replacethecap.
NOTE
Fastentheinkbottlecaptightlyto
avoidleakage.
Opentheinktankcoveraandpull
thetab
bdownwardstoopenthe
capoftheinktank.
1
2
IMPORTANT
Secure Network Access
Yourmachine’sdefaultpasswordisonthelabelontheback
ofthemachine(precededby"Pwd").
Westronglyrecommendyouchangeittoprotectyour
machinefromunauthorisedaccess.
1
2
Operation Videos
www.95105369.com
Installation
& Using
Videos