Follow the steps on the LCD to set the date and time.
5
Set the date and time
When the machine has finished the initial cleaning process, follow the steps on the LCD to configure
the machine settings.
• Set Firmware Update Notice
• Check the print quality
• Configure the paper tray
settings
6
Machine settings
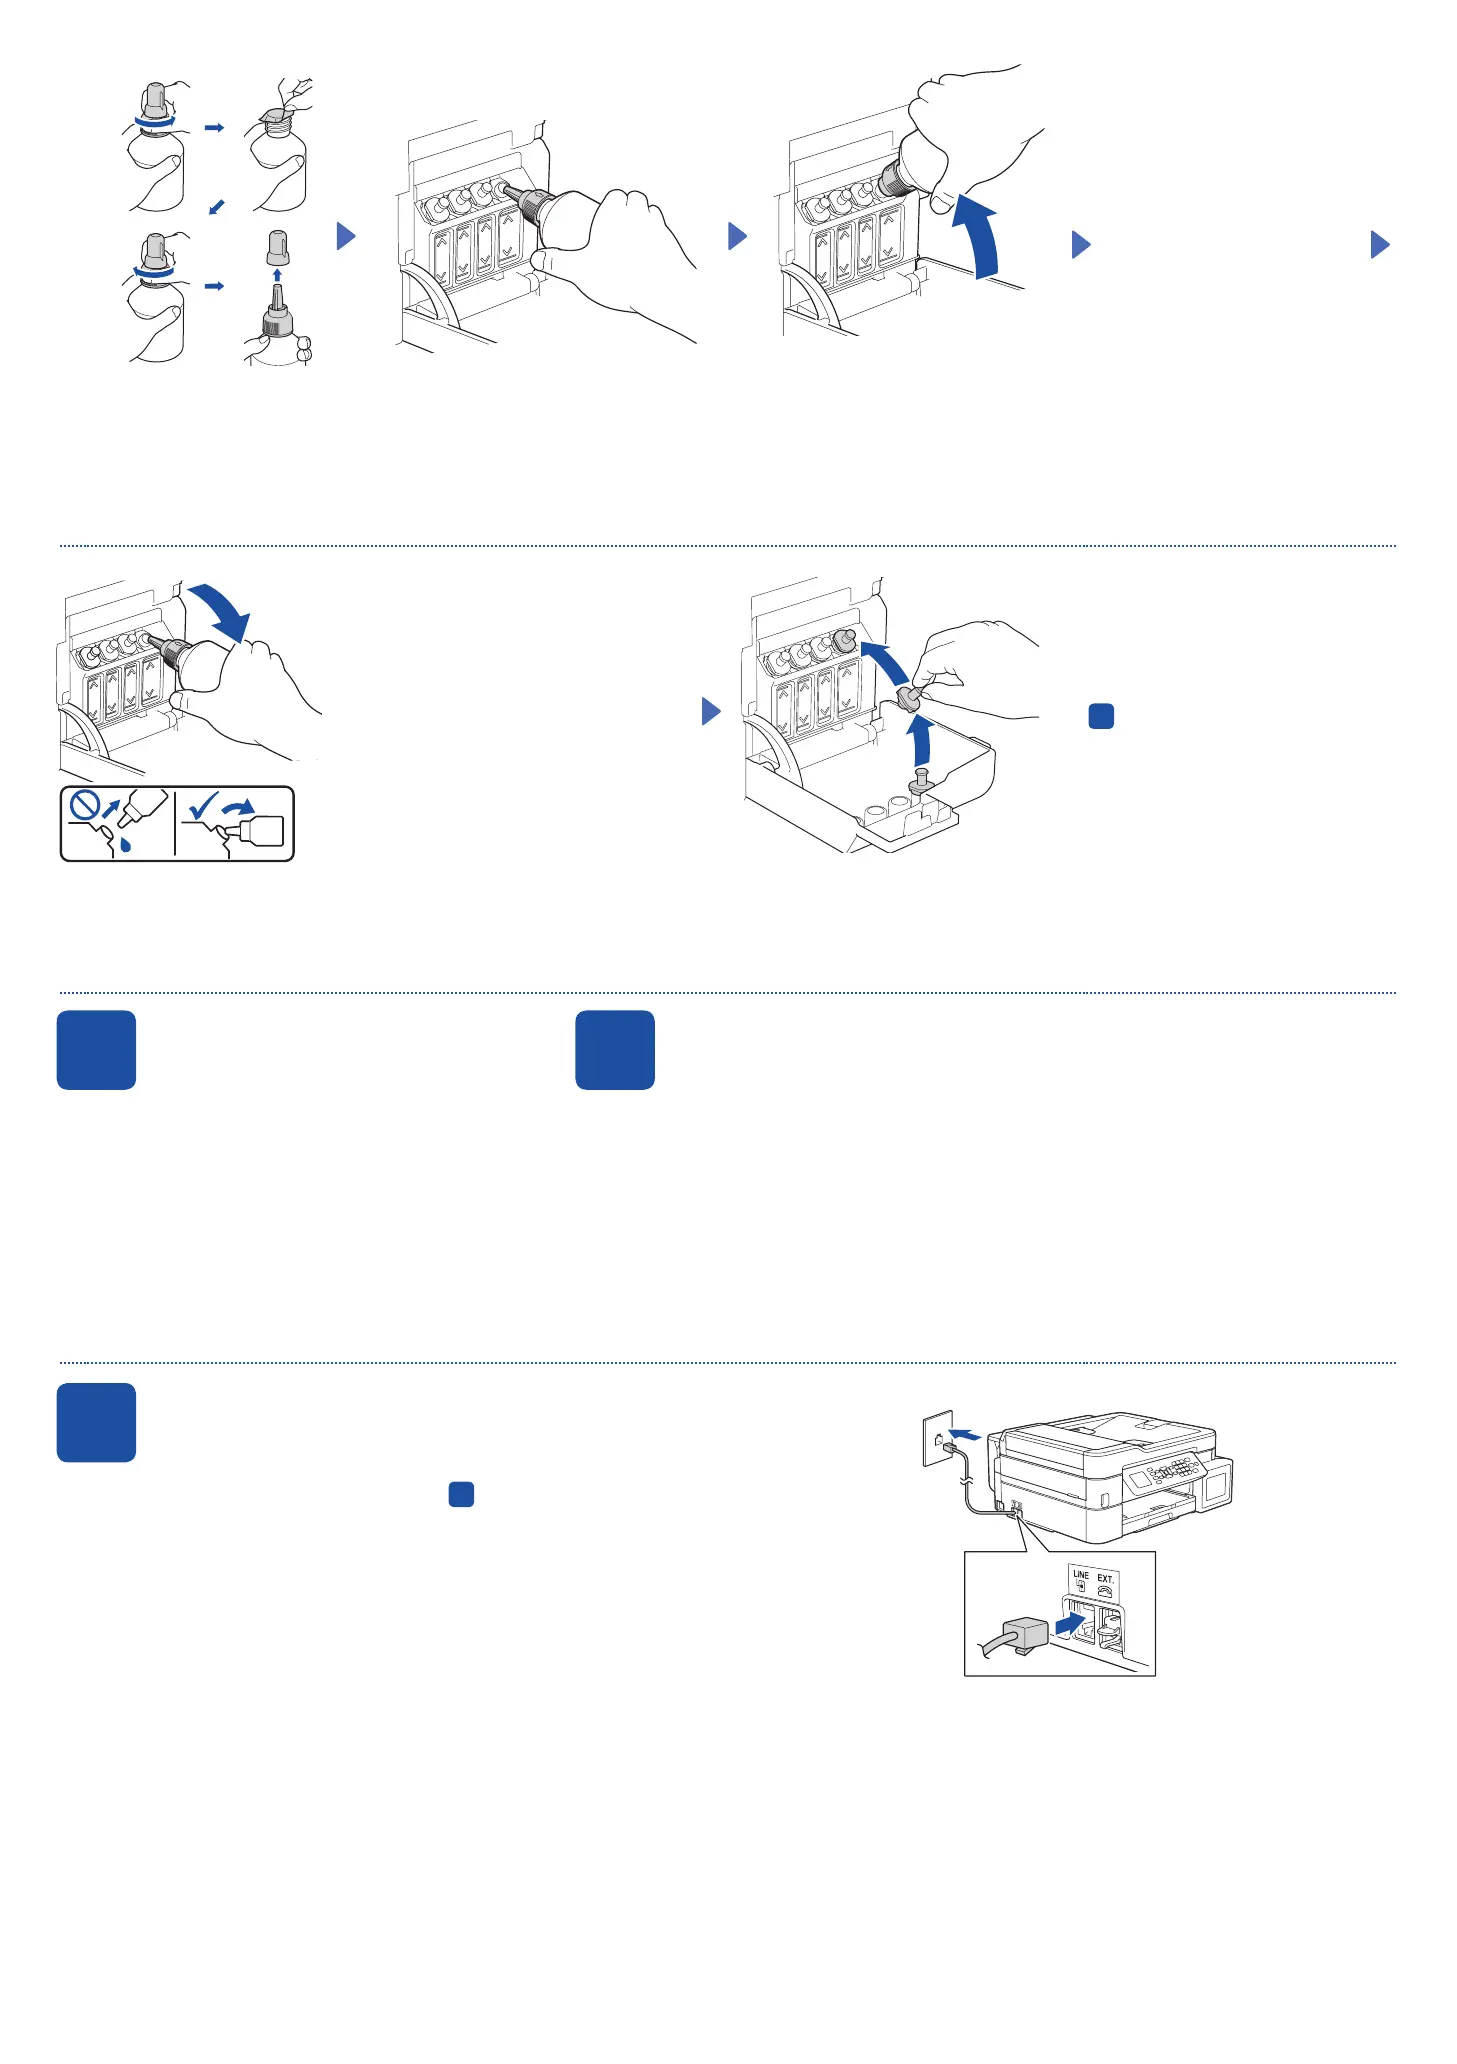
When finished, remove the bottle, pointing
the nozzle upward so the ink does not
spill.
Replace the ink tank cap. Repeat step
4
for the other ink tanks, and then
close the ink tank cover.
7
Connect the telephone line cord
If you are not using your machine as a fax, go to
8
.
For more information on using the fax feature, see the Online User’s Guide.
Insert the telephone line cord into the socket marked LINE.
Remove the film and tighten the cap firmly.
The bottle is self-standing and
the ink fills automatically until
the bottle is empty. To fill the
ink tank faster, squeeze the
bottle on both sides.
Remove the nozzle cap and insert the bottle nozzle firmly into the ink tank so that
the ink does not spill.
1
 Loading...