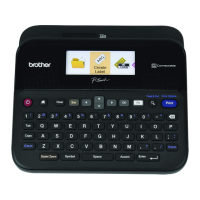
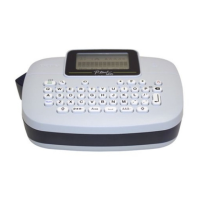
Basic Operations support.brother.com/manuals
Initial Settings
Language
Settings
Set your text entry language.
/ [Language] /
Select a language /
Unit
Settings
Set the unit for various types of
adjustments.
/ [Unit] /
[inch] / [mm] /
LCD
Contrast
Adjust the LCD contrast to make it easier
to read.
/ [Adjustment] /
[LCD Contrast]
[-2] to [+2]
/
Enter Text
New Line
Press to start a new line.
Maximum number of lines for each
tape width:
18 mm: ve lines
12 mm: three lines
9 mm, 6 mm: two lines
3.5 mm: one line
Block
+
Use this feature to include multiple
lines or font sizes on a single label.
Maximum: ve blocks
Delete Text
and Format
or
Delete text and formatting.
Delete one character at a time
Delete all characters
[Text Only] /
Delete all text and formatting.
[Text & Format] /
Tab
+
Insert a tab.
Maximum length: 100 mm
Tab Length
Set the tab length.
[Tab Length]
Select a value
/
Upper-
Case
Lower-
Case
Switch between upper-case and
lower-case characters.
Label
Length
Set the label length you want.
[Auto]: Automatically adjusts the label
length to the length of the text.
[Length] [Auto] / Set
a value
/
Symbol
Characters
Inserts symbols, units, and pictures.
Select a category /
Select a symbol /
Accented
Characters
Select an entered character and convert it
to an accented character.
Enter characters
Select an accent
/
Frame
Add a decorative frame to your label.
/ Select a frame
category
/ Select
a frame
/
Change Font
Change
Font
Change the label font, size, width, style,
and alignment.
/ Select a font
type
[Size] Select the font
height
[Width] Select the
font width
[Style] Select the
font style
[Align] Select the
font alignment
/
Change
Font Line
By Line
+
Change the line font, size, width, style,
and alignment.
Move the cursor to the line you want to
change
+ [Font]
Select a font type [Size]
Select the font height
[Width]
Select the font width
[Style]
Select the font style
[Align]
Select the font alignment
/
Auto Fit
Style
Automatically adjust the text size to t the
label length.
[Text Size]: Adjust to the length of the label
[Text Width]: Adjust by condensing the
character width by half
/ [Auto Fit Style] /
[Text Size] / [Text Width]
/
Set Margins
Set
Margins
Set the margins before and after an
entered character.
[Small Margin]: Insert a margin of approx.
23 mm before the rst label only, and
then insert margins of 2 mm between the
subsequent labels.
[Large Margin]: Insert an initial margin of
approx. 25 mm on each edge.
[Chain]: Print multiple labels with minimal
margins. Insert a margin of approx. 23 mm
before the rst label only, and then insert
margins of 2 mm between the subsequent
labels.
[No Cut]: Print multi-part labels or use special
tape, and then cut the labels manually.
[Special Tape]: Use this setting when
printing on special tape.
[Cut Option] Select
the margin type
/
Set Auto Format Layouts
Template Use your favourite designs as templates.
[Templates] /
Select a template category /
Select a template /
[Font] Select a font
type
[Style] Select a style
/ Enter text /
Block
Layout
Use block layout patterns as templates.
[Block Layouts] /
Select the tape width /
Select a block layout /
[Font] Select a font type
[Align] [Left] / [Center] /
[Right] / [Just]
[Frame]
[On] / [Off]
/ Enter text
/
Print Labels
Preview Use this feature to check the nal design
before printing.
Print
Start printing.
When printing a single label:
/ /
When printing multiple labels:
Select a print quantity
/ /
Numbering
Print
+
Set this feature when printing consecutive
alphanumeric characters to add a serialised
number to each label.
Enter alphanumeric characters +
[Numbering] /
Set the start position /
Set the end position /
Select a print quantity / /
Mirror
Print
+
Print reversed from left to right.
Print on clear tape and attach it to the inside
of glass to create a label that can be read
from the outside.
Enter text
+ [Mirror]
/ / /
Barcode
Printing
Create a barcode and print it.
[Barcode Setup] /
[Protocol] Select a Protocol
[Width] [Small] / [Large]
[Under#]
[On] / [Off] /
Enter barcode data
/
[Print]
Select a print quantity /
/
Other
Tape
Feed
+
Feed approx. 23 mm of tape to remove
any slack.
+
Save Save your labels and access them later to
edit and print them, as well as overwrite
and save edited data.
Maximum number of saved labels: 50 les
Maximum character count per le:
280 characters
Create a label
[Save]
/ Select a save
destination
/
Reset
+
+
Reset the internal memory, for example,
to reset the Label Printer or delete any
saved label data.
Turn off the machine.
Press and hold down
and . While
holding down
and , press once
and then release
and .
For more information about using your Label Printer,
see the User’s Guide on the Brother support website at
support.brother.com.
Print Labels (cont.)
Error Messages
Troubleshooting (cont.)
Troubleshooting
Message Cause/Remedy
Check no. of digits entered The number of digits entered in the barcode data does not match
the number of digits set in the barcode parameters. Enter the
correct number of digits.
Cutter error The Tape Cutter Lever was pressed while trying to print or
feed the tape. If the tape is jammed in the Cutter unit, remove
the tape. Turn the Label Printer off and then on again before
continuing.
Length limit The printed label length using the text entered is longer than
999 mm. Edit the text so that the label length is less than 999 mm.
Text too long The printed label length using the text entered is longer than the
length setting. Edit the text to t within the set length or change
the length setting.
System error XX Contact Brother customer service.
Problem Solution
• The tape does not feed
correctly.
• The tape gets stuck
inside the Label Printer.
• If the tape is bent, cut off the bent section.
• If the tape is jammed, remove the Tape Cassette, remove the
jammed tape, and then cut off any damaged tape.
• Check that the end of the tape exits through the Tape Guide.
• Conrm that the tape is pointed at the Tape Exit Slot.
• Remove the Tape Cassette and insert it again.
The screen is locked, or
the Label Printer does not
operate normally.
See the Basic Operations section in this guide and reset the
Label Printer’s internal memory to the factory settings. If resetting
the Label Printer does not solve the problem, disconnect the
AC Adapter and remove the batteries for more than 10 minutes.
The LCD remains blank
after turning the power on.
Check that the batteries are correctly installed or that the
AC Adapter included with your Label Printer is correctly connected.
The LCD messages are
displayed in a foreign
language.
See the Basic Operations section in this guide to select your
language.
The Label Printer stops
while printing a label.
• Replace the Tape Cassette if striped tape is visible as this
indicates that you have reached the end of the tape.
• Replace all batteries or connect the AC Adapter directly to the
Label Printer.
Previously saved label les
are not available.
All les saved in the internal memory are deleted if the batteries are
weak or the AC Adapter is disconnected.
• I cannot install the Printer
Driver even if I follow the
correct procedure.
• I cannot see my printer
listed in P-touch Editor
even though I have
installed the Printer
Driver.
If you cannot use your Label Printer even though you have installed
the Printer Driver:
1. Download the Printer Driver Uninstaller from your model’s page at
support.brother.com.
2. Use the Printer Driver Uninstaller to remove the printer
information.
3. Run the Printer Driver Installer again and follow the on-screen
instructions to proceed with the installation.
The ink ribbon is separated
from the ink roller.
If the ink ribbon is broken, replace the Tape
Cassette. If it is not, leave the tape uncut and
carefully remove the Tape Cassette, and then wind
the loose ink ribbon back onto the spool.
Spool
Problem Solution
Printed barcodes or
QR codes cannot be read.
• Change the tape. (Recommended: Black on white tape)
• Enlarge the barcodes or QR codes in the application you are
using.
I do not know the rmware
version of the Label
Printer.
Check the rmware information by pressing the following keys:
[Version Information] /
When the label is printed,
there is too much margin
(space) on both sides of
the text.
• When you use the [Small Margin] setting, the Label Printer feeds
approx. 23 mm of tape before each label. To save tape, use the
[Chain] setting. After the last label prints, press
and to
feed the tape, and then press the Tape Cutter Lever.
• The Label Printer feeds approx. 23 mm of tape before every new
label. When printing multiple labels, you can reduce the blank
space on the second and subsequent labels.
Select the [Chain] setting in the optional print settings. Then, print
your labels and leave the last label in the Label Printer until you
are ready to print a new label.
• After the last label prints, press
and simultaneously to
feed the tape, and then eject and cut the last label. Note that the
Label Printer will feed approx. 23 mm of tape before the next new
label when you use this method.
The font size cannot be
increased.
The font is already the maximum size for the width of the label.
Or, the label length has been set, so there is a limit on the font size
to prevent exceeding the set length.
When multiple labels are
printed, the last label is cut
incorrectly.
When Chain Print is enabled, feed the tape to eject the last printed
label, and then press the Tape Cutter Lever to cut the label manually.
I cannot update the
printer’s rmware using the
P-touch Update Software,
Transfer Express, or Mac
Update Tool.
Restart the printer and then try to update the rmware again. Do not
press any buttons during the rmware update.
Visit www.brother.com for contact information on your local Brother ofce.
To order supplies and accessories:
www.brother.eu/supplies
If you need additional help, visit support.brother.com.
Problem Solution
The Label Printer does not
print.
• Check that the Tape Cassette is inserted correctly.
• If the Tape Cassette is empty, replace it. To order supplies and
accessories, visit www.brother.com.
• Check that the Tape Cassette Compartment Cover is securely
closed.
• Check that the Label Printer is on.
• Check that the correct printer driver is installed when printing
from a computer.
• Connect the Label Printer to your computer using the
USB Cable (included) when printing from a computer.
• If the Print Head is dirty, clean it with a cotton swab or with the
optional Print Head Cleaning Cassette (TZe-CL4).
Symbols and Frames
Set Margins
By default the printer creates a margin of approx. 23 mm at the beginning of each label. To reduce this margin, print multiple labels
continuously.
You can also change the margin before and after the text for the second and subsequent labels when printing multiple labels.
Select [Chain] to print labels with the narrowest margin width. DO NOT feed the tape until the nal label is printed. When the nal
label prints, feed the tape, and press the Tape Cutter Lever.
Symbol Examples Frame Examples
...
...
Auto Format Layouts Examples Accented Character Examples
For more information about symbols and frames, see the User’s Guide on the Brother support website at support.brother.com.
Large Margin
ABC ABC
2 mm
Approx.
23 mm
Approx.
25 mm
2 mm
Approx.
23 mm
Approx.
25 mm
ABC
: Print area
: Margin
: Laminate margin
Chain
2 mm 2 mm Cut Position
Approx. 23 mm 2 mm
ABC ABC
No Cut
ABC ABC
2 mm 2 mm
Approx. 23 mm 2 mm
Special Tape
ABC ABC
2 mm 2 mm
2 mm
2 mm
Approx. 23 mm
Small Margin
When the label length is approx. 23 mm
or more
Approx. 23 mm
2 mm
2 mm
2 mm 2 mm
ABC ABC
Small Margin
When the label length is approx. 23 mm
or less
2 mm
Approx. 23 mm 2 mm
ABC
Approx. 23 mm
ABC
Enter Text (cont.)

 Loading...