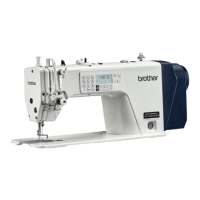
Do you have a question about the Brother S-7180A and is the answer not in the manual?
Explains the meaning of safety symbols and labels used in the manual.
Provides crucial safety guidelines for operating and installing the sewing machine.
Specifies environmental conditions for safe and optimal machine operation.
Details safety procedures and precautions during machine installation.
Safety instructions specific to the sewing operation.
Safety guidelines related to machine maintenance and care.
Safety precautions for servicing and inspecting the sewing machine.
Warns against modifying the sewing machine and its control unit.
Guidance on choosing an appropriate location for the sewing machine.
Instructions on safely carrying the sewing machine.
Steps for safely tilting the sewing machine head.
Procedure for returning the sewing machine head to its normal position.
Technical drawing and specifications for preparing the sewing machine table.
General installation steps, including connecting rods and nuts.
Instructions for installing and securing the oil pan.
Details on installing the head hinge receiving rubber.
Instructions for mounting the sewing machine head onto the table.
Instructions for adjusting the knee pad for lifting the presser foot.
Detailed procedure for lubricating the sewing machine.
Instructions for connecting power and ground wires.
Specific steps for connecting power and ground cords.
Identifies and explains the functions of each button on the operation panel.
Detailed explanation of each key's name and its corresponding function.
Explains the meaning and purpose of various icons displayed on the operation panel.
Guide on setting memory switches for operator and mechanic modes.
Step-by-step instructions for setting memory switches as an operator.
Step-by-step instructions for setting memory switches in mechanic mode.
Explains how to set different sewing patterns like normal, inching, and step sewing.
Detailed steps for setting up and performing normal sewing.
Instructions for configuring and performing fixed stitch (inching) sewing.
Steps for setting up and executing continuous backtack stitching.
Guide to setting up step sewing with a common pitch.
Specific settings for step sewing using a common pitch.
How to edit step sewing patterns with a common pitch.
Instructions for setting up step sewing with an arbitrary pitch.
Steps for setting up step sewing with an arbitrary pitch.
How to edit step sewing patterns with arbitrary pitch by number of stitches.
How to edit step sewing patterns with arbitrary pitch by adjusting pitch.
Guide on adjusting the sewing speed for different operations.
Procedures for setting pre-stop and post-stop backtack stitches.
Instructions for setting up and configuring condensation sewing.
Details on additional settings for condensation sewing.
Guide to editing condensation sewing parameters.
Instructions for creating and setting design stitches for the main part.
Steps for performing design stitching on the main section of the sewing.
How to enter and use the design stitch editing mode for the main section.
Guide on setting design stitches for the sewing stop functionality.
Steps for applying design stitches to the sewing stop part.
How to edit design stitches for the sewing stop section.
How to check and modify the production counter settings.
Instructions for setting up the handy switch functions.
Procedure to check the software version of the machine.
How to configure the sewing machine head specifications.
Different methods for initializing machine data to factory defaults.
Detailed list and description of all memory switch parameters.
Lists common error codes and their recommended solutions.
Information and precautions regarding the use of USB ports.
Adjusting the position of the arm thread guide R for optimal sewing.
How to adjust the height of the presser foot for proper sewing.
Adjusting the vertical position of the feed dog for thread feeding.
Adjusting the angle of the feed dog for fabric handling.
Adjusting the vertical position of the needle bar.
Synchronizing the needle and feed dog movements for correct stitching.
Aligning the needle and hook for proper thread catching.
Procedure to adjust the oil flow to the hook mechanism.
Adjusting the oil supply to the upper shaft components.
Instructions for adjusting the thread trimmer mechanism.
Addresses issues related to thread tension, needle, and stitching.
| Brand | Brother |
|---|---|
| Model | S-7180A |
| Category | Sewing Machine |
| Language | English |