Do you have a question about the Brother S-7300A-403P and is the answer not in the manual?
Explains the meaning of DANGER, WARNING, and CAUTION indicators used in the manual.
Describes the meaning of various safety symbols used on the machine and in the manual.
Details critical safety instructions under DANGER and WARNING classifications.
Covers environmental requirements and installation safety precautions under CAUTION.
Provides safety guidelines specific to the sewing process and machine operation.
Outlines safety measures to be followed during the cleaning of the sewing machine.
Details safety precautions for carrying out maintenance and inspection of the machine.
Advises on using genuine parts and avoiding machine modifications for safety.
Explains the meaning and purpose of various warning labels found on the sewing machine.
Details the content and advice provided by specific warning labels on the machine.
Covers maximum sewing speed, backtack speed, and stitch pitch specifications.
Details specifications for presser foot height, feed dog height, needle, motor, and rotary hook.
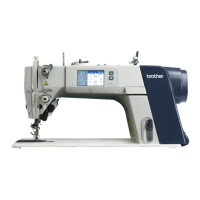
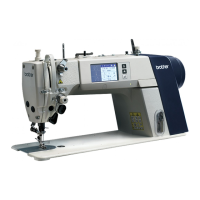
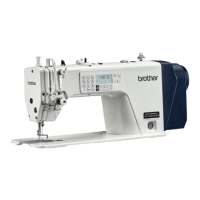
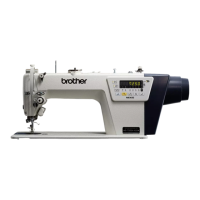
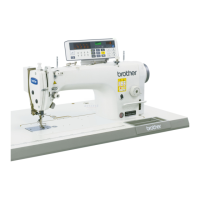
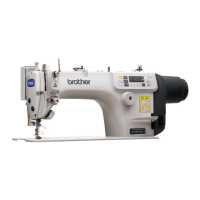
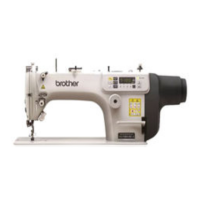
Identifies key parts of the sewing machine with numerical labels in a diagram.
Lists and identifies specific safety devices attached to the machine.
Outlines essential safety and setup guidelines before installing the sewing machine.
Details safe methods for carrying and tilting the machine head during installation.
Provides a diagram with dimensions for table processing required for machine installation.
Guides the installation of the control box and connecting rod components.
Details the installation of rubber cushions and the machine head rest.
Explains how to apply the machine head seal sticker and protective sheet.
Step-by-step guide for adjusting the play and position of the knee lifter plate.
Details how to adjust the presser foot position using the knee lifter plate.
Safety warnings related to handling lubricating oil and performing lubrication.
Instructions for filling the oil tank and checking the oil level for proper lubrication.
Instructions for raising and positioning the harness cover for cord connection.
Details connecting the sewing machine motor, feed motor, hand switch, and operation panel connectors.
Steps for lowering the harness cover and connecting additional cords.
Explains how to connect the ground wire and power cord for safe operation.
Illustrates the connection of filter box, power cord, and other components for European models.
Provides warnings regarding staple usage and extension cords for European specifications.
Describes the installation of the power switch for 100V/400V systems.
Details connecting the transformer box, power supply connector, and ground wire.
Provides warnings regarding staple usage and extension cords for transformer systems.
Describes installation of power switch, power cord, and staples for 220V Americas systems.
Provides warnings regarding staple usage and extension cords for 220V systems.
Instructions for turning on the power and observing the initial operation panel display.
Guidance on testing the machine's operation using the treadle.
Explains how to adjust forward and backward depression sensitivity of the treadle.
Details how to adjust the treadle stroke length for optimal operation.
Instructions for correctly installing the sewing needle into the machine.
Steps for safely removing the bobbin case from the sewing machine.
Instructions for winding the lower thread onto the bobbin, including adjustments.
Details the process of inserting the bobbin and bobbin case into the rotary hook.
Step-by-step instructions for threading the upper thread through the machine.
Explains the importance of raising the thread take-up lever before threading.
Describes how the knee lifter operates to raise the presser foot.
Identifies the main keys (Menu, Home, Half Stitch) and the touch panel display.
Explains the function of the home screen and switching between detailed and simple views.
Identifies and explains the function of each key and icon on the detailed home screen.
Provides detailed explanations for various function keys like lock, illumination, program number, speed, etc.
Identifies the main display elements and shortcut keys on the simple home screen.
Explains the default assignments for shortcut keys and how they can be customized.
Describes Type A (simple symbols) and Type B (plain touch keys) icons.
Explains Type C icons, which change status when touched, like lock and backtack keys.
How to return to the home screen and navigate through the five menu screens.
Overview of the different pages within the menu screen and how to switch between them.
Explains why registering frequently used patterns as programs is recommended.
Details the components of a single program: start backtack, main sewing, and end backtack parameters.
How to access the start backtack setting mode from different screens.
Guide to setting parameters like pattern, stitches, pitch, and speed for start backtacking.
Details how to set parameters for the main sewing operation.
Explains how to set parameters for the end backtack operation.
Provides a table detailing setting values, units, and initial values for start backtack.
Details setting values, units, and initial values for main sewing parameters.
Provides a table detailing setting values, units, and initial values for end backtack.
Differentiates between functions set per program and those set for all programs.
Shows the default assignment of functions as individual or common at the time of factory shipment.
Sets whether the needle stops in the up or down position after sewing.
Configures thread trimming operation and thread wiper function.
Enables or disables correction sewing operation using the hand switch.
Configures automatic sewing and thread trimming operations.
Sets slow start patterns to control sewing speed at the beginning of a seam.
Allows selection of different feed dog loci for specific sewing applications.
Configures functions to prevent thread pulling out and reduce bird's nests.
Enables X-over seam assist using the sensor for improved sewing.
How to access the production counter editing mode from various screens.
Steps for changing the production counter value and resetting it.
How to access the lower thread counter setting mode.
Instructions for turning the counter on/off, setting values, and resetting.
Explains how the counter value decreases during sewing and when it updates.
Describes warnings for low thread and the procedures to address them.
How to select between detailed and simple home screen displays.
Instructions for setting the desired home screen mode using the +/- keys.
How to access the illumination LED brightness setting mode.
Instructions for setting the brightness level for the illumination LED.
How to add or delete individual steps within a sewing program.
Details how to manage steps, including cursor positioning and limitations.
How to access the mode for editing individual sewing steps.
Instructions for editing sewing pattern, stitches, pitch, speed, and linking.
How to access the mode for setting a specific start step for interrupted sewing.
How to select and confirm the start step number for resuming sewing.
How to access the mode for copying existing sewing programs.
Steps for selecting source and destination programs and executing the copy operation.
How to navigate to the shortcut key setting mode.
Steps for selecting a shortcut key and assigning a specific function to it.
How to access the mode for registering new design stitches.
Steps for selecting design stitch numbers (DS-1 to DS-5) to register.
How to set stitch pitch and number of stitches for design stitches.
Instructions for selecting and sewing design stitches that have been registered.
How to access the mode for setting the working pace for the target counter.
Steps for setting the operating status and pace value for the target counter.
How to access the mode for setting memory switches.
Steps for selecting memory switch numbers and changing their values.
Details memory switch settings related to presser foot lifter and treadle operations.
Lists memory switch settings for sewing machine motor and feed motor control.
Details memory switch settings related to sewing program configurations.
Lists memory switch settings for standard device functions like puller switches.
Details memory switch settings for panel operations like needle up/down and thread trimming lock.
Covers memory switch settings for automatic panel lock and standby time.
Details memory switch settings for start backtack and sewing speed controls.
Lists memory switch settings for presser foot lifter and puller functions.
Explains the two types of hand switches (A and B) and their possible functions.
Details how to assign functions to hand switches for correction sewing.
Lists specific functions assignable to hand switches when correction sewing is enabled.
Lists functions for hand switches related to pitch, seam assist, thread trimming, and presser foot lifter.
How to access the mode for configuring hand switch functions.
Example of setting Hand Switch A to operate as a correction sewing switch.
How to set the pitch ratio for correction sewing.
How to set the second pitch ratio that activates when a hand switch is pressed.
How to access the mode for reading and writing data using USB media.
Details the types of data that can be read/written and how to create folders for USB media.
How to access the initialization menu to reset settings.
Steps for selecting items to initialize and confirming the reset process.
Steps to start sewing, including powering on and treadle operation.
How to activate and use the thread wiper after thread trimming.
How to use Hand Switch B to reverse feed direction for backtacking.
Mentions that Hand Switch B can be set for various operations.
How to use Hand Switch A to sew stitches with small lengths.
Explains how stitch pitch can be changed based on how far Hand Switch A is pushed.
Reduces bird's nests and shortens thread trailing length.
Instructions on how to set the mode and adjust pre-tension for optimal thread trailing length.
Reduces tangled threads and broken needles during X-over seam sewing.
Guides on setting seam thickness and correction values for X-over seams.
How to select feed dog loci based on sewing application for improved results.
Notes on improving performance with heavy-weight materials using specific parts and settings.
How to assign functions to hand switches via the menu.
Practical examples of using hand switches for pitch changes, correction sewing, and presser foot lifting.
Explains how to identify and correct tension issues for even stitches.
Step-by-step guide for adjusting lower and upper thread tension for optimal stitch quality.
How to adjust presser foot pressure for different materials.
How to adjust the thread trailing length after trimming using pretension.
How to adjust thread take-up amount for easier tension adjustment with heavy materials.
Steps for increasing or returning the thread take-up amount to standard settings.
Instructions for cleaning the needle plate and feed dog area.
Steps for cleaning the rotary hook and bobbin case.
How to check the oil level in the tank and perform lubrication.
Important checks before sewing, including needle and thread path verification.
Procedure to check the amount of oil supplied to the rotary hook.
Steps for adjusting the rotary hook lubrication amount using the adjusting screw.
How to adjust the position of the thread take-up spring.
Safety precautions related to presser foot and treadle operations during adjustments.
Details the standard tension of the thread take-up spring based on machine specifications.
How to adjust the position of the arm thread guide R for thread take-up amount.
How to adjust the standard height of the presser foot.
Procedure for calibrating the X-over seam sensor after replacing the presser foot.
How to access the mode for adjusting feed dog height.
Steps for checking clearance and adjusting the vertical height of the feed dog.
How to access the mode for adjusting the feed dog angle.
Steps for aligning the feed dog and adjusting its angle for sewing.
How to align the needle bar with the needle bar bush for correct height.
Instructions for lowering the needle bar and adjusting its position.
How to access the mode for adjusting needle and feed mechanism timing.
Steps for adjusting timing and preventing material slippage or thread tightening issues.
How to align the rotary hook tip with the needle for correct timing.
How to check clearance between rotary hook and bobbin case holder.
How to make minute adjustments to the floating amount for different materials.
Instructions for adjusting the floating amount using the adjustment screw.
Steps to loosen screws to allow independent operation of knife holders.
How to install and adjust the upper and lower knives for proper meshing.
How to align the upper and lower knives for proper meshing.
Steps for securing the upper knife and testing the thread trimming mechanism.
How to set the maximum meshing amount for the upper and lower knives.
Adjusting the thread trimming cam position and checking clearances.
Steps to adjust the thread trimming cam position relative to the needle bar.
How to check clearances and tighten set screws after cam adjustment.
Explains how error codes appear and general notes for technicians.
Illustrates the layout of connectors on the main P.C. board and sewing machine.
Lists error codes related to switches, keys, and connections.
Lists error codes associated with the sewing machine motor and its operation.
Lists error codes related to the feed motor and its operation.
Lists error codes related to panel communication, USB media, and memory.
Lists error codes related to power supply and board components.
Lists error codes encountered during software version updates.
Safety warnings and general advice before troubleshooting.
Identifies causes and solutions for upper thread not being tight or loops in the seam.
Causes and remedies for skipped stitches and large bird's nests at sewing start.
Addresses problems related to needle installation, presser foot pressure, and height.
Causes and solutions for uneven seams and puckering due to tension or speed.
Addresses tangled lower thread and bobbin-related problems.
Identifies causes for upper and lower threads breaking and their remedies.
Addresses issues with thread breaking during backtack and variable backtack pitch.
Solutions for upper thread pulling out after thread trimming.
Addresses problems with condensed stitches and T/T short function.
Remedies for incorrect thread trimming and broken needles.
Addresses problems with the oil gauge and knee lifter operation.
Causes and solutions for the machine not operating or stopping during sewing.
Addresses issues where nothing appears on the panel display or grease up warnings.
| Brand | Brother |
|---|---|
| Model | S-7300A-403P |
| Category | Sewing Machine |
| Language | English |