S-7300A
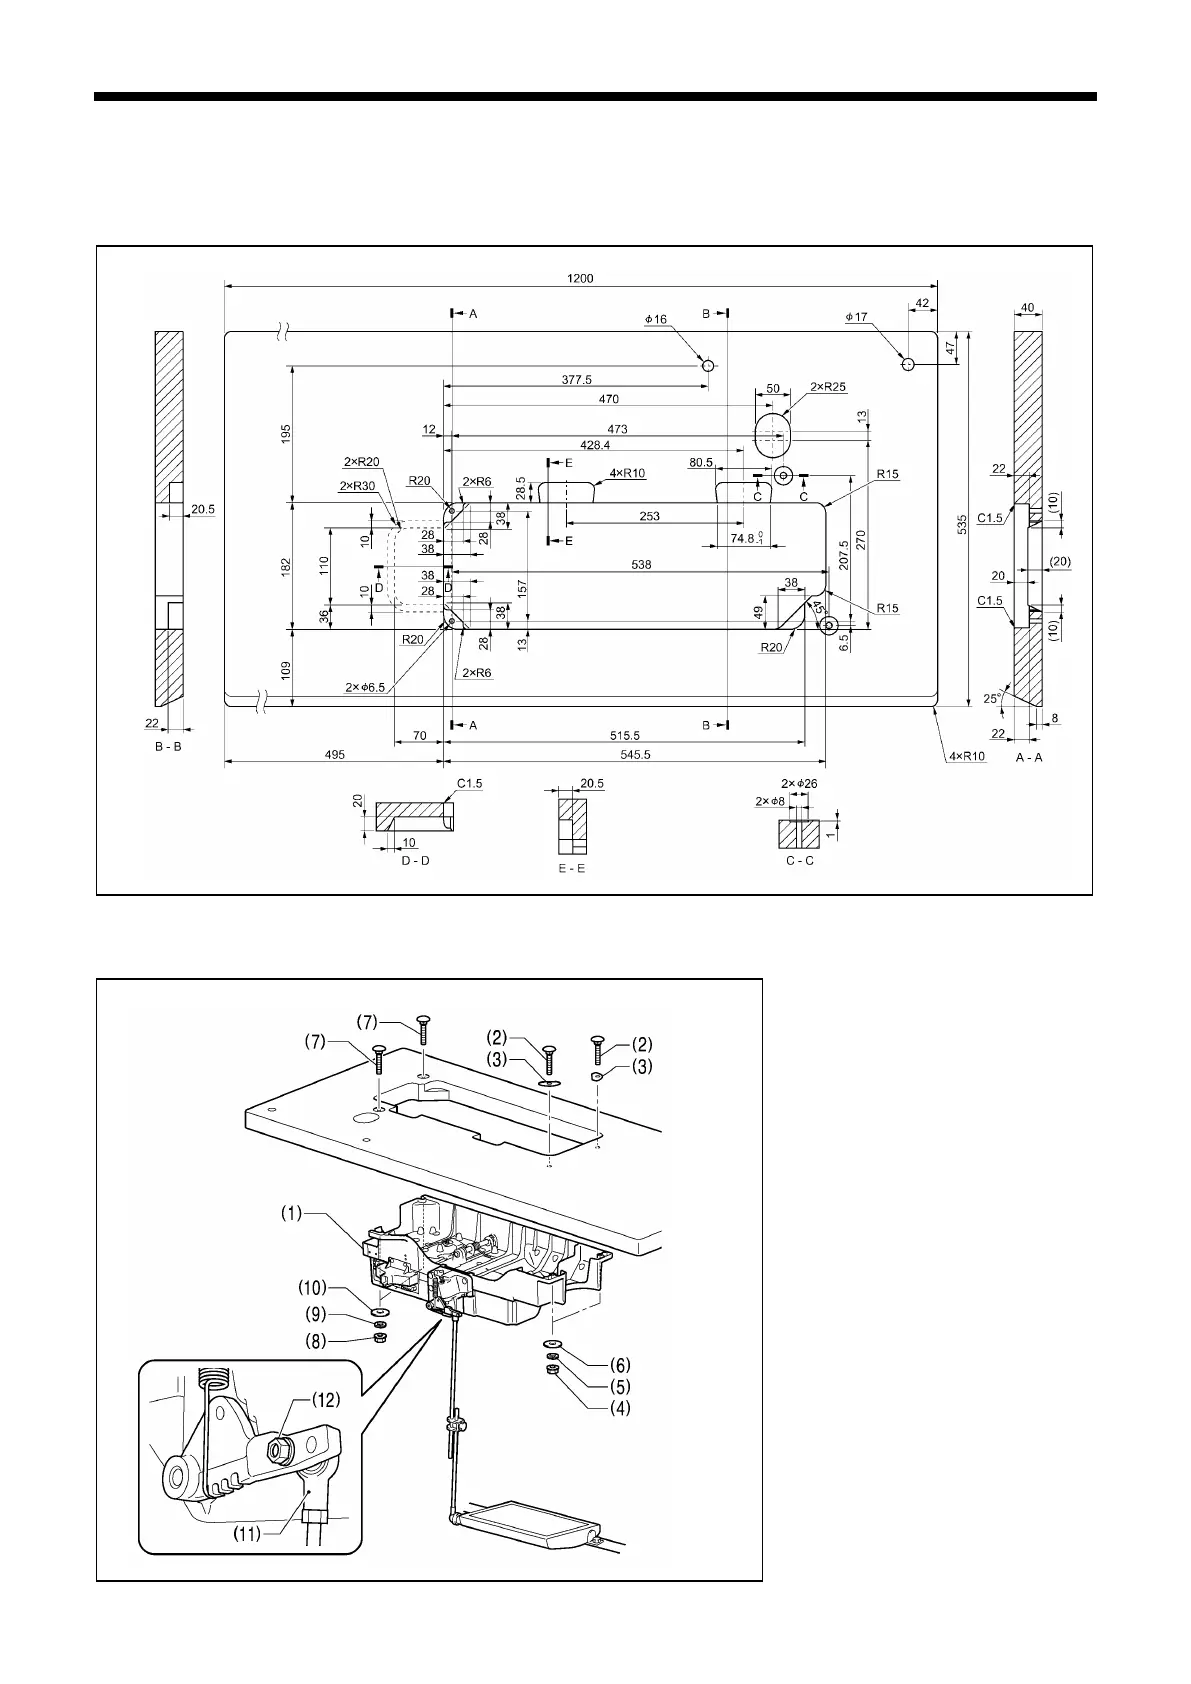
3-1. Table processing diagram
・ The top of the table should be 40 mm in thickness and should be strong enough to hold the weight and with-stand the
vibration of the sewing machine.
・ Drill holes as indicated in the illustration below.
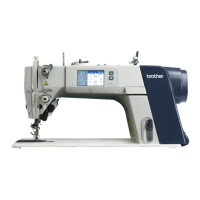
3-2. Installation
1. Control box
(1) Control box
(2) Bolts [4 pcs]
(3) Washers [2 pcs]
(4) Nuts [2 pcs]
(5) Spring washers [2 pcs]
(6) Washers [2 pcs]
(7) Bolts (large) [2 pcs]
(8) Nuts (large) [2 pcs]
(9) Spring washers (large) [2 pcs]
(10) Washers (large) [2 pcs]
2. Connecting rod
(11) Connecting rod
(12) Nut
Cotton stand hole
Cord hole
Head rest hole
Control box
mounting hole