Do you have a question about the Brother TN-1050 and is the answer not in the manual?
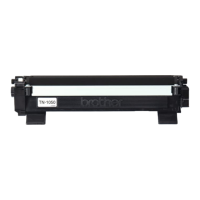
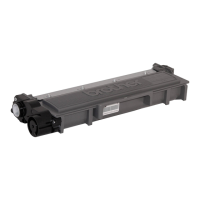
Prepare the Brother TN-1050, HL-1110, HL-1112 toner cartridge by cutting off the spot weld and removing the sealing plug.
Crucially, remove all remaining toner from the cartridge before refilling to prevent clumping and damage.
Fill the Brother TN-1050, HL-1110, HL-1112 toner cartridge using a funnel and refill toner.
Learn how to reset the toner level mechanism for Brother TN-1050, HL-1110, HL-1112 cartridges.
Attach the new side cover with the reset lever recess to the Brother toner cartridge.
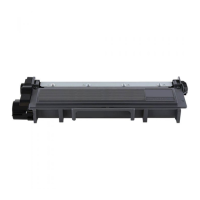
This document outlines the refill instructions for Brother TN-1050, HL-1110, and HL-1112 toner cartridges, providing a detailed guide for users to replenish their toner and reset the cartridge for continued use. The primary function of these instructions is to enable the economical reuse of toner cartridges, offering an alternative to purchasing new ones, especially given the compact and space-saving design of these Brother models. By following these steps, users can extend the life of their cartridges, contributing to both cost savings and environmental sustainability.
The usage features described in the manual focus on the practical steps involved in refilling and resetting the toner cartridge. The process begins with preparation, which involves carefully cutting off a small spot weld on the cartridge. This initial step is crucial as it allows access to the sealing plug, which must then be removed. Users are advised to use a small spatula or a similar flat tool to gently pry open the stopper, ensuring it is set aside safely for later replacement. This careful handling prevents damage to the cartridge components, which is essential for successful refilling.
A critical usage feature highlighted is the importance of removing residual toner before refilling. The manual explicitly states that new and old toner, due to their differing physical and chemical properties, can clump together if mixed, rendering the cartridge useless. To prevent this, users are instructed to either shake the cartridge in a sealed plastic bag to dislodge the old toner or, ideally, use a toner vacuum cleaner to thoroughly remove any remaining powder. This step ensures that the new toner functions optimally and prevents potential print quality issues or cartridge malfunction.
Once the cartridge is prepared, the actual refilling process is straightforward. Users are directed to take a bottle of refill toner, shake it lightly, and then remove its cap. A funnel is then screwed onto the bottle, facilitating a clean and controlled pour of the toner into the cartridge. The instructions emphasize carefully pouring the toner, ensuring that the cartridge is adequately filled. After filling, the previously removed plug is replaced, sealing the cartridge. This part of the process is designed to be user-friendly, allowing for a clean and efficient transfer of toner.
Beyond refilling, a significant usage feature is the resetting of the toner level. The manual explains that the reset lever is a mechanical device designed to count down the toner level with each print. For starter cartridges—those that come with a new printer—users will need to insert a new reset lever and a new side cover. This is because starter cartridges typically lack these components, which are necessary for the cartridge to register as "full" after refilling. For cartridges that have already been replenished, the reset lever and new cover are usually already in place, requiring only a reset of the existing mechanism.
The instructions detail the steps for accessing and manipulating the reset lever. This involves loosening two screws on the side cover, which then allows the cover to be removed after disengaging two barbs. Once the side cover is off, users are guided to remove the upper, right-hand gear. This action provides access to the area where the reset lever needs to be inserted or reversed. A key detail is ensuring that the small plastic arm of the reset lever points to the left, which is crucial for its correct function. After the reset lever is properly positioned, the gear is replaced, and the side cover is reattached. This intricate process ensures that the printer accurately recognizes the cartridge as full, allowing for continued printing without error messages.
Maintenance features are implicitly woven throughout the instructions, primarily focusing on the proper handling and preparation of the cartridge to ensure its longevity and functionality. The emphasis on removing old toner is a critical maintenance step, preventing internal clumping and ensuring smooth operation. Similarly, the careful handling of the sealing plug and the precise reassembly of the side cover and gears are all part of maintaining the cartridge's integrity. The guide also highlights the need for a new side cover for starter cartridges, which is a specific maintenance requirement to enable the reset lever to function correctly. This new cover has a recess designed to accommodate the reset lever, allowing it to perform its services without problems and reliably indicate when the toner cartridge is "empty" again.
The final steps involve inserting the new side cover, if applicable, and securing it with the two screws. The manual advises users to take the new cover and replace it in the same position as the old one, ensuring it is tightened properly. Once these steps are completed, the toner cartridge is ready to be placed back into the printer, and printing can resume as usual. This comprehensive approach to refilling and resetting ensures that users can effectively maintain their Brother toner cartridges, maximizing their utility and minimizing waste. The instructions are designed to be followed meticulously, ensuring that each component is handled correctly to achieve a successful refill and reset, thereby extending the life of the printer's consumables.
| Type | Toner Cartridge |
|---|---|
| Color | Black |
| OEM Part Number | TN-1050 |
| Page Yield | 1, 000 pages |
| Compatibility | Brother DCP-1510, HL-1110, MFC-1810 |