EasyManua.ls Logo

Brother TN 2010 - User Manual

Brother TN 2010
5 pages
Print Icon
To Next Page IconTo Next Page
Loading...
Toner that doesn’t cost the earth
Printed on recycled paper, using refilled cartridges
© Zinetic.co.uk. All Rights Reserved
INSTRUCTIONS FOR REFILLING BROTHER TN 2010 CARTRIDGE
BROTHER DCP-7055, DCP 7055W, DCP-7057, HL-2130. HL -2132, HL-2135W
When to refill:
The Brother machine lets you know when you are low on toner using a series of LED lights on the printer.
You can force the printer to continue to print and use up as much toner as possible by selecting
CONTINUE MODE.
TONER LOW - The Toner LED will turn on for 2 seconds and off for 3 seconds -
ignore message - Keep printing
In “Stop mode” you would be required to empty and refill at this point.
However you can use the CONTINUE MODE to override this default setting and
print for longer see below.
How to select Continue mode:
HL 2130 /2132/2135W machines :
To force the machine to continue printing after the LEDs indicate REPLACE TONER, press Go seven times to
enter “Continue mode” (all the LEDs flash twice, and then the Ready LED turns on).
The machine will then continue printing until the LEDs indicate TONER ENDED
DCP 7055 / DCP 7055W machines – there is no GO Button. So follow instructions below
Press Menu, press arrow keys to choose 1.General Setup and press OK,
Press arrow keys to choose 4.Replace Toner, and press OK,
Press arrow keys to choose Continue and press OK.
The machine will then continue printing until the LEDs indicate TONER ENDED
(To return to the default setting (Stop mode), press Go seven times (all the LEDs flash once).
Replace toner (CONTINUE MODE) the toner light is on but you can continue to
print.
CONTINUE MODE - Toner Light on continuously with error light lit - machine will
not print – Empty it and Refill it (TONER ENDED)
You must now empty and refill.
Question and Answer IconNeed help?

Do you have a question about the Brother TN 2010 and is the answer not in the manual?

Summary

Refilling Brother TN 2010 Cartridge Instructions

When to Refill and Use Continue Mode

Guides on identifying low toner, using Continue Mode, and understanding printer LED indicators.

Selecting Continue Mode for HL Series

Instructions for HL 2130/2132/2135W models to enter Continue Mode via the Go button.

Selecting Continue Mode for DCP Series

Steps for DCP 7055/7055W models to activate Continue Mode using menu navigation.

Physical Toner Refilling Process

Printer and Cartridge Preparation

Steps for switching off the printer, removing the cartridge, and preparing it for refilling.

Toner Dumping and Bottle Preparation

Instructions on safely removing waste toner and preparing the new toner bottle for pouring.

Toner Pouring and Cartridge Sealing

Details on pouring new toner into the cartridge and replacing the toner cap securely.

Cartridge Reset and Final Checks

Guidance on resetting the cartridge and performing final checks after refilling.

Cartridge Reset Mechanism

Reset Gear Identification and Preparation

Information on starter cartridges lacking a reset gear and the initial screw removal process.

Accessing the Reset Gear and Cogs

Detailed steps for carefully removing the end cover to expose the reset gear and internal cogs.

Reset Gear and Spring Adjustment

Instructions for removing the white reset gear and correctly setting the gear spring position.

Gear Meshing and Agitator Position

Guidance on gear placement, noting non-meshing teeth, and setting the agitator gear correctly.

Final Reset Gear Alignment

Ensuring the black arrow on the cover aligns with the marked white arrow #3 on the reset gear.

Safety and Disclaimer Information

Toner Powder Safety Precautions

Guidelines for safe handling of toner powder, including inhalation, eye, and skin contact risks.

Document Usage and Disclaimers

Information on the source, accuracy, and user responsibility for the provided manual content.

Overview

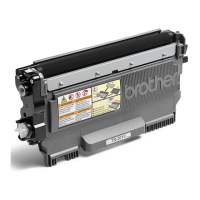
This document provides comprehensive instructions for refilling and resetting Brother TN 2010 toner cartridges, compatible with Brother DCP-7055, DCP 7055W, DCP-7057, HL-2130, HL-2132, and HL-2135W printers. The instructions are designed to enable users to continue printing using refilled cartridges, promoting cost savings and environmental benefits by utilizing recycled paper and refilled cartridges.

Function Description:

The primary function of this guide is to instruct users on how to manually refill Brother TN 2010 toner cartridges and reset the printer's toner counter. This process allows for the reuse of existing cartridges, reducing waste and the need to purchase new ones. The guide addresses common issues such as "toner low" and "toner ended" messages, providing workarounds to maximize cartridge life.

Important Technical Specifications:

The instructions are specifically tailored for Brother TN 2010 toner cartridges used in the following Brother printer models:

  • DCP Series: DCP-7055, DCP 7055W, DCP-7057
  • HL Series: HL-2130, HL-2132, HL-2135W

The guide highlights the presence of a "flag gear" in Brother cartridges, which is responsible for resetting the printer's toner counter. This flag gear is a critical component that needs to be manipulated during the reset process. Starter cartridges, which ship with new printers, typically do not include this reset gear, necessitating its separate purchase for refilling.

The document also mentions the potential for "waste toner" accumulation, noting that Brother cartridges can retain up to 25 grams of waste toner even when reporting empty. This emphasizes the importance of completely emptying the cartridge before refilling to prevent print defects caused by mixing new and old toner.

Usage Features:

The guide provides detailed steps for both operating the printer in "Continue Mode" and physically refilling the cartridge.

Printer Operation (Continue Mode):

The Brother printers are designed to notify users when toner is low or empty through LED indicators. The guide explains how to override these default settings to continue printing, maximizing toner usage.

  • For HL 2130/2132/2135W machines: When the LEDs indicate "REPLACE TONER," users can press the "Go" button seven times to activate "Continue Mode." This causes all LEDs to flash twice, and then the "Ready" LED turns on, allowing printing to continue until "TONER ENDED" is indicated. To revert to "Stop mode," the "Go" button must be pressed seven times again (all LEDs flash once).
  • For DCP 7055 / DCP 7055W machines: These models lack a "Go" button. Users must navigate the printer's menu:
    1. Press "Menu."
    2. Use arrow keys to select "1. General Setup" and press "OK."
    3. Use arrow keys to select "4. Replace Toner" and press "OK."
    4. Use arrow keys to select "Continue" and press "OK." This enables printing until "TONER ENDED" is indicated.

The document illustrates the LED states:

  • TONER LOW: Toner LED on for 2 seconds, off for 3 seconds. Users can ignore this message and keep printing.
  • CONTINUE MODE (Toner light on): Toner light is on, indicating continued printing is possible.
  • TONER ENDED (Toner light on continuously with error light lit): The machine will not print. This signifies the cartridge must be emptied and refilled.

Cartridge Refilling Process:

The refilling process is broken down into 11 clear steps:

  1. Switch printer off.
  2. Remove cartridge from printer: Place it on newspaper to catch spills.
  3. Locate the hopper cap: Usually hidden behind the label.
  4. Remove the hopper cap: Use needle-nose pliers or a flat-blade screwdriver.
  5. WARNING: Dump all old toner: This is crucial to prevent print defects. Empty the old toner into a large bin bag in an area tolerant of spills (e.g., a garage).
  6. Shake new toner bottle: Vigorously for 30 seconds before opening. Remove the cap and seal.
  7. Fit pouring spout: Securely attach the reusable spout to the toner bottle.
  8. Insert spout into hole: The toner will flow easily; be careful not to spill.
  9. "Upend" cartridge: Slowly pour toner into the cartridge.
  10. Replace cap: Use the new plug provided.
  11. Distribute toner: Gently rock the cartridge side to side. Wipe away excess toner.

Maintenance Features:

The guide emphasizes the importance of resetting the cartridge after refilling, which involves manipulating a small "flag gear" within the cartridge.

Cartridge Resetting Process:

This process is critical for the printer to recognize the refilled cartridge as full.

  1. Remove 2 screws: As indicated in the diagrams.
  2. Carefully remove end cover plate: This reveals the reset gear and other cogs. Caution is advised to avoid dislodging any cogs.
  3. Remove only the white reset gear.
  4. Set the reset gear spring: The red arrows in the diagram show the exact position for the spring.
  5. Replace the gears: Ensure the gear teeth are not meshed when set, as this is the correct configuration. The gear is spring-loaded and will turn when driven by the printer.
  6. Note agitator gear position: The straight edge of the agitator gear (highlighted in yellow) must be in a specific position for the printer to reset correctly. Failure to replicate this position will prevent the reset.
  7. Re-install gear cover plate: With the gear set in the correct position, replace the cover plate and the two screws.
  8. Align black arrow on cover with white arrow #3 on TN2010 gear: This final alignment step is crucial for proper reset.

After a successful reset, users should replace the cartridge in the printer and print some test pages to remove any excess toner and confirm functionality.

Safety Information:

The document includes important safety guidelines regarding toner powder:

  • Toner powder is a nuisance dust.
  • Not for use by children.
  • Avoid inhalation, eye, and skin contact.
  • Do not ingest.
  • Inhalation: May cause slight irritation of the respiratory tract; consult a doctor.
  • Eye contact: May cause irritation by mechanical abrasion; consult a doctor.
  • Skin contact: Wash with soap and cold running water.
  • Ingestion: No known hazard.
  • Carcinogenicity/Mutagenicity: N/A, AMES test negative.

Zinetic disclaims warranty for the accuracy or completeness of the safety information, stating it is provided as a guide, and users are responsible for adopting necessary safety precautions and complying with local laws. The document also clarifies that Zinetic is not associated with or endorsed by the cartridge/printer manufacturers mentioned, and all brand names and part numbers are used for identification purposes only.

Brother TN 2010 Specifications

General IconGeneral
BrandBrother
ModelTN 2010
CategoryPrinter Accessories
LanguageEnglish

Related product manuals