Do you have a question about the Brunswick Black Wolf Pro and is the answer not in the manual?
Assemble leg assemblies, install levelers, and attach the stretcher between legs using screws and washers.
Attach leg brackets, side sills, cross supports, and slate cleats to the base frame.
Lower base frame, secure it, and attach pocket system components like triangle brackets and bridge racks.
Square the base frame by measuring diagonals and level the table using leg levelers.
Position the center slate section evenly between base frame cross supports with equal overhang.
Position end slate sections, check overhang, drill holes, and fasten them to the base frame.
Level end slates using wedges, shim center slate for flush fit, and fill slate joints.
Lay the bed cloth over the slate, ensuring equal overhang at ends and sides, with nap side up.
Fold cloth back at head end, spray contact adhesive on slate edge and cloth underside, avoid top surface.
Attach cloth at marked points, stretch across the table, fold overhang underneath, and press into position.
Lay cloth with nap running head to foot, leaving specific overhang at head/left and balance at foot/right.
Tack cloth at point #1, stretch across to #2 and tack, then stretch from #1 to #3 and tack.
Stretch cloth tightly on sides and ends, tacking at points #5, #6, #7, and #8.
Cut slits at pocket openings, pull cloth into pockets, and tack securely to the wood frame.
Tack cloth at head end (#11), pull to #12 and tack, stretch to foot end #13, and secure tightly.
Tack cloth along sides, head end, foot end, and right side on 2" centers, then cut pocket openings.
Place and attach foot and head end gully tracks to base frame members using screws and washers.
Attach triangle rack brackets to the receiver box on each side using pan head screws and fender washers.
Place corner casting, seat rail clearance holes, hold rails square, and attach with bolts and washers.
Attach tie plate to corner casting post using a hex head bolt and fender washer, then drill and tap screws.
Thread a stud into the pre-positioned nut plates inside each rail for assembly.
Attach aprons to the rails with the rails face down, ensuring equal overhang at each end.
Carefully slide an apron corner extrusion over the ends of the aprons and attach it.
Position the rail and apron assembly over the table, aligning rail studs with holes on the slate.
Attach rails securely to the table using threaded studs, dome washers, and hex nuts.
Position side pocket pads and corner pocket pads, fit, trim, and attach with nails.
Brush the area for bed spots, position the spot, and roll a ball over it to ensure good adhesion.
Securely attach the ball receiver box to the base frame end sill using hex head screws.
Attach triangle rack brackets to the sides of the receiver box using pan head screws and fender washers.
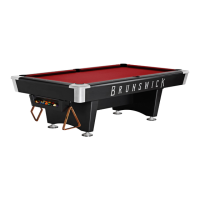
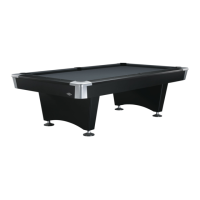
This document is an installation manual for the Brunswick Black Wolf Pro Pocket Billiard Table, providing detailed instructions for assembly, cloth attachment, and specific components for return system tables.
The Brunswick Black Wolf Pro is a pocket billiard table designed for recreational or professional play. The manual outlines the steps required to assemble the table from its base frame and legs to the slate, rails, and apron, and finally, the ball receiver box for return system models. The core function of the manual is to guide installers through a damage-free assembly process, ensuring the table is properly constructed and leveled for optimal play. It covers both drop pocket and gully pocket (return system) table configurations, with specific instructions for each where applicable.
| Brand | Brunswick |
|---|---|
| Model | Black Wolf Pro |
| Category | Board Game |
| Language | English |