38
SERVICE (Cont.)
Removal and Replacement:
1. Disconnect the wires from the rectifier.
2. Remove the #10-32 screw securing the rectifier
to the motor mounting bracket.
3. Remove the rectifier and discard.
4. Install new rectifier on the rear of the motor mount-
ing bracket and secure with a #10-32 screw.
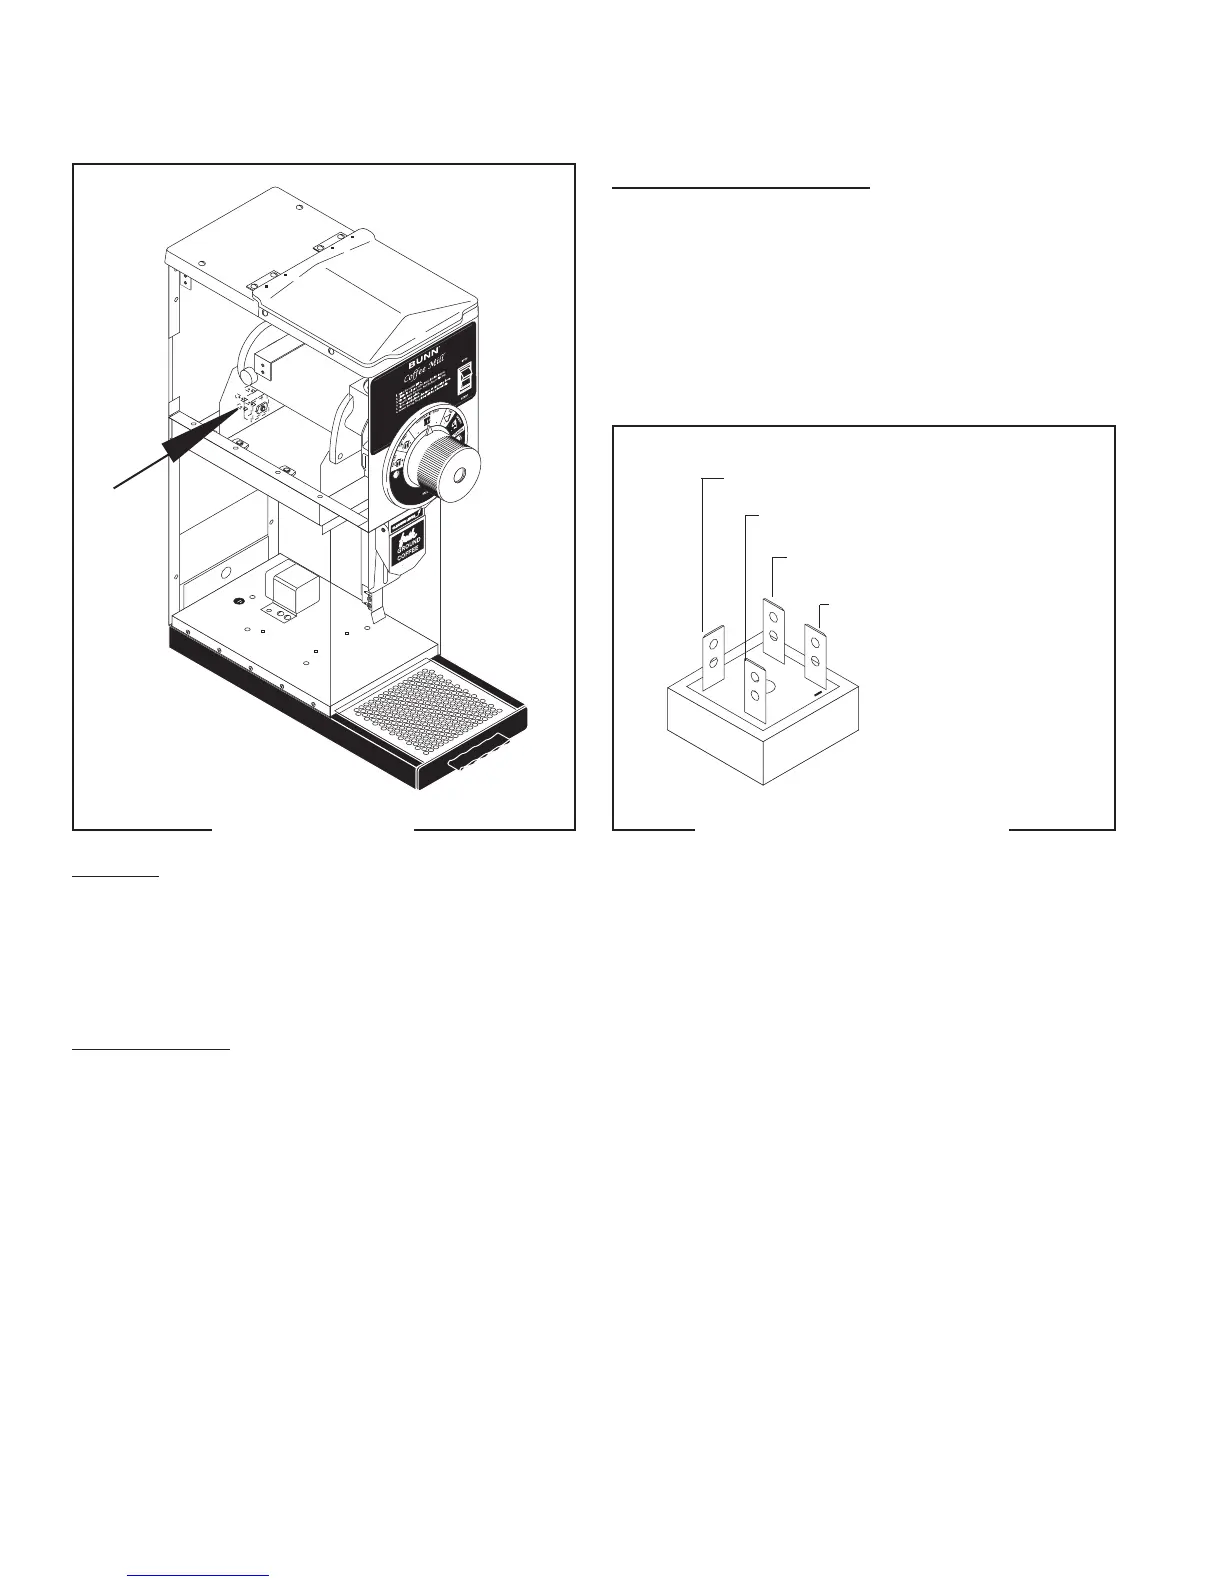
5. Refer to Fig. 37 and reconnect the wires.
BLK from Motor (+)
BLU to BLU from Motor (AC)
WHI from Main Harness (AC)
RED from Motor (-)
FIG. 37 RECTIFIER TERMINALS
P1381
Rectifier (Models G1 MD, FPG-2 DBC)
FIG. 36 RECTIFIER
P1706
Location:
The rectifier is located inside the grinder housing
mounted on the rear of the motor mounting bracket
for models G1 MD and on the component mounting
bracket for model FPG-2 DBC.
Test Procedures:
1. Disconnect the grinder from the power source.
2. Remove the red wire and the black wire from the
rectifier.
3. Check the voltage across the (+) and (-) termi-
nals on the rectifier with a voltmeter. Connect the
grinder to the power source and start the grinder
motor. The indication must be approximately 108
volts dc.
4. Disconnect the grinder from the power source.
If voltage is present as described, the rectifier is op-
erating properly.
If voltage is not present as described, refer to the
grinder wiring diagram and check the grinder wiring
harness.
41545 122209
 Loading...