EasyManua.ls Logo

Burmester Classic Series - User Manual

Burmester Classic Series
16 pages
Print Icon
To Next Page IconTo Next Page
Loading...
OWNER'S MANUAL
0
3
2 INTEGRATED AMPLIFIER
-
\

=
9
1


1

1




CLASSIC LINE
Question and Answer IconNeed help?

Do you have a question about the Burmester Classic Series and is the answer not in the manual?

Summary

Unpacking and Setting Up

Unpacking and Content Check

Verifying the contents of the package and safe unpacking procedures.

Packaging and Unit Placement

Recommendations for retaining original packaging and proper unit placement for ventilation.

Functional Overview

Front Panel Controls

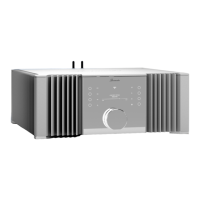
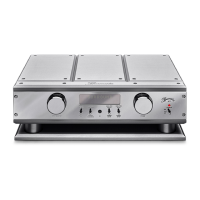
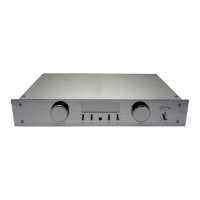
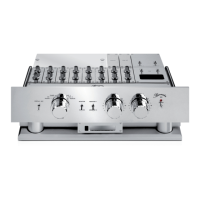
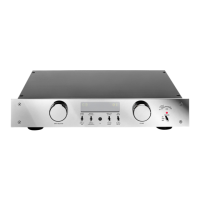
Identification and description of the amplifier's front panel controls and indicators.

Rear Panel Connections

Identification and description of the amplifier's rear panel terminals and interfaces.

Connections

Power and Input Connections

Connecting the AC power cord and various audio input sources to the amplifier.

Output and Speaker Connections

Connecting loudspeakers, headphones, and recording devices to the amplifier's outputs.

Remote and Burlink Interfaces

Connecting external control units and computer systems via remote and Burlink interfaces.

Operating Controls

Power and Volume Operations

How to turn the unit on/off and adjust the volume level using front panel controls.

Input Selection and Monitor Function

Selecting audio sources and using the monitor function for recording.

Tone Control Adjustment

Adjusting treble, bass, and balance settings for audio output.

Remote Control

Remote Control Operation

Using the 067 remote control to operate the amplifier's functions remotely.

The Setup Menu

Accessing and Navigating Setup

Procedures for accessing, navigating, and modifying the amplifier's setup menu settings.

Configurable Menu Items

Overview of adjustable settings including input levels, volume, and output amplification.

Error Protection

Overheating Protection Mechanism

How the amplifier protects itself from overheating, including display indications.

Overload and DC Offset Protection

How the amplifier protects against overload and DC offset, including display indications.

Burlink

Burlink Interface and Commands

Connecting and controlling the amplifier via Burlink RS-232 or USB interfaces.

General Instructions

Operation and Environment

Guidelines for optimal operating temperature, environment, and unit handling.

Connections and Safety

Information on terminals, IR receiver, lightning strikes, interconnects, fuses, voltage, and care.

Electrical Safety Precautions

Important safety warnings regarding electrical shock when handling the unit or fuses.

Technical Specifications

Dimensions and Weight

Physical dimensions and weight of the 032 integrated amplifier.

Mains Voltage and Fuses

Specifications for mains voltage compatibility and required fuse ratings.

Power Consumption

Details on the amplifier's power consumption in ON and standby modes.

Overview

The Burmester 032 Integrated Amplifier is a high-end audio component designed to deliver exceptional musical fidelity, combining robust manufacturing quality with technical innovation and a high degree of operating flexibility. It is part of Burmester's Classic Line and serves as the central control unit for a two-channel hi-fi system, integrating pre-amplification and power amplification stages into a single chassis.

Function Description:

The 032 Integrated Amplifier functions as the core of an audio system, receiving signals from various source components, processing them, and then amplifying them to drive loudspeakers. It features multiple inputs to accommodate a range of audio devices, including CD players, FM tuners, tape decks, and auxiliary sources. A key feature is its ability to integrate with surround sound processors, allowing the 032 to handle the front right and left channels in a multi-channel setup, bypassing its internal tone and volume controls for this specific input.

The amplifier incorporates a sophisticated error protection system that safeguards both the unit and connected loudspeakers from potential damage due to overheating, overload, or DC offset. In the event of an error, the system automatically mutes the amplifier, switches off speaker outputs, and displays an error message (e.g., "TEMP" for overheating, "OF/CU" for overload/DC offset). This system ensures the longevity and reliability of the device and connected components.

For enhanced control and integration into smart home systems, the 032 includes Burmester-LINK interfaces (RS-232 and USB). These interfaces allow external computer systems, such as PCs, CRESTRON®, or Nevo, to control the amplifier remotely, offering a comfortable and programmable touch panel experience.

Important Technical Specifications:

  • Dimensions (Width x Height x Depth): 482 x 191 x 482 mm (19.0 x 7.5 x 19.0 inches). Note that these dimensions do not include binding posts or space for interconnect cable plugs.
  • Weight: Approximately 28 kg (61.7 lbs), indicating a substantial and robust build.
  • Mains Voltage and Fuses:
    • For 200V to 240V 50/60Hz: 2 x slow 250mA E, 2 x slow 3.15A E
    • For 100V to 127V 50/60Hz: 2 x slow 500mA E, 2 x slow 6.3A E
  • Power Consumption:
    • ON: Max. 609 W
    • STBY (Mains switch ON): Approx. 3 W
  • Input/Output Configuration:
    • Balanced Inputs (XLR): CD (20), TUNER (19), AUX1 (18), SURROUND-IN (12). These inputs are pinned as PIN1=GND, PIN2=NEG, PIN3=POS.
    • Unbalanced Inputs (RCA): AUX2 (17), TAPE (16).
    • Balanced Outputs (XLR): PREAMP output (13). Pinned as PIN1=GND, PIN2=NEG, PIN3=POS.
    • Unbalanced Outputs (RCA): PREAMP output (14), TAPE output (15).
    • Loudspeaker Terminals: Right positive (21), right negative (22), left negative (30), left positive (31).
    • Remote Control Connections: DC OUT (25), DC IN (27).
    • BURLINK Interfaces: RS-232 (26), USB (29).
    • Headphones Jack: PHONES (28) for 6.3mm stereo plugs with an impedance of 100Ω or more.

Usage Features:

  • Front Panel Controls:
    • IR receiver (1): For remote control signals.
    • Stand-by LED (2): Indicates stand-by mode.
    • Display (3): Alphanumeric display for showing selected input, volume level, menu settings, and error messages.
    • TONE LED (4): Illuminates when tone control is active.
    • INPUT button for SURROUND input (5): Activates the SURROUND IN (12) input.
    • MONITOR button (6): For tape monitoring.
    • INPUT selector buttons (7): For selecting various audio inputs.
    • VOLUME knob (8): Controls volume in 61 steps (00 to 60) and navigates setup menu functions.
    • POWER button (9): Turns the unit on or off from stand-by.
    • TONE button (10): Activates/deactivates tone control or enters tone control setup.
    • SETUP button (11): Enters the configuration menu.
  • Remote Control (067): The unit comes with a 067 remote control, providing access to power, input selection (TUNER, TAPE, SURR, AUX, DISC for CD), and setup menu (MENU button). The DIM key adjusts display brightness in four steps, including "off." Volume can be adjusted using VOLUME + and VOLUME - buttons.
  • Tone Control: Allows adjustment of bass and treble output in 2dB steps from +14dB to -14dB, and stereo balance in 1dB steps up to -60dB. The tone control mode is accessed by pressing and holding the TONE button (10). Settings are retained after exiting the mode.
  • Setup Menu: Accessible via the SETUP button (11) on the front panel or the MENU button on the remote control. This menu allows users to customize basic settings such as:
    • Input Level Adjustment: For CD, TUNER, TAPE, AUX1, AUX2 inputs, adjustable from -9 to +9 to prevent large volume jumps between sources.
    • Initial Volume Setting: Allows presetting the volume level when the 032 is switched on (0 to 20, or "L" for last volume).
    • Output Amplification: Selectable between "HI" (high) or "LO" (low) to match loudspeakers.
  • SURROUND Input (12): Designed for direct connection to surround sound processors, bypassing the 032's internal tone and volume controls.
  • Headphones Jack (28): Automatically switches off speakers and reduces volume when headphones are connected.
  • DC Remote Control: DC OUT (25) and DC IN (27) jacks allow the 032 to act as a master or slave for simultaneous power on/off with other Burmester units.

Maintenance Features:

  • Packaging: It is recommended to keep the original packaging for future shipping needs.
  • Placement: The unit requires sufficient air circulation to prevent overheating. Ventilation ducts and openings must not be covered. Avoid excessive exposure to sun, dust, or humidity.
  • Cleaning: The housing should never be cleaned with a wet cloth or chemical cleaning agent. Ensure no liquid enters the housing.
  • Fuses: Fuses are located inside the unit and should only be changed by a qualified technician.
  • Reset Function: If the unit becomes unresponsive, it can be reset by switching it off and back on using the AC mains switch on the rear panel.
  • Lightning Protection: During summer months, completely unplugging the power cord is the only effective protection against voltage spikes from lightning strikes.
  • Warranty: The warranty is valid provided the 032 is hooked up and operated correctly and is mechanically undamaged. Opening the unit, modifying it, or dismantling outlets will void the warranty.
  • Safety Precaution: Always unplug the unit from the wall outlet before opening the housing or changing fuses to avoid electric shock.

Burmester Classic Series Specifications

General IconGeneral
BrandBurmester
ModelClassic Series
CategoryAmplifier
LanguageEnglish

Related product manuals