Do you have a question about the Burmester 077 and is the answer not in the manual?
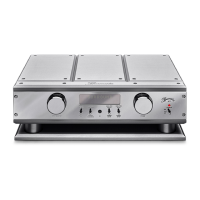
Overview of the preamp's features, including inputs, outputs, and module slots.
Instructions for safely unpacking the unit and identifying included accessories and packaging.
Guidance on proper placement, ventilation, and initial setup of the preamp for optimal performance.
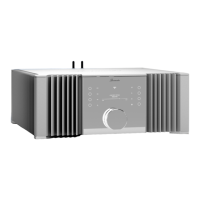
Identifies and describes all buttons, displays, and LEDs on the front panel of the 077 preamp.
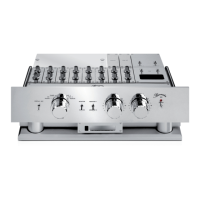
Details all connectors and terminals on the rear panel when equipped with an internal power supply.
Details all connectors and terminals on the rear panel when equipped with an external power supply.
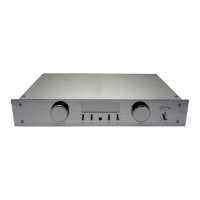
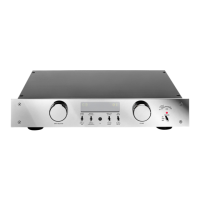
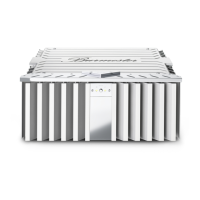
Identifies controls and connections on both the front and rear panels of the external power supply unit.
Step-by-step guide for connecting the power supply and preamp, and powering on the unit for the first time.
Explains how to connect various audio sources and outputs to the preamp, including adapter plug usage.
Details the available LINE, PHONO MC, and PHONO MM module inputs and their configuration options.
Describes the D/A converter module inputs (RCA, USB) and the function of the grounding screw.
Explains the record output, headphone jacks, remote control functionality, and BURLINK interface.
Details the function of the AC mains switch, power switch, volume selector, and input selector on the front panel.
Explains phase reversal, switching between MAIN/RECORD levels, and adjusting display brightness.
Covers RECORD output, SURROUND input, volume scale, and output amplification settings.
Details input naming, monitor lock, volume balance, and 4 Channel Mode setup.
Covers serial number display, disabling front panel controls, and setting initial volume.
Guide on how to access, navigate, and exit the various setup menus on the preamp.
Adjustments for input level, input names, serial number display, 4 Channel Mode, and factory resets.
How to assign custom names to inputs and configure serial number display options.
Details the 4 Channel Mode and its implications for MAIN and RECORD outputs, including fader options.
Options for disabling front panel controls and enabling remote control input selection via STATION keys.
Configuration options for balance, fader, initial volume, volume scale, amplification, and input 6.
How to configure the fader function and choose volume scale units (BUR/dB) for the main level.
Adjusting amplification levels and configuring Input 6 as surround or regular high-level input.
Settings for balance, initial volume, volume scale, volume control, and tape monitor lock for the record level.
Configuring initial volume, volume scale, and volume control for the record level, and tape monitor lock.
Choosing whether headphone outputs play MAIN or RECORD level audio for PHONES 1 and PHONES 2.
Options to enable the subsonic filter and perform automatic channel level adjustment for phono inputs.
Step-by-step guide for using the automatic level adjustment feature for phono inputs.
Adjusting gain and input resistance for the PHONO MC module.
Adjusting gain and input capacitance for the PHONO MM module.
Details on using the remote for power, input selection, volume adjustment, and display brightness.
Explains commands for phase control, sample rate, display dimming, and navigating various setup menus.
Describes BURLINK connections (RS-232, USB) and lists available control commands for the preamp.
Commands for phase reversal, D/A sample rate, and display brightness adjustment.
Commands to activate and navigate various setup menus like Global, Main, Phones, and Phono.
Commands for navigation buttons and retrieving unit information like type and version.
Guidelines on operating temperature, placement, mains voltage checks, and initial setup precautions.
Important safety symbols, warranty information, care instructions, and disposal guidance.
Provides physical dimensions, weight, mains voltage, fuse specifications, and power consumption of the preamp.
| Signal-to-Noise Ratio | > 100 dB |
|---|---|
| Input Sensitivity | 1.2 V |
| Input Impedance | 10 kΩ |
| Gain | 26 dB |
| Frequency Response | 100 kHz |
| Total Harmonic Distortion | < 0.01% |
| Inputs | RCA, XLR |