4
BUTTERFLY™ ASSEMBLY
The Butterfly™ elements of the antenna will be assembled first, then attached to the boom. The antenna
can then be installed
fully assembled
on the mast. Although the antenna can rest on the ground for a
short time, it is best to have your mast and rotor in place before assembly. NOTE: Mast, rotor and sup-
porting structure are not included with the antenna.
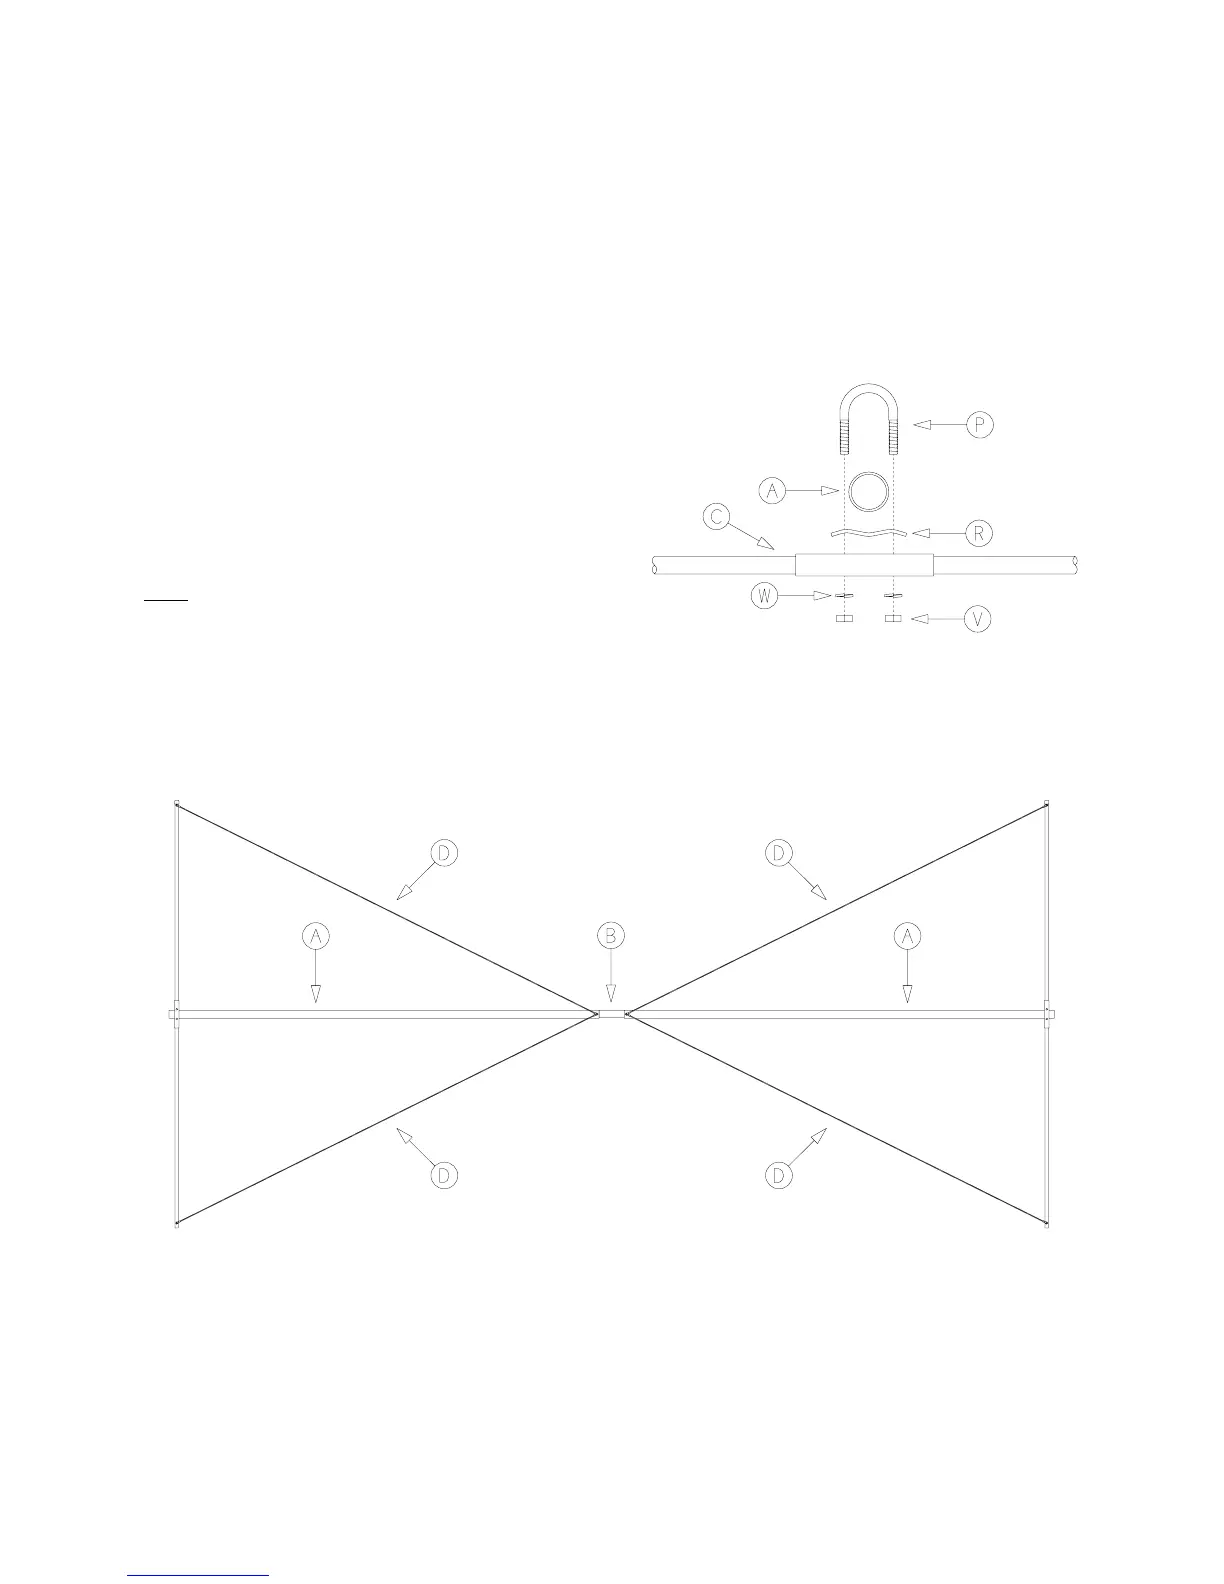
1. Place a 1 1/8" u-bolt (P) through the holes in an M-shaped backing clamp (R), then through the
holes in the center of a tube (C).
2. Slide the u-bolt from above over the end of tube (A) which does not have a hole through it. The
backing clamp (R) should now be sandwiched between tubes (A) and (C). Position the edge of th
backing clamp (R) 3/4" (1.9 cm) from the end of tube (A). Using two lock washers (W) and two
hex nuts (V) secure the u-bolt (P) finger tight.
NOTE: Over tightening the u-bolt (P) will crush tube
(A).
NOTE: It may be hard to start the hex nuts (V) on the u-
bolt (P) with the lock washers (W) in place. If this is
the case, tighten the hex nuts (V) three turns past the
end of the u-bolt (P), then remove them and put the lock
washers (W) on. The nuts (V) are then tightened until
flush
with the end of the u-bolt (P) and no further!
3. Place the "T" just formed above on a flat surface
with the nut side of the u-bolt (P) facing upward.
NOTE: A couple of 2 x 4 wood scraps may be used under tube (C) to provide support.
4. Insert one end of a fiberglass insulator (B) into the end of tube (A) with the hole through it. Line up
the hole in the fiberglass insulator (B) with the holes in tube (A)and pass a 1 1/2" bolt (Z) through
tube (A) and the fiberglass insulator (B) from the bottom.
5. Lay out two spreader wires (D). Place one lug end of each spreader wire (D) over the 1 1/2" bolt
(Z). Place one lug of coil (K) over the 1 1/2" bolt (Z). Secure with a lock washer (BB) and hex nut
(AA).
6. Pass a 3/4" bolt (X) up through the hole in one end of tube (C). Place the other lug end of spreader
wire (D) previously installed, over the 3/4" bolt (X). Secure with a lock washer (BB) and hex nut
(AA).
7. Repeat procedure 6 for the other end of tube (C) and the remaining spreader wire (D).
NOTE: Make sure the alignment of tubes (A) and (C) is correct before proceeding!
 Loading...