-7-
2.
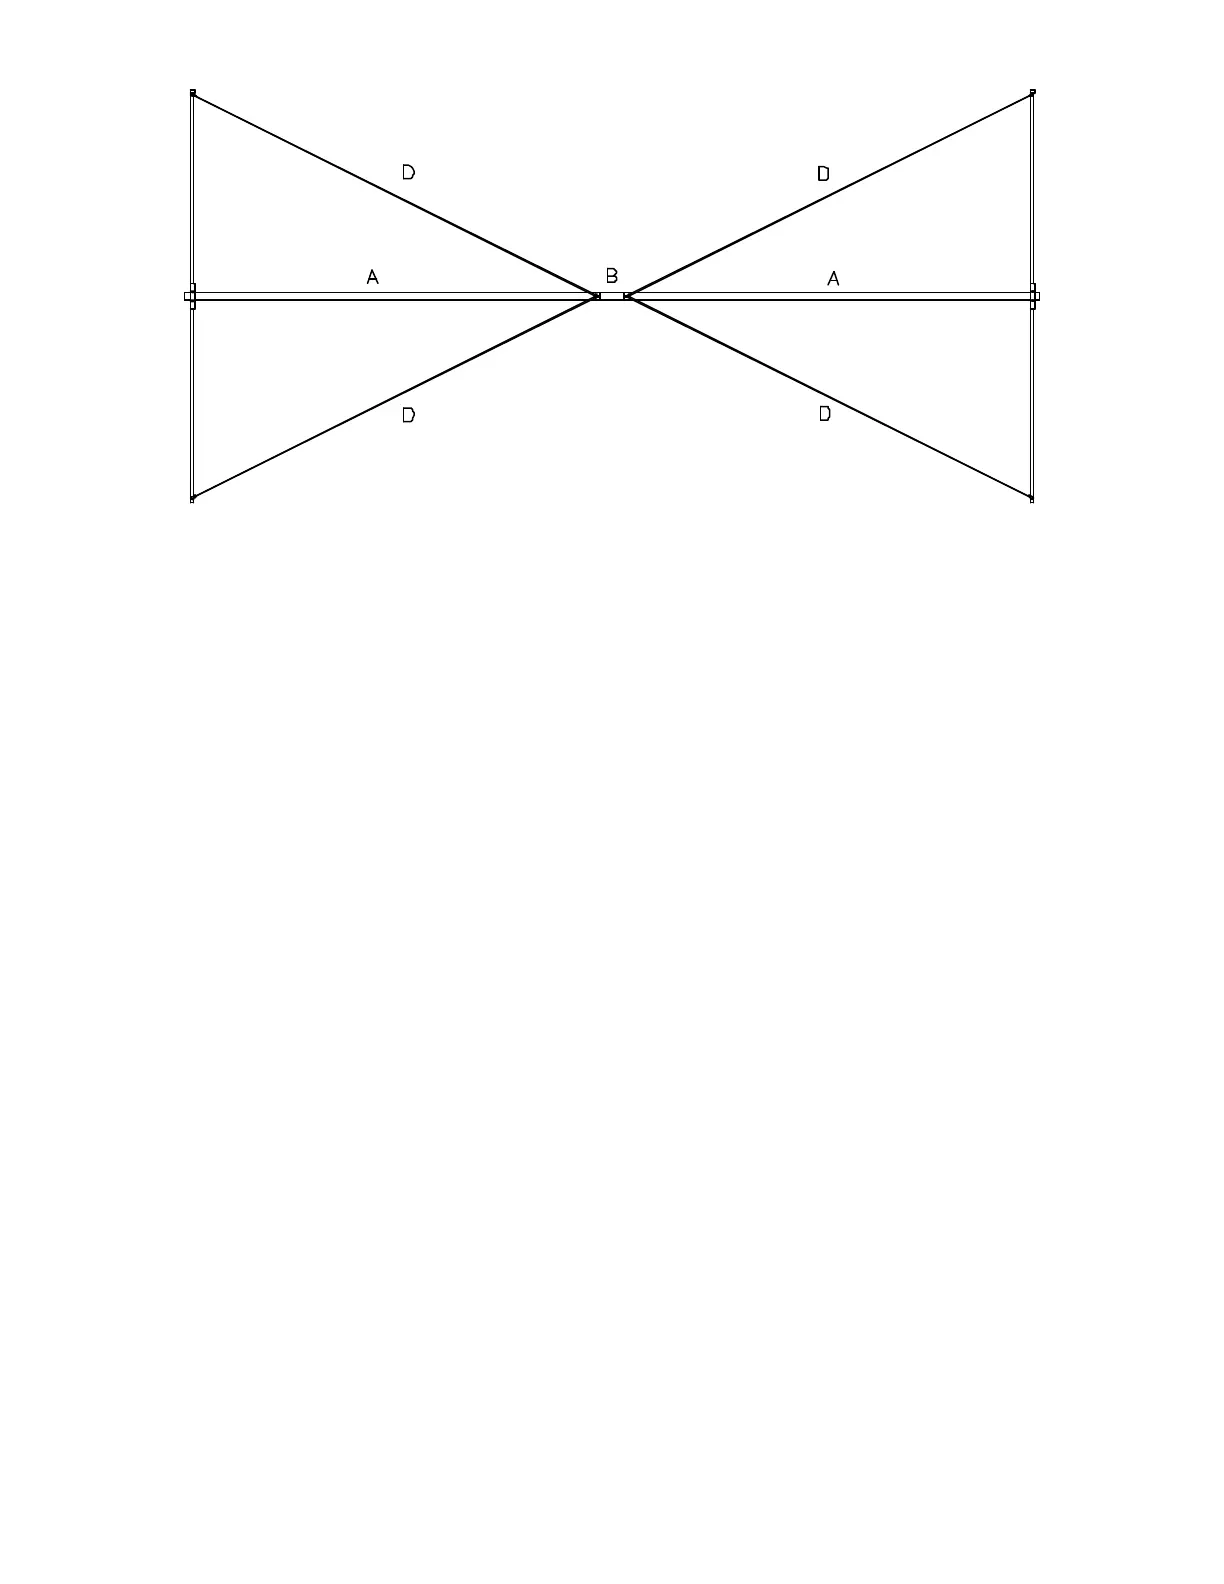
Insert one end of element tube insulator (B) into element tube (A) and align the holes. Insert a 1
1/2" bolt, from the bottom, through element tube (A) and element tube insulator (B). Lay out two
spreader wires (D) and place one lug of each over the 1 1/2" bolt. Secure with a lock washer and
hex nut.
3.
Insert a 3/4" bolt from the bottom of spreader tube (C). Place the remaining lug of one of the
previously attached spreader wires (D) over the 3/4" bolt and secure with a lock washer and hex
nut.
4.
Repeat step 3 for the remaining spreader wire (D) for the other end of spreader tube (C). Make a
final alignment of tubes, U-bolt and spreader wires. Both spreader wires (D) should be on the same
side of element tube (A) as spreader tube (C). A slight bowing of spreader tube (C) should be
expected and will not hurt anything.
NOTE: BE SURE THAT THE ALIGNMENT OF ELEMENT TUBE (A) AND SPREADER TUBE
(C) IS CORRECT BEFORE PROCEEDING BECAUSE WHEN THE U-bolt IS FINALLY
TIGHTENED, ELEMENT TUBE (A) WILL DISTORT JUST ENOUGH TO FIX SPREADER TUBE
(C) INTO PLACE!
Tighten 1/4" hex nuts (AA) until they are flush with the end of U-bolt (V). Tighten the three hex
nuts securing spreader wires (D).
5. Assemble a second element tube (A), spreader tube (C), U-bolt (V) and spreader wires (D) as in
steps 1 through 4, attaching it to the other end of element tube insulator (B). This will form a
complete Butterfly™ element.
NOTE: MAKE SURE THE CAPPED ENDS OF SPREADER TUBE (C) ARE BOTH POINTING IN
THE SAME DIRECTION.
6.
Repeat steps 1 through 5 to assemble a second Butterfly™ element.
This completes the first part of the assembly process. Check your work to see that all parts are properly
aligned and all hardware is tight.