-8-
Band Segment (20 Meters) Spacing
Low (CW) Segment 18 3/4 in (47.6 cm)
Middle Segment 18 in (45.7 cm)
High (Phone) Segment 18 in (45.7 cm)
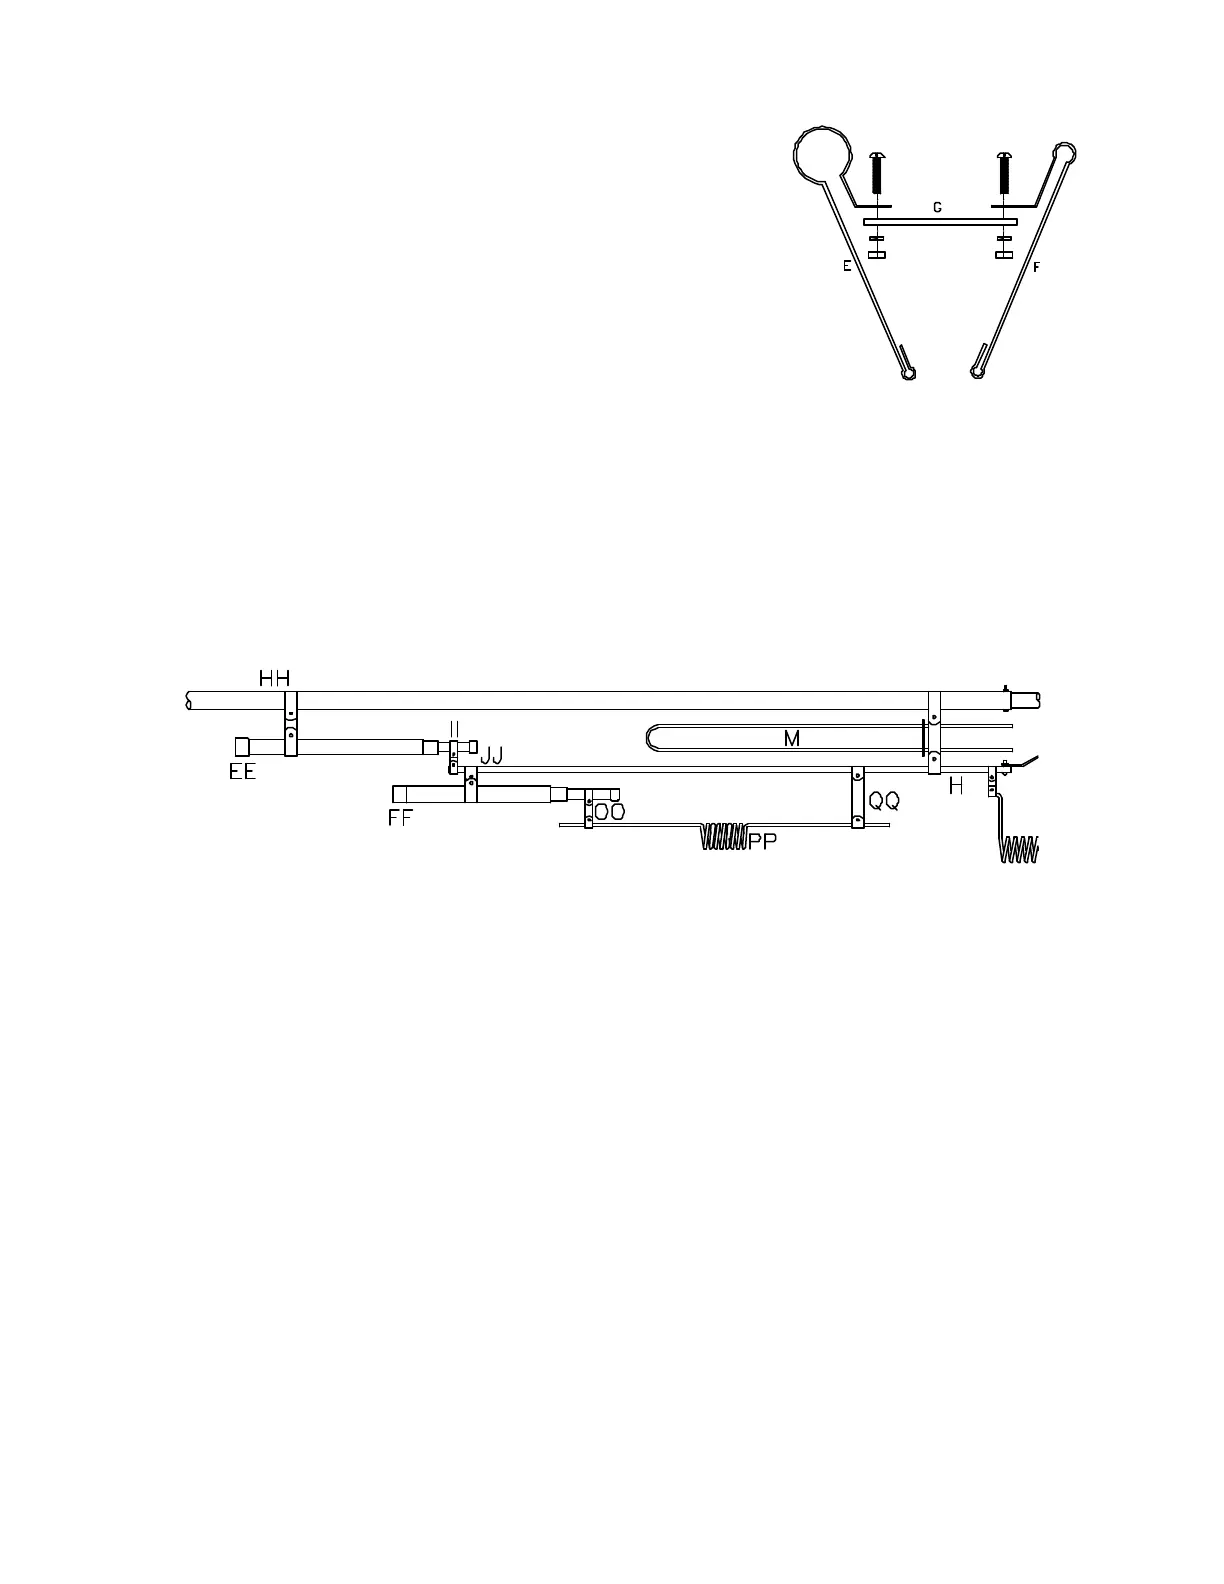
FOUR-WAY CLAMP ASSEMBLY
1. Using 3/4" bolt, attach plastic spacer (G) to bracket end clamp (E)
and secure with lock washer and hex nut.
2.
Attach the other end of plastic spacer (G) to end clamp (F) with a
3/4" bolt and secure with lock washer and hex nut as shown.
3. Repeat steps 1 through 3 for the remaining 3 clamp assemblies.
DRIVEN ELEMENT ASSEMBLY
When you install clamps in the following steps, apply a light coating of Butter-It’s-Not™ anti-seize/oxide
paste at the spot where the clamp attaches to the tubing. A paper towel or cotton swab may be used for
this purpose. Do not overdo it! Too much will cause problems later on.
1.
Take either of the completed Butterfly™ elements and place it on a flat surface, using wood blocks
for support at the ends. The threaded end of U-bolt (V) and spreader wire (D) should be facing
down.
2.
Place a 4-way clamp around the left element tube (A) 4 1/2 in (11.4 cm) from element tube
insulator (B). Secure with a 1" bolt, lock washer and hex nut.
3. Install tube (H) on the left side of the element as shown making sure that the end with the hole is
facing element tube insulator (B). Secure it with 3/4" bolt, lock washer and hex nut finger tight.
4.
Position capacitor clamp (HH) 41 in (1 m) from 4-way clamp on the left element and secure it with
1" bolt, lock washer and hex nut.
5. Position capacitor clamp (II) 30 in (76.2 cm) from 4-way clamp on tube (H) and secure it with 3/4"
bolt, lock washer and nut.
6.
Install capacitor (EE) into the capacitor clamps installed above and secure it with 3/4" bolts, lock
washers and hex nuts.
7.
Using the chart below, position the u-shaped stub (M) on the 4-way clamp located on the left
element and secure with 3/4" bolts, lock washers and hex nuts.