-2-
REQUIRED TOOLS
Flat blade screwdriver and pliers. A 1/4", 11/32" and 3/8" nut driver will be helpful.
ASSEMBLY
Refer to the appropriate diagrams and proceed as follows:
1.
Check to be sure that all parts are present.
2.
Install tube w/insulator (A) per instructions packaged with mounting system or
Tech Notes Ground/Radial Systems.
NOTE: A small packet of anti-seize/anti-oxide compound (Butter-It’s-
Not™) will be found inside tube w/insulator (A). This compound
should be applied lightly to each tubing joint and to the inside of all
clamps that must make good electrical contact with the tubing
sections.
3.
Locate tube (B) and tube (B1). Slide the insulator end of tube (B1) into the end of
tube (B) with hole located 1/4 in (6.4 mm) from the end of the tube. Pass a # 8 x
1 1/2" screw through both parts and secure with a lock washer and hex nut.
4.
From the center of the insulator, measure downward to a point that is 13 in (33
cm) along tube (B) and make a pencil mark.
5.
From the center of the insulator, measure upward to a point that is 9 3/8" (23.8
cm) along tube (B1) and make a pencil mark.
6. Locate coil assembly 80/40 meter (C) and slide the clamp at the outer end of the
larger 80 meter coil over tube (B1), lowering the entire assembly until the middle
clamp can be positioned around the insulator between tube (B) and tube (B1).
NOTE: The middle clamp may have to be pulled open slightly to pass
the bolt that goes through tube (B1) and the insulator.
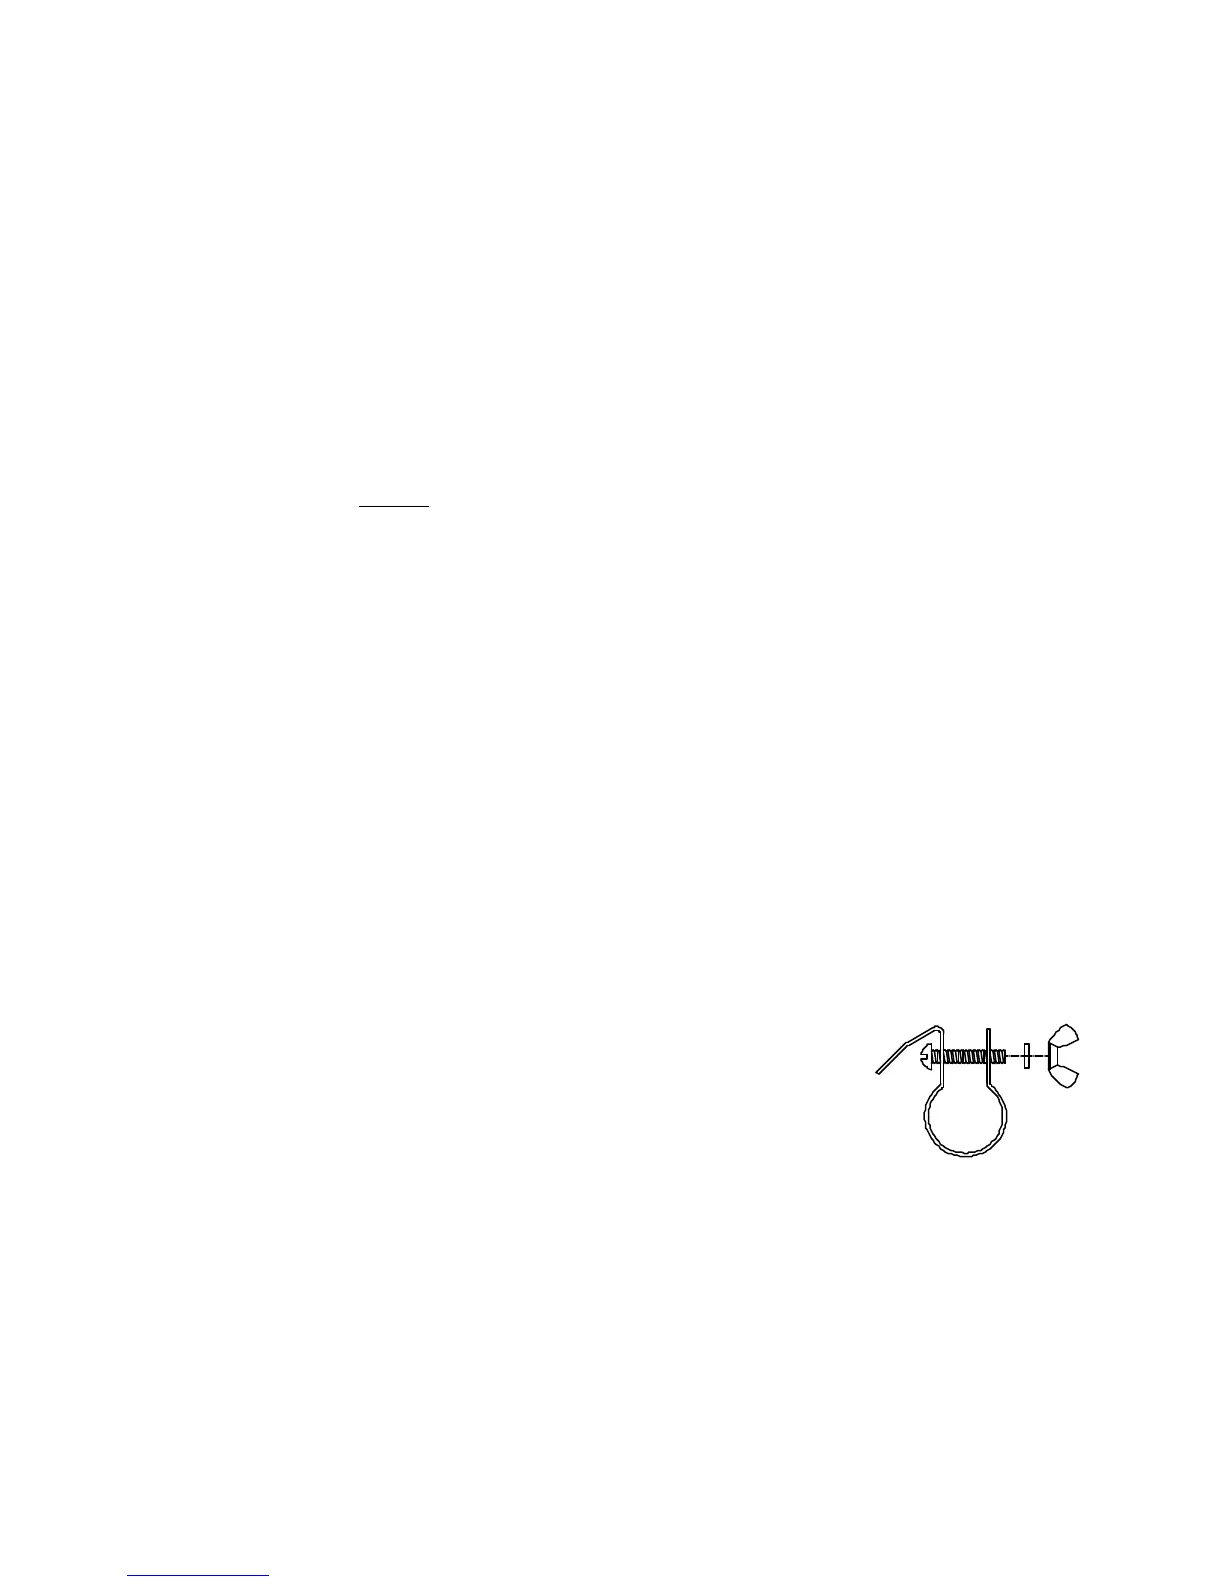
7. Position the center coil clamp of coil assembly 80/40 meter (C)
in the center of the insulator between tube (B) and tube (B1).
Pass a #10 x 1" screw through the clamp as shown. Secure
with a flat washer, lock washer and wing nut.
NOTE: The outer tab of this clamp may be bent back
slightly to provide clearance for the bolt, bending it back into place
after assembly.
8. Stretch the 40 meter (smaller) coil on the coil assembly 80/40 meter (C) until the
top of the upper clamp is even with the upper mark. Secure with a #10 flat
washer, lock washer and wing nut.