15
Cone Spindle Selection and Setting
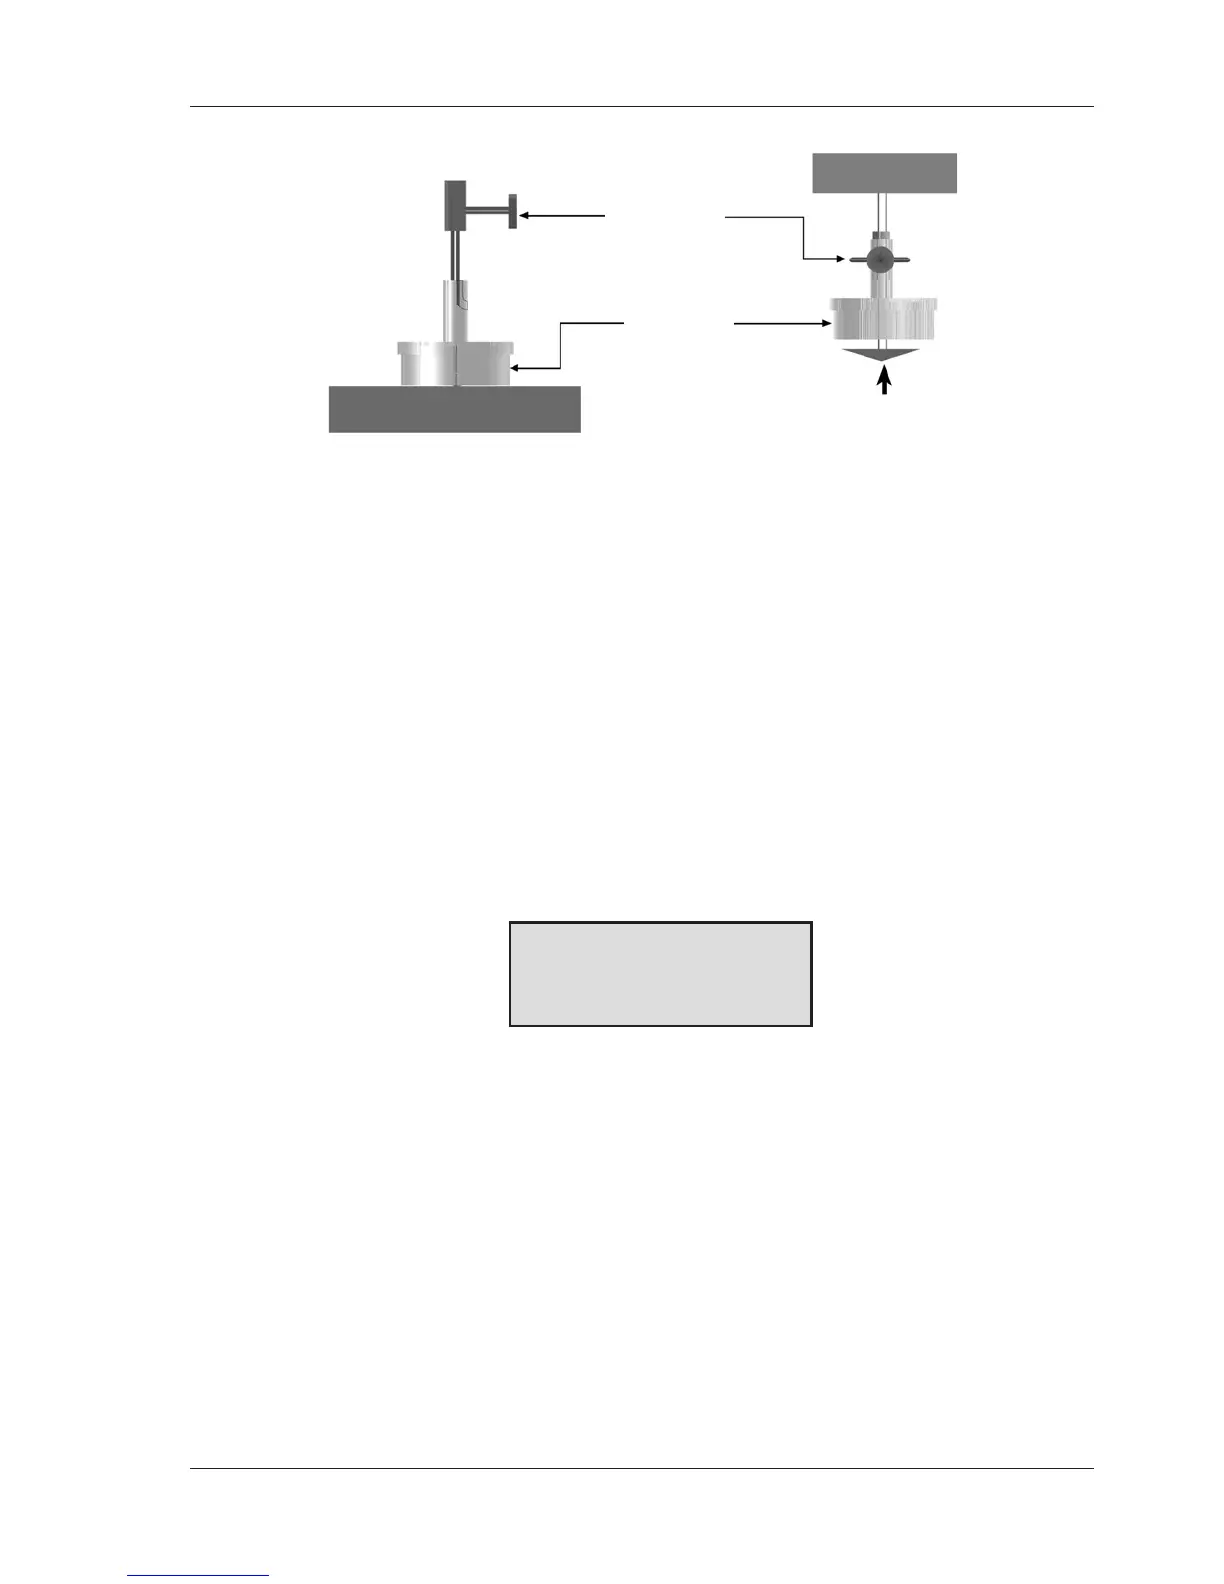
When using the solvent trap, connect it to the cone adapter by sliding it up,
passing the slot by the thumb screw and turning the trap clockwise onto the
thumbscrew. Slide the cone up into the adapter as far as it will go and hand lock it
inplacewiththethumbscrew.Tightenthethumbscrewrmlyandsecurely.
Press the SPINDLE key. The display will change to the spindle entry screen. Using
the number keys, type in the required spindle number.
Two digits must be entered for the cone number. For cone 01 through 09,therst
number remains as “0”.
NOTE: The default cone setting on power-up will be the last cone entry prior to
shutting off the viscometer.
After the correct two (2) digits have been entered, press the ENTER key and the
cone will be accepted for viscometer calculations. The screen will display the
following message:
Spindle 04
CALIBRATE? YES/NO
Figure II-3
Normally there is no requirement to perform a cone calibration. Cones supplied at
the time of order are calibrated to the viscometer prior to shipment.
NOTE: 1. CAP Viscometers allow for only one cone at a time of the same cone
number to be calibrated to the viscometer. Multiple cones of the same
cone number must each be calibrated to the viscometer before
operation (refer to Appendix B).
2. Conesenteredas11through99mustberstcalibratedfollowingthe
directions in Appendix B.
If you are not going to calibrate the cone, continue by pressing the NO key then
ENTER. The viscometer will display the MAIN SCREEN (Figure II-1).
If you are going to calibrate the cone, press the YES key, refer to Appendix B, and
follow the calibration instructions under Cone Calibration.
Figure II-2
Thumb Screw
Solvent Trap
Cone Spindle
Viscometer in measurement position Viscometer in „cleaning“ position