To program non-latching zones (Note: This function is non-compliant with EN54-2)
1. Press the ACCESS LEVEL THREE FUNCTIONS button until the NONLATCHING light flashes (any zones that are already
programmed for non-latching operation will now have their Zone Fault lights lit steady).
2. To change the non-latching configuration press the NEXT OPTION button (zone 1’s Fault light will flash slower than the
NONLATCHING light if not programmed, or at the same rate if it is).
3. If required, toggle between the two states by pressing the ENABLE/DISABLE button.
4. To confirm your choice, press the NEXT OPTION button. This will move you to the next zone (if available).
5. Repeat steps 3 and 4 until the process is complete.
6. To finish the function, press the ESCAPE ACCESS button or move onto the next programming function (DELAYS) by
pressing the ACCESS LEVEL THREE FUNCTIONS button.
To program delays
1. Press the ACCESS LEVEL THREE FUNCTIONS button until the DELAYS light flashes (any zones that are already programmed
for delays will now have their Zone Fault lights lit steady, and similarly, if the Remote Output or Auxiliary Output are
delayed, then their relevant status lights will be lit steady. Note: Any existing fault indications will be temporarily
suppressed during this programming function. On exiting the function, the previous indications will be restored).
2. To change the delays configuration press the NEXT OPTION button (zone 1’s Fault light will flash slower than the DELAYS
light if not programmed, or at the same rate if it is).
3. If required, toggle between the two states by pressing the ENABLE/DISABLE button.
4. To confirm your choice, press the NEXT OPTION button. This will move you to the next zone (if available).
5. Repeat steps 3 and 4 until the zone selection process is complete.
6. Pressing the NEXT OPTION button when on the last zone will now select the Remote Output for editing. The output’s
current status will be shown by the Remote Output Status light, in the same way as for the zones.
7. If required, toggle between the two states by pressing the ENABLE/DISABLE button.
8. Pressing the NEXT OPTION button will now select the Auxiliary Output for editing. The output’s current status will be
shown by the Auxiliary Output Status light, in the same way as for the zones.
9. If required, toggle between the two states by pressing the ENABLE/DISABLE button.
10. Pressing the NEXT OPTION button will return the selection to zone 1.
11. Set the delay period which will apply to all delayed zones or outputs by adjusting the VR1 control on the Main Control PCB
with a terminal screwdriver (this can be anything from 1 to 10 minutes), then press the ESCAPE ACCESS button or move
onto the next programming function (TEST) by pressing the ACCESS LEVEL THREE FUNCTIONS button.
Note: Even if delays are programmed into the panel, the user can still decide not to use them. See the disablement section
of the User Manual / Log Book for more details.
To program zones into test
1. Press the ACCESS LEVEL THREE FUNCTIONS button until the TEST light flashes (any zones that are already programmed for
test will now have their Zone Fault lights lit steady).
2. To change the test configuration press the NEXT OPTION button (zone 1’s Fault light will flash slower than the TEST light if
not programmed, or at the same rate if it is).
3. If required, toggle between the two states by pressing the ENABLE/DISABLE button.
4. To confirm your choice, press the NEXT OPTION button. This will move you to the next zone (if available).
5. Repeat steps 3 and 4 until the process is complete.
Important: Before testing any of the zones you have programmed for test, you must first press the ESCAPE ACCESS button.
Any zone(s) in test will now be lit steady and the General Test light will also be lit. Testing can now commence. Remember
to take the relevant zones out of test when testing is complete.
To program the sounders function
1. Press the ACCESS LEVEL THREE FUNCTIONS button until the SOUNDER STATUS light flashes.
If the SOUNDER STATUS light flashes three times quickly with a longer off period, then an alarm in a new zone will
resound the sounders. If the SOUNDER STATUS light flashes with equal on-off periods, then an alarm in a new zone will
NOT resound the sounders.
2. If required, toggle between the two states by pressing the ENABLE/DISABLE button.
3. To finish the function, press the ESCAPE ACCESS button, or move onto the next programming function (COINCIDENCE) by
pressing the ACCESS LEVEL THREE FUNCTIONS button.
Note: ‘SYSTEM FAULT’, ‘REPEATER FAULT’, ‘OPEN CIRCUIT’ and ‘SHORT CIRCUIT’ options are for fault diagnosis
purposes, as detailed on pages 18 to 22.
The relevant part of the System Set-Up Data chart in the User Manual / Log Book must be updated if you
implement or make any changes to the coincidence, non-latching zones, delays, or program sounders
functions.
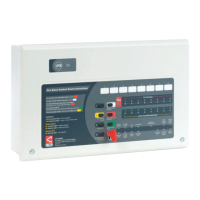
LPCB APPROVED CFP 2/4/8 ZONE FIRE ALARM PANEL
INSTALLATION & MAINTENANCE MANUAL • Approved Document No. DFU7004010 Rev 3 • Page 17 of 24