9
2 Changing Assembly Parts
2.4 Changing the Print Mechanism
Danger!
Risk of death by electrocution.
Before opening or dismounting the cover disconnect the device from the power grid and wait at least
one minute until the device has discharged.
6
1
2
3
4
7
8
9
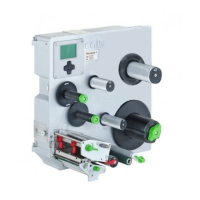
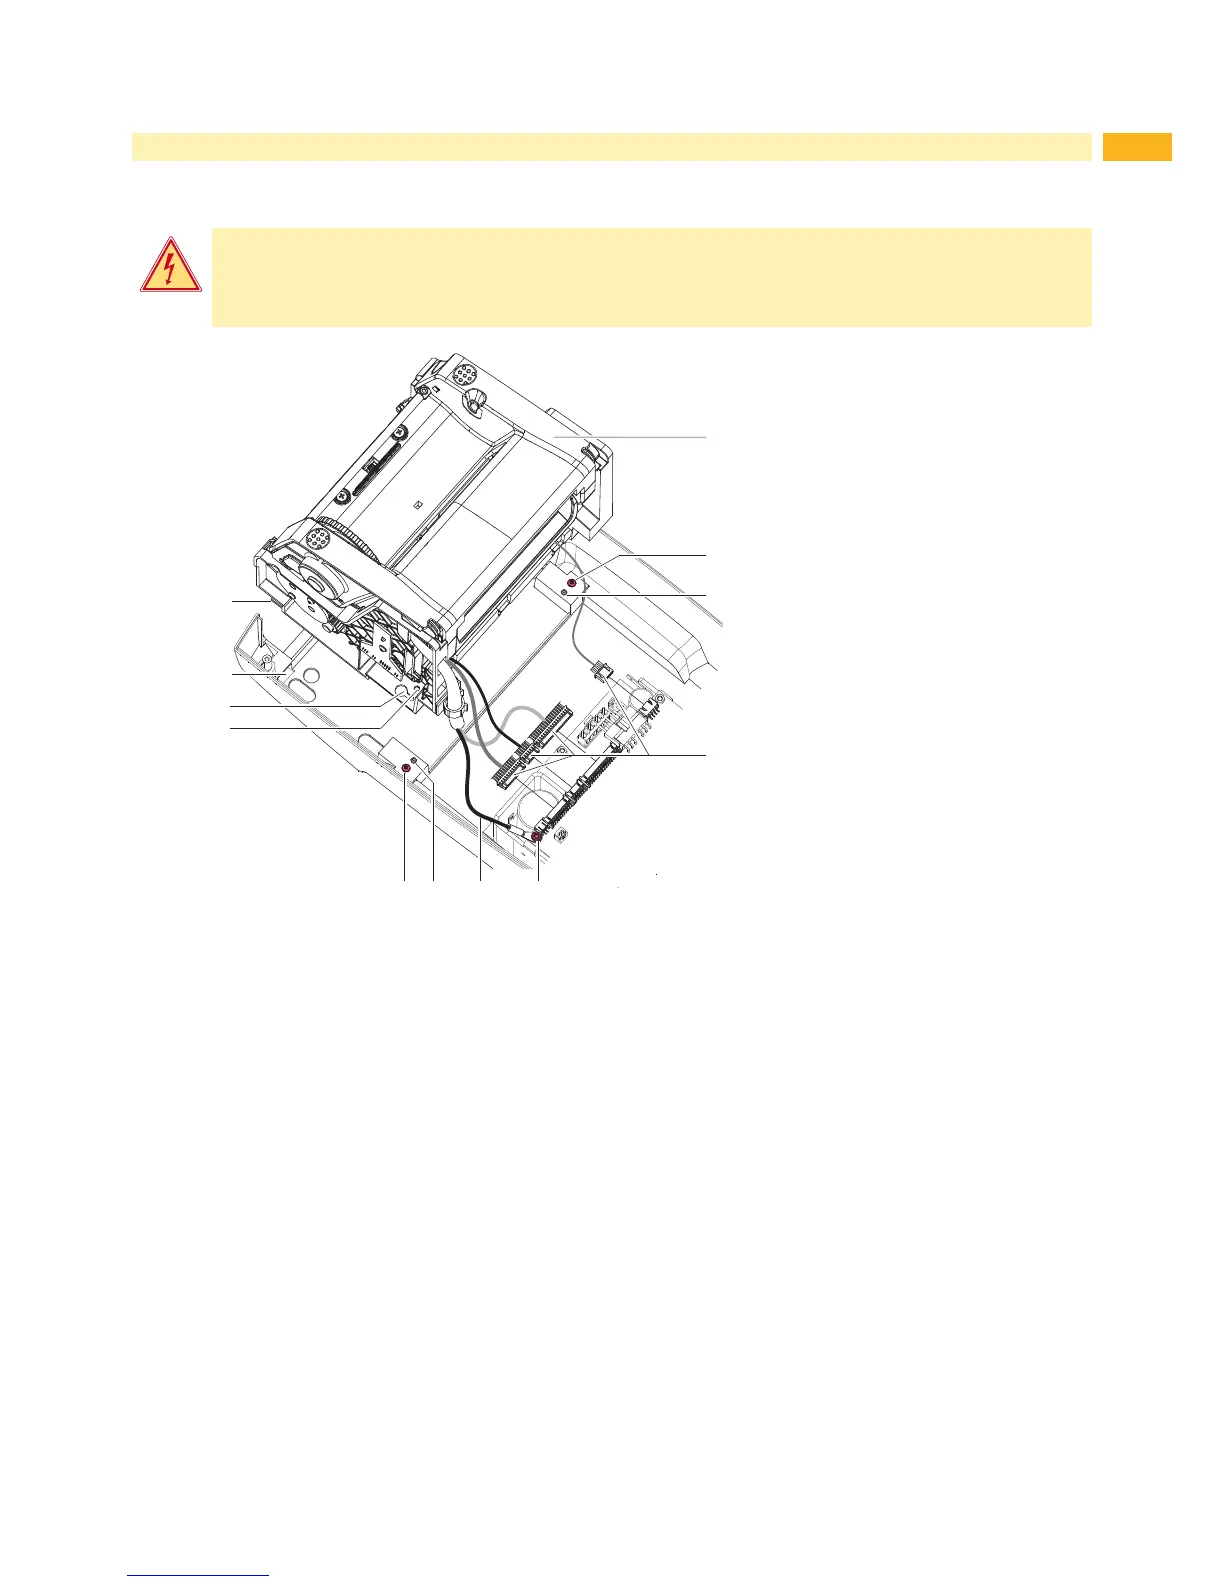
Fig. 3 Changing the print mechanism
1. Dismount the control panel ( 2.2 on page 7).
2. Dismount the printhead ( 2.5 on page 10).
3. Dismount the cover ( 2.3 on page 8).
4. Disconnect the cables (4) connecting the printing mechanism to the CPU circuit board.
5. Disconnect the ground wire (6) from the from CPU circuit board by undoing the screw (5).
6. After loosening the two screws (2) slide and raise the print mechanism backwards until it, with the screws (2), can
be lifted out of the adjustment slots (7).
7. Slide the new printing mechanism with the bracket (9) into the guides (8). Place the adjustment slots (7) onto the
screws (2) pushing the unit forward until the indentations (3) snap into their counterparts (6).
8. Fasten the screws (2).
9. Fasten the ground wire (6) to the CPU circuit board with screw (5).
10. Connect cables (4) to the CPU circuit board.
11. Mount the cover and lid ( 2.3 on page 8).
12. Mount the printhead ( 2.5 on page 10).
13. Mount the control panel ( 2.2 on page 7).

 Loading...