7
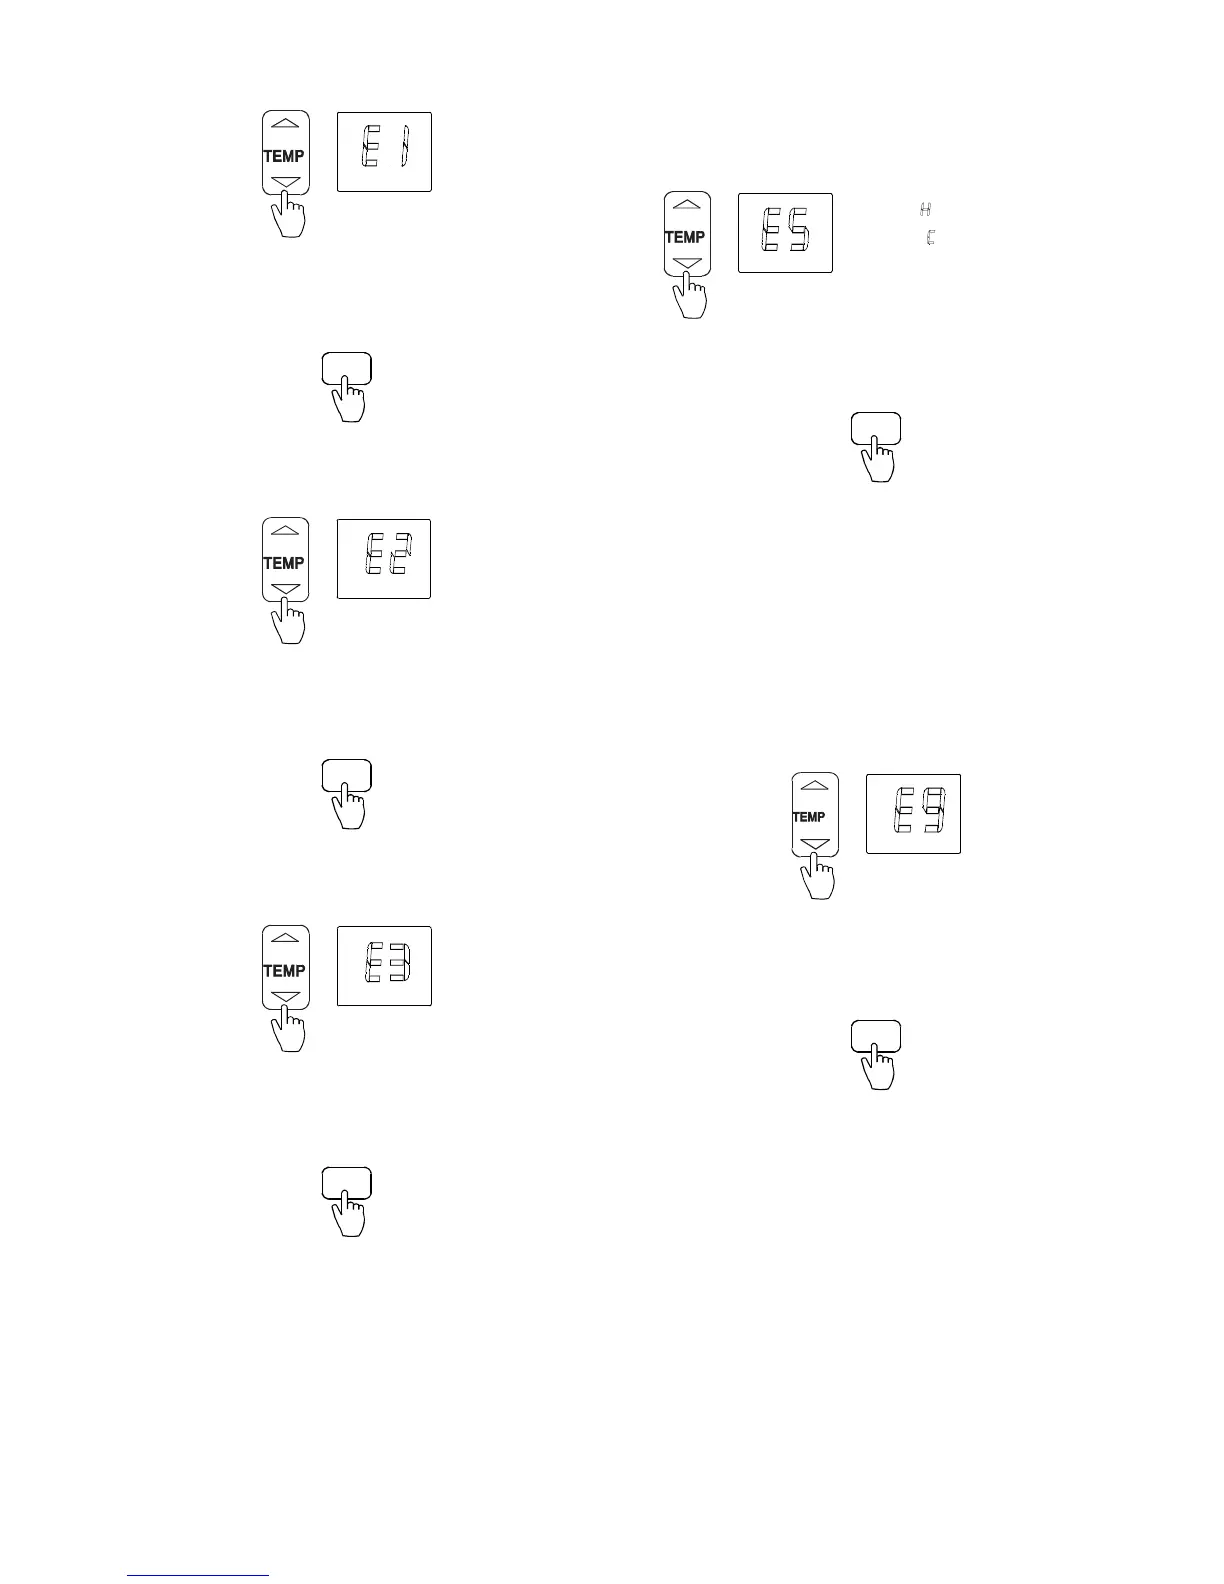
Filter Replacement Reminder (E1)
1. Press ▲ and ▼to select “E1”.
Fig. 41 – Select E1
2. Press MODE. Next, press
▲ and ▼to select “ON” or
“OFF”.
3. Press TIMER ON to confirm.
TIMER ON
Fig. 42 – TIMER ON
Lowest Temperature Setting (E2)
1. Press ▲ and ▼to select “E2”.
Fig. 43 – Select E2
2. Press MODE. Next, press
▲ and ▼ to set the temperature
(range: 63
_F(17_C) to 75_F(24_C)).
3. Press TIMER ON to confirm.
TIMER ON
Fig. 44 – TIMER ON
Highest Temperature Setting (E3)
1. Press ▲ and ▼ to select “E3”.
Fig. 45 – Select F3
2. Press MODE. Next, press
▲ and ▼ to set the temperature
(range: 77
_F(25_C) to 86_F(30_C)).
3. Press TIMER ON to confirm.
TIMER ON
Fig. 46 – TIMER ON
Special Function Setting (E4)
Not available, used on future applications.
Priority Setting of Heating or Cooling (only on
Multi−Zone Systems (E5))
1. Press ▲ and ▼ to select “E5”.
:Heatingmodefirs
:coolingmodefirst
Fig. 47 – Select E5
2. Press MODE. Next, press
▲ and ▼to select “H” or “C”.
3. Press TIMER ON to confirm.
TIMER ON
Fig. 48 – TIMER ON
Network Address Setting (E6)
Not available, used on future applications.
Capacity Code Selection (E7)
Not available, used on future applications.
Twins Setting (E8)
Not available, used on future applications.
Static Pressure Setting (E9)
Available only on 40MBDQ Ducted Units.
1. Press
▲ and ▼ to select “E9”.
Fig. 49 – Select E9
2. Press MODE. Next, press
▲ and ▼to select the values
between 0 and 4.
3. Press TIMER ON to confirm.
TIMER ON
Fig. 50 – TIMER ON
NOTE: Depending on the model, some of the remote controller’s
functions may not function.