• Place the bracket between the colored panels, in the upper part, to lock the sides (see Fig. 30 page 21).
• Blocking the bracket with the screw (see Fig. 31 page 21).
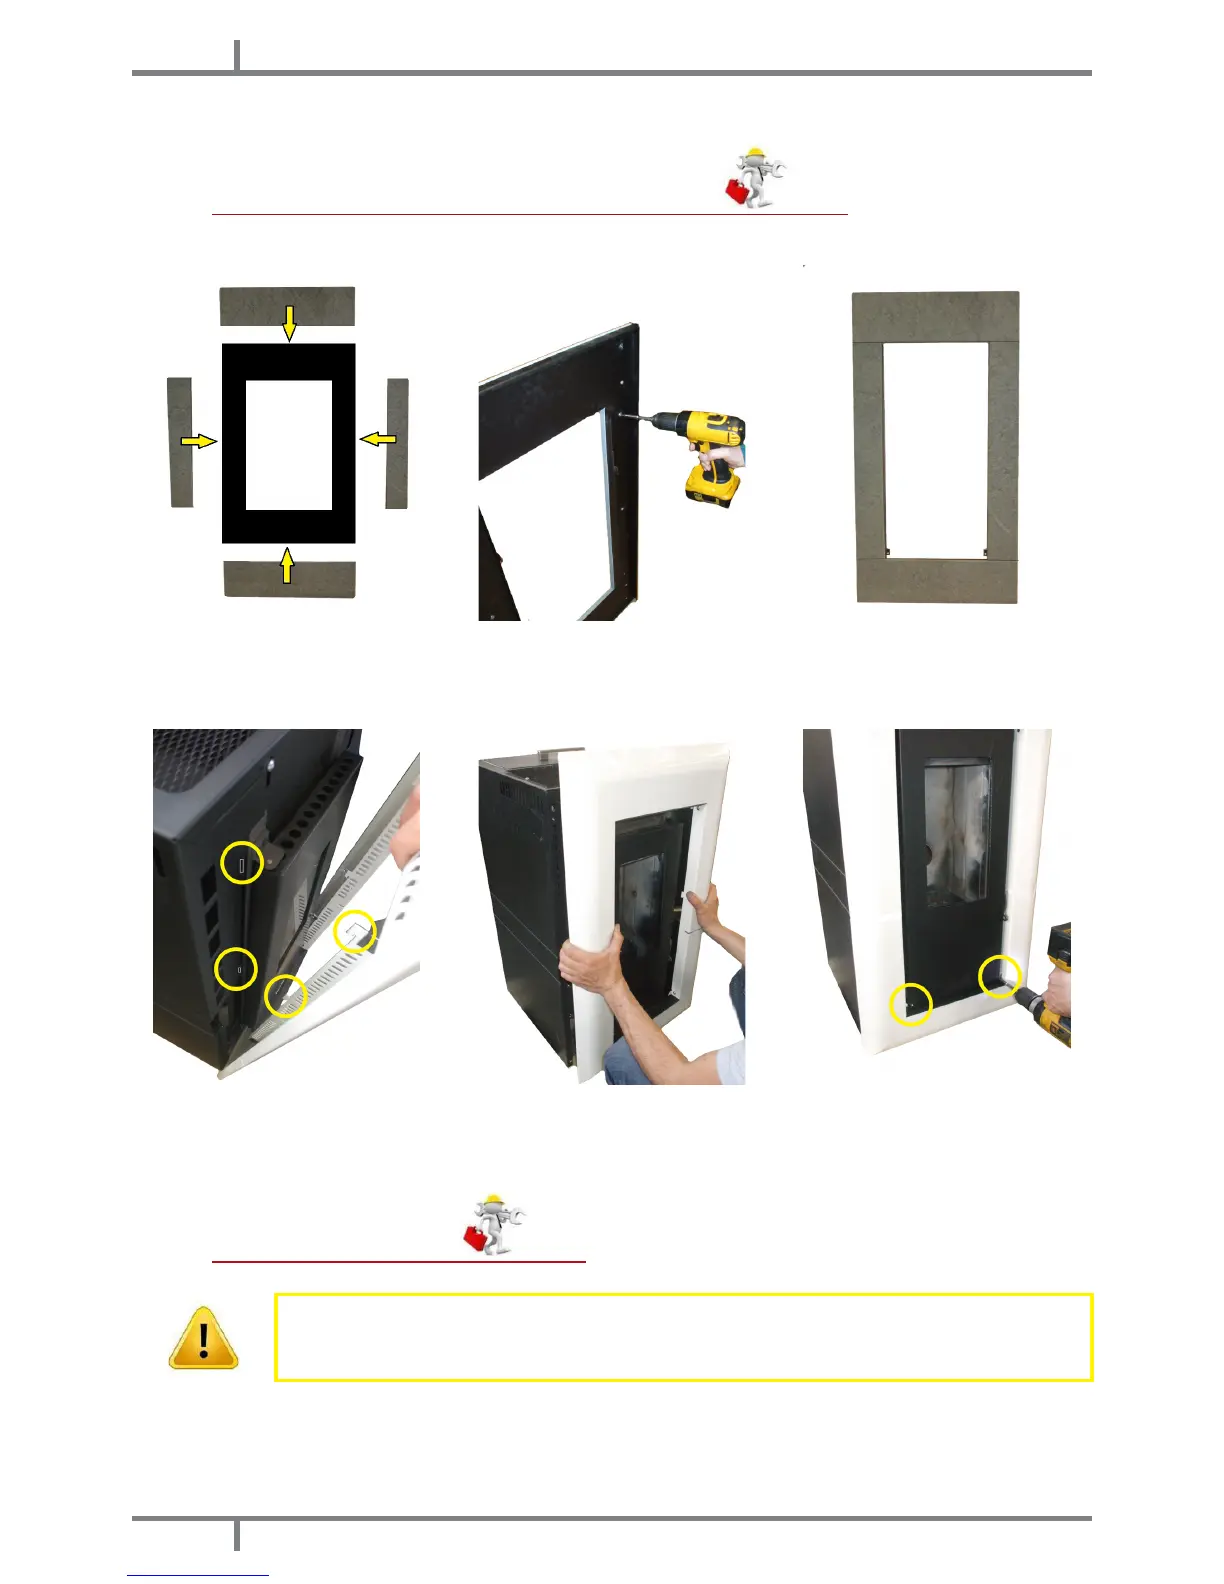
11.7 FRONTAL PANEL ASSEMBLY (VEGA STONE MODEL)
For frontal panel installation, proceed as follows:
Fig. 32 - Place the stones Fig. 33 - Fasten the stones Fig. 34 - Assembled frame
• Place the stones on the frame (see Fig. 32 page 22).
• Fasten the stones with the screws behind the frame (see Fig. 33 page 22).
• Assembled frame (see Fig. 34 page 22).
Fig. 35 - Frontal panel assembly Fig. 36 - Frontal panel position Fig. 37 - Frontal panel xing
• Hook the frontal panel cogs at its specic holes (see Fig. 35 page 22).
• Place the frontal panel in the correct position (see Fig. 36 page 22).
• Fix the frontal panel by tightening two screws in the lower part (see Fig. 37 page 22).
11.8 ELECTRIC CONNECTION
Warning: the appliance must be installed by an authorized technician!
• The electric connection occurs through a cable with plug put in an electric socket which is able to support
charge and tension specic of every model, as described in the technical datas table (see FEATURES page
44).
• The plug must be easily accessible when the appliance is installed.
• Please further assure you that your network is endowed with an efcient earth connection: if it does not exist