EasyManua.ls Logo

Callaway LS - User Manual

Callaway LS
2 pages
Print Icon
To Next Page IconTo Next Page
Loading...
CALLAWAY LS LASER RANGEFINDER MANUAL
While looking through the Eye
Piece, PRESS & RELEASE the
Power Button. The rangender
is now powered on.
1.
FOR MORE SUPPORT VISIT: www.callawaytag.com/product-support
HOW TO USE
To focus/increase clarity, use
the Diopter Adjustment by
turning the Eye Piece.
2.
Continue looking through the Eye
Piece, aim the Zero-In Aiming Square
at your intended target & PRESS the
Power Button. The laser will re and
the Laser Indicator Box will appear
around the Zero-In Aiming Square.
The measurement will be displayed at
the top of the LCD display.
3.
164Y
RANGEFINDER DIAGRAM
LCD DISPLAY
A. Zero-In Aiming Square
B. Laser Indicator Box
C. P.A.T. Mode Indicator
D. Pulse Indicator
E. Distance
F. Unit of Measure
G. Low Battery
H. Slope Adjusted Distance
164
Y
A. Eye Piece
B. Diopter
Adjustment
C. Power Button
D. Mode Button
E. Battery Door
Question and Answer IconNeed help?

Do you have a question about the Callaway LS and is the answer not in the manual?

Summary

How to Use the Laser Rangefinder

Powering On the Device

Press and release the Power Button while looking through the Eye Piece to turn on the rangefinder.

Adjusting Focus and Clarity

Turn the Eye Piece to adjust the Diopter for sharper focus and clarity.

Aiming and Taking Measurements

Aim the Zero-In Aiming Square at the target and press the Power Button to fire the laser.

Measurement Modes

Standard Mode

Recommended for measuring distances to larger objects. Provides standard distance readings.

P.A.T. Mode with Pulse Technology

Best for flagsticks; provides vibration feedback when locked onto the pin.

Scanning Mode

Measures distances to multiple targets in succession by continuously firing the laser.

Slope Measurement On;Off

Enables or disables slope measurement and adjusted yardage display.

Changing Unit of Measure

Switch between Yards and Meters by holding the Mode Button for specific durations.

Overview

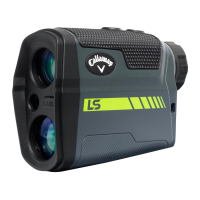
The Callaway LS Laser Rangefinder is a sophisticated optical device designed for precise distance measurement, primarily for golf and outdoor activities. It integrates advanced laser technology with user-friendly features to provide accurate and reliable readings.

Function Description:

The primary function of the Callaway LS Laser Rangefinder is to measure distances to targets using a laser. It operates by emitting a laser pulse and calculating the time it takes for the pulse to reflect off a target and return to the device. This time-of-flight measurement is then converted into a distance reading, which is displayed on an internal LCD. The rangefinder is designed to be held up to the eye, allowing the user to aim at a target through an eyepiece.

Important Technical Specifications:

While specific numerical technical specifications like range, accuracy, or laser class are not explicitly detailed in the provided manual, the device's functionality implies certain characteristics:

  • Laser Type: Emits a laser pulse for distance measurement.
  • Display: Features an internal LCD display for showing measurements and operational indicators.
  • Power Source: Uses a battery, accessible via an E. Battery Door.
  • Optical System: Includes an A. Eye Piece for viewing and a B. Diopter Adjustment for focusing, indicating a monocular optical system.

Usage Features:

The Callaway LS Laser Rangefinder offers several usage features and modes to enhance its versatility and accuracy:

  1. Power On/Off:

    • To power on, the user looks through the Eye Piece and presses and releases the C. Power Button.
    • The manual does not explicitly state how to power off, but typically devices power off automatically after a period of inactivity or by holding the power button.
  2. Focusing:

    • Clarity can be adjusted by turning the B. Diopter Adjustment, which is part of the Eye Piece. This allows users to sharpen the view for their individual eyesight.
  3. Basic Measurement:

    • To take a measurement, the user aims the A. Zero-In Aiming Square at the target through the Eye Piece and presses the C. Power Button.
    • The laser fires, and the B. Laser Indicator Box appears around the aiming square.
    • The measured distance (E. Distance) is displayed at the top of the LCD, along with the F. Unit of Measure (Y for yards or M for meters).
  4. Measurement Modes:

    • Standard Mode: Recommended for measuring distances to larger objects. This is the default mode.

    • P.A.T. (Pin Acquisition Technology) with Pulse Technology Mode:

      • Best for measuring distances to smaller objects like flagsticks.
      • The device provides a short vibration ("pulse") to confirm that the laser has locked onto the pin, which is a crucial feedback mechanism for golfers.
      • To toggle between Standard and P.A.T. Mode, quickly press the D. Mode Button once while the device is powered on.
      • When P.A.T. Mode is active, a flagstick icon (C. P.A.T. Mode Indicator) appears on the left side of the LCD, and a Pulse icon (D. Pulse Indicator) appears on the right.
      • To deactivate Pulse, hold the D. Mode Button for 5 seconds.
      • Note on P.A.T. Scanning: When scanning in P.A.T. Mode, the measurement only changes when a shorter distance is measured. This feature is particularly useful for targeting a flagstick when there are trees or other objects in the background, as it helps prevent accidental readings of background objects.
    • Scanning Mode:

      • Allows for continuous measurement of multiple targets.
      • To activate, power on the device, then hold the C. Power Button.
      • The B. Laser Indicator Box will flash, and the laser will continuously fire.
      • Measurements will update as the user scans across the landscape and changes targets.
  5. Slope Measurement:

    • This feature calculates and displays a slope-adjusted distance (H. Slope Adjusted Distance), which is crucial for golf to account for elevation changes.
    • The slope measurement and adjusted yardage appear in the bottom right corner of the LCD display when enabled.
    • To turn On/Off: With the unit off, hold the D. Mode Button for three seconds until the slope function appears in the bottom right corner of the LCD. Release the Mode Button. Repeating this process will turn the slope measurement off. The slope function will not appear unless explicitly enabled.
  6. Unit of Measure Change:

    • The unit of measure can be toggled between Yards ("Y") and Meters ("M").
    • To change, start with the device powered off.
    • Then, hold the D. Mode Button for 7 seconds in P.A.T. Mode (or 5 seconds in Standard Mode).
    • The selected unit is indicated directly to the right of the displayed distance.

LCD Display Indicators:

The LCD provides comprehensive information to the user:

  • A. Zero-In Aiming Square: The target reticle.
  • B. Laser Indicator Box: Appears when the laser is firing.
  • C. P.A.T. Mode Indicator: Flagstick icon, indicating Pin Acquisition Technology mode.
  • D. Pulse Indicator: Appears when Pulse Technology is active.
  • E. Distance: The measured distance to the target.
  • F. Unit of Measure: "Y" for yards or "M" for meters.
  • G. Low Battery: An indicator to alert the user when the battery is running low.
  • H. Slope Adjusted Distance: The distance adjusted for elevation changes.

Maintenance Features:

The manual does not explicitly detail maintenance features such as cleaning instructions or battery replacement procedures beyond indicating the presence of an E. Battery Door. However, the G. Low Battery indicator serves as a crucial maintenance alert, prompting the user to replace the battery when needed to ensure continuous operation.

Safety Warning:

The manual includes a critical caution: "Use of controls or adjustments or performance of procedures other than those specified herein may result in hazardous radiation exposure." This highlights the importance of adhering strictly to the provided instructions to ensure safe operation of the laser device.

Callaway LS Specifications

General IconGeneral
BrandCallaway
ModelLS
CategoryMeasuring Instruments
LanguageEnglish

Related product manuals