Do you have a question about the Callaway XLS and is the answer not in the manual?
Press and release the Power Button while looking through the Eye Piece.
Use the Diopter Adjustment by turning the Eye Piece for better focus.
Aim the Zero-In Aiming Circle at the target and press the Power Button to fire the laser.
Identifies key external components: Eye Piece, Diopter Adjustment, Power Button, Mode Button, Slope Switch, and Battery Door.
Details the indicators on the LCD screen: Aiming Circle, Laser Box, Mode Indicators, Distance, Units, and Slope.
Recommended for measuring distances to larger objects.
Best for smaller objects like flagsticks, providing vibration feedback upon locking onto the pin.
Allows measuring multiple targets in succession by continuously firing the laser.
Switch between Yards and Meters by holding the Mode Button for 3 seconds with the device powered off.
When the slope switch is red, the function is off, making the laser tournament legal.
When the slope switch is green, the function is enabled, displaying slope-adjusted yardage.
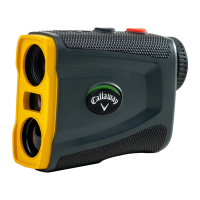
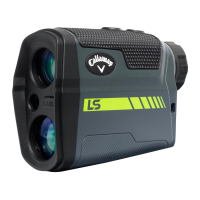
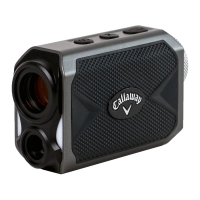
The Callaway XLS Laser Rangefinder is a sophisticated optical device designed to accurately measure distances, particularly useful in activities like golf. It offers a range of features to enhance precision and user experience, including various measurement modes and a slope function.
The primary function of the Callaway XLS Laser Rangefinder is to measure distances to objects using a laser. When activated, it emits a laser beam that reflects off the target, and the device calculates the distance based on the time it takes for the laser to return. This measurement is then displayed on an internal LCD screen, providing immediate feedback to the user.
The device incorporates several key components for its operation. The Eye Piece is where the user looks through to view the target and the LCD display. A Diopter Adjustment allows the user to focus the view, ensuring clarity for different eyesight needs. The Power Button serves to turn the device on and initiate laser measurements. A Mode Button enables switching between different measurement settings. For advanced functionality, a Slope Switch allows the user to enable or disable the slope compensation feature. The Battery Door provides access for battery replacement.
The internal LCD Display is crucial for conveying information to the user. It features a Zero-In Aiming Circle to help the user target the desired object accurately. Once the laser is fired, a Laser Indicator Box appears around the aiming circle, confirming the laser is active. In specific modes, a P.A.T. Mode Indicator and a Pulse Indicator may appear, signifying particular measurement states. The measured Distance is prominently displayed, along with the Unit of Measure (Yards or Meters). When the slope function is enabled, the Angle of Incline/Decline and the Slope Adjusted Distance are also shown. A Battery Indicator keeps the user informed about the device's power level.
Operating the Callaway XLS Laser Rangefinder is straightforward, designed for quick and efficient use.
To power on the device, simply look through the Eye Piece and PRESS & RELEASE the Power Button. Once powered on, the rangefinder is ready for use. To ensure a clear view, the Diopter Adjustment can be turned to focus the Eye Piece, enhancing clarity for the user's vision.
With the device powered on and focused, aim the Zero-In Aiming Circle at the intended target. Then, PRESS the Power Button. The laser will fire, and the Laser Indicator Box will appear around the aiming circle. The measured distance will be displayed at the top of the LCD.
The rangefinder offers several measurement modes to suit different scenarios:
Standard Mode: This mode is recommended for measuring distances to larger objects. It provides a direct distance measurement without special considerations.
P.A.T. with Pulse Technology: This mode is ideal for measuring distances to smaller objects, such as a flagstick. When the laser locks onto the pin, the device provides a short vibration, confirming the lock. To toggle between Standard and P.A.T. Mode, quickly PRESS the Mode Button once while the device is powered on. When P.A.T. Mode is active, a flagstick icon and a pulse icon will appear on the LCD. To turn the pulse feature ON/OFF within P.A.T. Mode, quickly PRESS the Mode Button twice.
Scanning Mode: For measuring distances to multiple targets in succession, first PRESS and RELEASE the Power Button to power on. Then, HOLD the Power Button. The Laser Indicator Box will flash, and the laser will continuously fire. As the user scans the landscape and changes targets, the measurements on the LCD will continuously update. A useful note for scanning in P.A.T. Mode is that the measurement will only change when a shorter distance is measured, which is helpful when targeting a flagstick amidst background trees or other objects.
The device allows users to switch between Yards and Meters. To change the unit of measure, ensure the device is powered off. Then, HOLD the Mode Button for 3 seconds. The current unit of measure is indicated by a "Y" for Yards or "M" for Meters, displayed to the right of the measured distance.
The Callaway XLS features a Slope Switch on its side, offering two positions:
RED is showing (Slope function is off): In this position, the slope compensation is disabled. The laser provides direct line-of-sight distances, making it tournament legal.
GREEN is showing (Slope function is enabled): When the slope function is enabled, the device calculates and displays a slope-adjusted yardage after every laser measurement. This adjusted distance accounts for changes in elevation between the user and the target. However, it's important to note that the laser is not tournament legal when the slope function is enabled.
While the manual primarily focuses on usage, the mention of a Battery Indicator on the LCD display implies a basic maintenance feature. This indicator helps the user monitor the battery level, prompting them to replace the battery when necessary to ensure continuous operation. The Battery Door provides easy access for this purpose.
For comprehensive maintenance and troubleshooting, users are directed to an online resource, indicating that detailed care instructions, if any beyond battery replacement, would be found in the complete user manual available on the CallawayDMD product support website. This suggests that the device is designed for user-level maintenance primarily limited to battery management, with more complex issues likely requiring professional attention or detailed guidance from the full manual.
| Type | Laser Rangefinder |
|---|---|
| Magnification | 6x |
| Accuracy | +/- 1 yard |
| Slope Function | Yes |
| Pin Acquisition Technology (P.A.T.) | Yes |
| Water Resistance | Yes |
| Display Type | LCD |