Do you have a question about the Callaway Micro Pro and is the answer not in the manual?
Change units from Yards to Meters by holding the Mode Button for 3 sec.
Green flashing indicates slope off (tournament legal), Red flashing indicates slope on.
Insert USB-C charger into device and USB port. Recommended rate is 5V, 1A.
Indicator light turns green when charging is complete.
A full charge lasts over 100 rounds of golf.
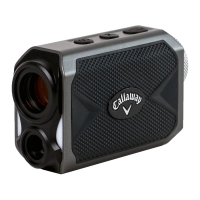
Identifies key external parts: Eye Piece, Diopter Adjustment, Power Button, Mode Button, Slope Button, Charging Port.
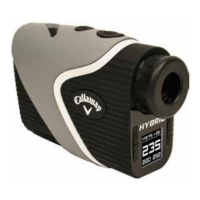
Details LCD icons: Aiming Square, Laser Indicator, Mode Indicators, Distance, Units, Angle, Slope Adjusted Distance.
Press and release the Power Button while looking through the eyepiece.
Use the Diopter Adjustment to focus the eyepiece for clear vision.
Aim the Zero-In Aiming Square at the target and press the Power Button to fire the laser.
Recommended for measuring distances to larger objects.
Best for flagsticks/small objects; confirms lock-on with vibration.
Measures multiple targets sequentially by holding the Power Button for continuous firing.
The Callaway Micro Pro Laser Rangefinder is a sophisticated optical device designed to assist golfers in accurately determining distances on the course. This manual provides comprehensive instructions on its operation, features, and maintenance, ensuring users can maximize its potential for improved game performance.
The primary function of the Callaway Micro Pro Laser Rangefinder is to measure distances to various targets, such as flagsticks, hazards, and other points of interest on a golf course. It achieves this by emitting a laser beam and calculating the time it takes for the beam to reflect off the target and return to the device. The rangefinder offers several modes of operation to cater to different golfing scenarios, including Standard Mode for larger objects, P.A.T. (Pin Acquisition Technology) with Pulse Technology for smaller targets like flagsticks, and Scanning Mode for continuous measurement across multiple targets.
A key feature of this rangefinder is its Slope Function, which provides slope-adjusted distances, taking into account changes in elevation between the user and the target. This feature can be toggled on or off, making the device compliant with tournament rules when the slope function is disabled. When the slope function is active, the device displays both the actual distance and the slope-adjusted distance, offering a more precise understanding of the shot required.
The device incorporates a clear LCD display that presents all relevant information, including the measured distance, unit of measure (yards or meters), laser indicator, P.A.T. mode indicator, pulse indicator, angle of incline/decline, and slope-adjusted distance. An aiming square helps users precisely target their desired object.
Unit of Measure: The Callaway Micro Pro Laser Rangefinder allows users to switch between yards ("Y") and meters ("M"). To change the unit, the device must be powered off. Users then press and hold the Mode Button for 3 seconds. The selected unit is indicated directly to the right of the displayed distance.
Powering On and Focusing: To power on the device, users look through the eyepiece and press and release the Power Button. For optimal clarity, the Diopter Adjustment, located on the eyepiece, can be rotated to focus the view.
Measuring Distances:
Slope Function: The slope function can be toggled on or off using the "S" button on the top of the unit.
Charging: The Callaway Micro Pro Laser Rangefinder is equipped with a rechargeable battery.
Safety Information: The manual includes a caution regarding the use of controls or adjustments or performance of procedures other than those specified, warning that such actions may result in hazardous radiation exposure. Users are advised to adhere strictly to the instructions provided to ensure safe operation.
For additional support and information, users can visit the CallawayDMD website, as indicated in the manual. This resource likely offers FAQs, troubleshooting guides, and further details to enhance the user experience and address any potential issues.
| Type | Laser Rangefinder |
|---|---|
| Magnification | 6x |
| Accuracy | +/- 1 yard |
| Battery Type | CR2 |
| Features | Slope Technology |
| Resolution | 0.1 yards |
| Weight | 7.5 oz (213 g) |