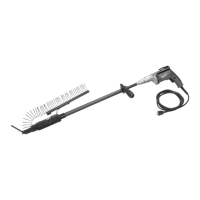
INSTALLATION INSTRUCTIONS
The CAMO
®
Edge Pro
™
is part of the CAMO Hidden Deck Fastening System. The Edge Pro is a
versatile, autofeed screw guide, designed specifically for installing treated wood deckboards with
no gap between the boards to create a beautiful, fastener-free deck surface; it can also be used
with secondary spacers for the gap of your choice with treated wood, hardwood, cedar, composite
or PVC deckboards. No pre-drilling is required. These instructions will share the simple process of
installing boards with no gap.
Note: CAMO Hidden Fasteners, CAMO Tools and CAMO Driver Bits are engineered to work
exclusively together. Using other branded tools, fasteners or bits will impair performance and not
produce the desired results.
Before beginning installation of your deck, you will need the following:
• CAMO Edge Pro - assembled
• CAMO Collated Hidden Fasteners
• Optional: Secondary Spacers if a gap is desired, and “L Brackets” or 2-1/2’’ x #7 CAMO
Exterior Trimhead Premium Deck Screws for the board abutting the structure
Gap Options:
The CAMO Edge Pro allows for multiple gap options when installing deckboards. For treated lumber,
the zero gap option allows builders to butt deckboards tightly together. If a gap is desired, secondary
spacers may be used between the boards.
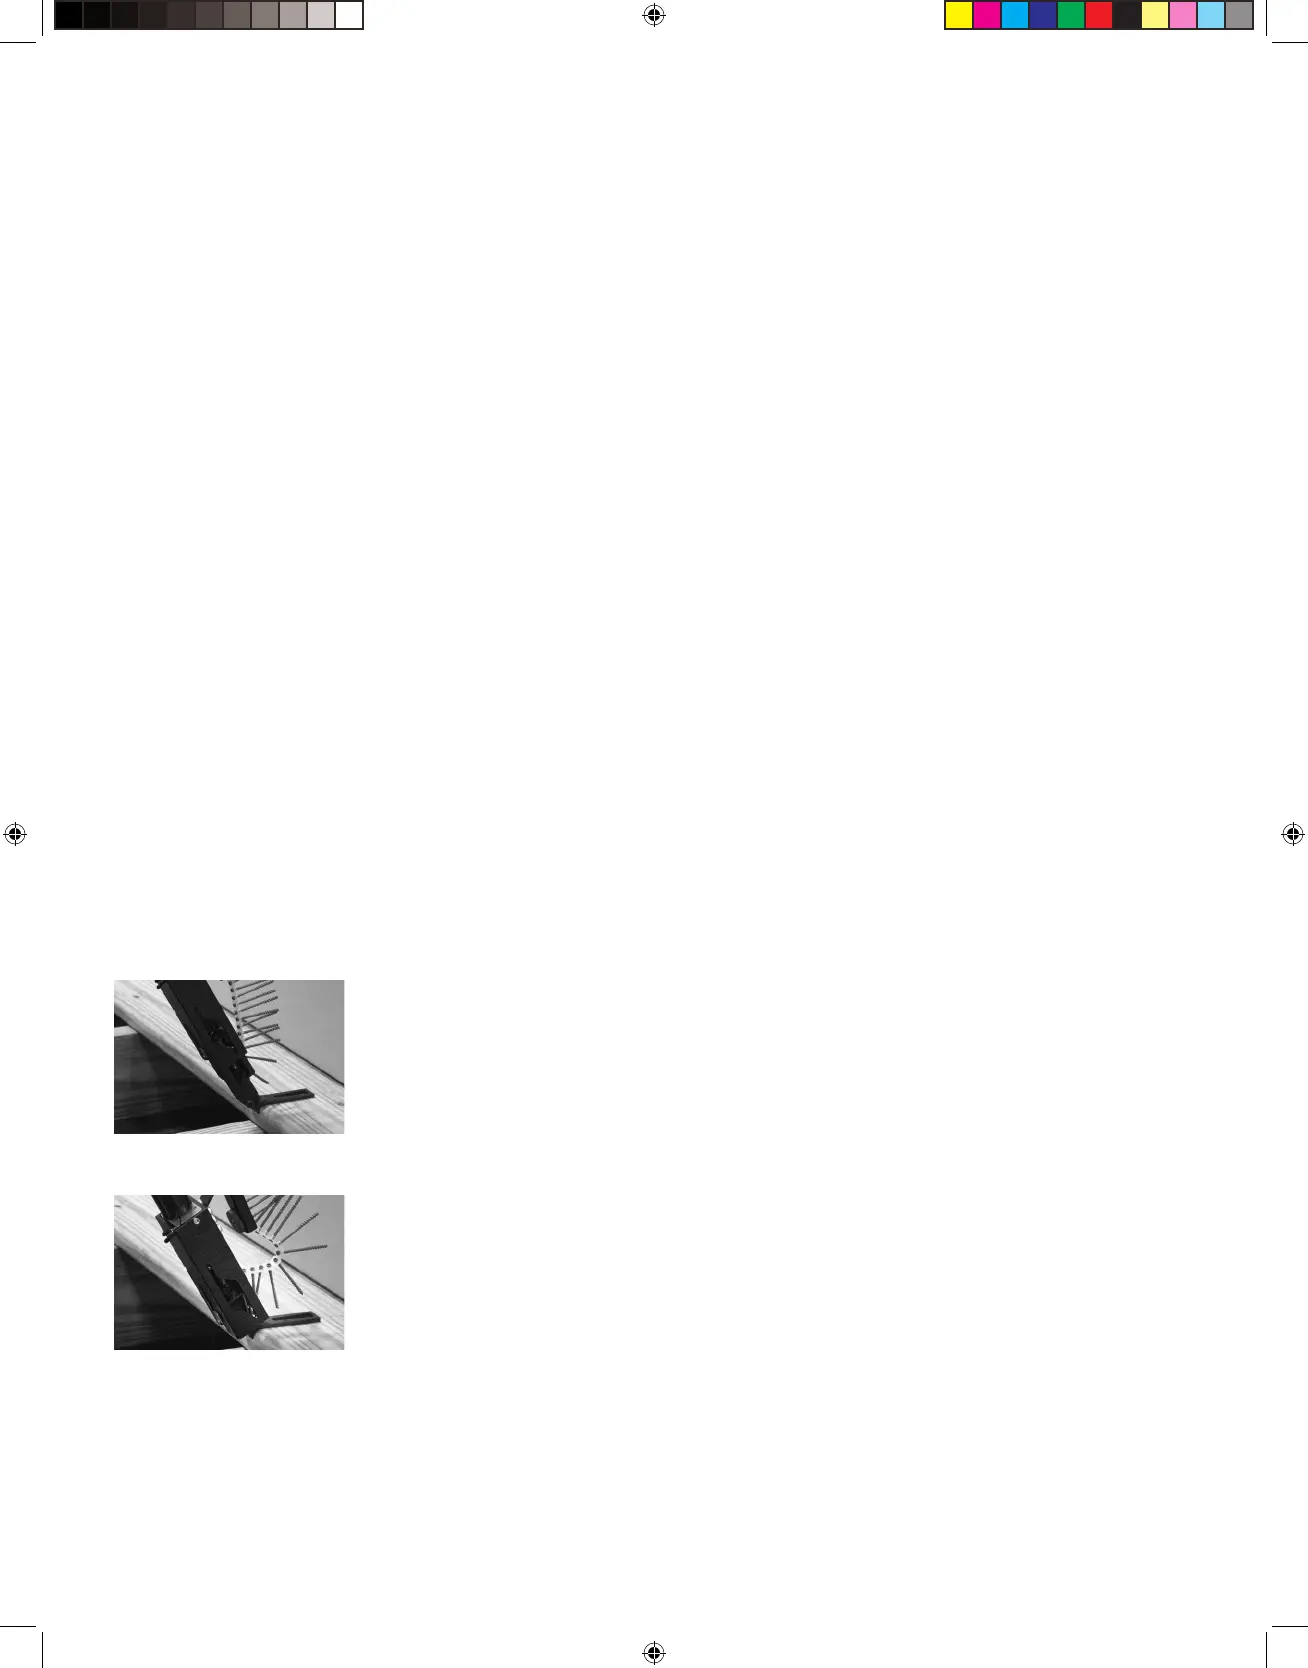
Board Installation:
To begin deck installation, lay the first board that abuts the structure into position. Starting with the
outside edge of the board, fasten the deck board at each joist using the CAMO Edge Pro as follows:
For the outer edge of the deckboard, align the Level Guide with the joist below the
deckboard (we recommend a minimum of 1’’from board ends). Place the Edge Pro
so that the Level Guide is flat to the board surface, with the Edge Guide tight to the
board edge.
Using the Hand Grip, apply downward pressure to fully compress the spring-
loaded Screw Feed Assembly to provide positive pressure on the Edge Guide.
(BOARD INSTALLATION CONTINUED ON NEXT PAGE)
1.
2.
5
&$02('*(3522:1(5·60$18$/:,7+75$16/$7,216LQGG 30