Do you have a question about the Canon iR1600 Series and is the answer not in the manual?
Details the key features of the copier, including high-speed copying, image quality, large paper source, mixed paper sizes, networking, and hard disk capabilities.
Provides detailed specifications for the copier, including type, system components, functions, and operational parameters.
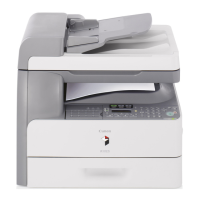
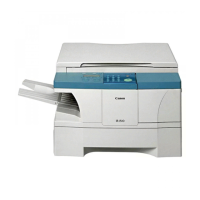
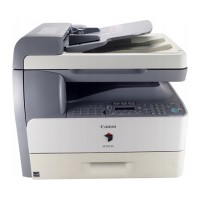
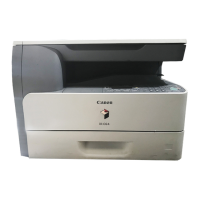
Identifies and illustrates the external view of the copier, including key components like the control panel and delivery tray.
Describes the control panel layout and functions for both non-fax and fax models, detailing each key and indicator.
Explains the master password used for servicing and system administrator functions, emphasizing its confidentiality.
Details the basic operation procedures for both non-fax and fax models, covering key functions accessible via the control panel.
Explains extended operation functions like page separation, margin settings, and frame erase for both non-fax and fax models.
Outlines the structure of the User Mode settings screen, covering common settings, copy settings, and other configurable options.
Provides instructions for users on how to perform routine maintenance, including cleaning the fixing roller and copyboard glass.
Covers important safety information regarding laser light, CDRH requirements, and handling of the laser unit and toner.
Details the machine's image formation system, outlining the construction and the steps involved in the reproduction process.
Outlines the functional construction of the machine, dividing it into six major blocks for operational understanding.
Describes the major electrical mechanisms controlled by PCBs, detailing the functions of the Image Processor PCB and DC Controller PCB.
Illustrates the wiring diagram of the major PCBs, showing the connections between various components and units.
Explains the basic sequence of operation for scanning and printing in memory copying, including scanner and printer start conditions.
Details the functions of the main motor control circuit and the construction of the circuit, including drive signals and error detection.
Describes the major functions of the image reading/processing system, including exposure, scanning, and size detection.
Explains the components and operation of the reader drive system, including the reader motor, carriage, and drive belt.
Details how the machine detects original size using sensors for auto paper selection and auto enlargement/reduction.
Explains the image processing and correction steps performed in copier mode, including A/D conversion and density adjustments.
Provides instructions on how to disassemble and assemble the machine, emphasizing safety precautions and screw identification.
Describes the laser exposure system components, including the laser unit and scanner motor, and control methods.
Explains the generation of the horizontal sync signal used to direct laser light to the photosensitive drum.
Details the laser driver circuit's function in driving the semiconductor laser according to video signals from the image processor PCB.
Explains how the scanner motor is controlled for constant speed rotation and pre-rotation, including signal inputs and error conditions.
Provides instructions on how to disassemble and assemble the laser/scanner unit, with safety precautions.
Describes the functions and methods of the image formation system, including components like photosensitive drum and toner cartridge.
Illustrates the sequence of operation for the image formation system during power-on and printing.
Explains the primary charging control system, including bias control and turning the bias on/off.
Details the developing bias control system, covering turning bias on/off and controlling it to a constant voltage level.
Explains the transfer charging mechanism control, including bias application and voltage level correction.
Describes the toner level sensor and how the machine detects cartridge presence and toner levels.
Explains the waste toner case monitoring system, including the stirring rod and the waste toner case full sensor.
Provides instructions for disassembling and assembling the image formation system components, including the drum unit and developing assembly.
Explains the pickup mechanism, including specifications and constructions for different cassette types and paper handling methods.
Illustrates the arrangement of major rollers and sensors within the pickup/feeding system, crucial for paper handling.
Details the pickup control mechanisms from the cassette and multifeeder tray, including sequences and retry operations.
Explains how the registration roller is controlled to detect the leading edge of paper and ensure proper image alignment.
Describes the jam detection system using sensors, including sequences for delay jams, stationary jams, and jam history.
Provides instructions for disassembling and assembling key components of the pickup/feeding system, such as the cassette pickup assembly.
Describes the fixing system's operation, including the roles of the fixing roller, delivery roller, and toner image fusing.
Explains the temperature control mechanisms for the fixing heater, including response to power switch, paper type, and energy save modes.
Details the error detection methods for the fixing system, covering thermistor and thermal switch errors and their causes.
Describes the protective mechanisms designed to prevent fixing heater malfunctions, such as thermistor high temperature and disconnection detection.
Provides instructions for disassembling and assembling the fixing system components, including the fixing assembly and delivery sensor.
Describes the construction of the control panel, including the circuitry of its PCBs and indications on the LCD for different models.
Explains the machine's DC power generation, conversion into ON/OFF systems, and output levels from the power supply PCB.
Details the energy save mode (ESS) mechanism, including how it is controlled and its operation based on standby time or key presses.
Describes the heat discharge fan, its control mechanism for two-speed operation (full and half speed), and error detection.
Explains the back-up battery system, including lithium and vanadium lithium batteries for data back-up, and their specifications.
Provides general instructions for disassembling and assembling machine parts, emphasizing safety and proper handling.
Describes the cassette unit's basic outline, specifications, and construction, including pickup mechanisms and drive sources.
Illustrates the arrangement of major rollers and sensors for 1-cassette, 2-cassette, and 3-cassette units.
Details the pickup control system for different cassette units, including link gears and motor drive signals.
Explains jam detection mechanisms for the cassette unit, including sensor functions and sequences for delay jams and stationary jams.
Provides instructions for disassembling and assembling the cassette unit, including removing the cassette unit and its components.
Details the system specifications for the inner 2-way tray, including number of bins, stacking, paper type, and size.
Illustrates the arrangement of major rollers and sensors within the inner 2-way tray, crucial for paper delivery.
Explains how paper is delivered to the No. 2 delivery slot and how to select delivery trays via user mode.
Describes jam detection for the inner 2-way tray, including sensor functions and sequences for delay jams, stationary jams, and jam history.
Provides instructions for disassembling and assembling the inner 2-way unit, emphasizing safety precautions.
Outlines the requirements for selecting an installation site, including environmental conditions and spatial needs for maintenance.
Provides points to note before starting the installation work and details the sequence for installing the machine.
Details the unpacking process and the removal of fixing members, checking for missing attachments.
Provides step-by-step instructions for removing the dummy drum, including handling the developing assembly locking lever and left cover.
Details the procedure for mounting the drum unit, including removing fixing members and handling the air-bubble sheet.
Provides instructions for mounting the toner cartridge, including removing fixing tape and fitting the cartridge correctly.
Details the procedure for loading paper into the cassette, including sliding out the cassette and removing tapes.
Explains how to place paper in the multifeeder tray, including setting paper guides and ensuring proper alignment.
Describes how to check the copy images after installation, ensuring proper operation and image quality.
Guides the user on selecting the country/region setting in service mode to ensure proper communication standards.
Provides instructions for setting the date and time in user mode, covering navigation through the Timer Settings menu.
Explains how to generate and store a specifications report from the service mode for documentation purposes.
Details the procedure for setting fax functions, including connecting the line and setting the dialing method.
Guides the user on checking the printer functions after installation, including test prints and network cable connections.
Provides instructions for relocating the machine, emphasizing proper procedures for securing components like the drum unit and carriage.
Outlines the recommended sequence for installing accessories, such as the card reader and network interface board.
Details the installation process for the Card Reader-E1 accessory, including required parts and connection procedures.
Provides instructions for installing the Image RAM accessory, with separate steps for non-fax and fax models.
Guides the user on installing the Remote Diagnostic Device II accessory, including parts procurement and connection steps.
Lists parts that require periodical replacement to ensure machine performance, noting that the copier, cassette unit, and inner 2-way tray have no such parts.
Provides information on durable parts that may require replacement due to wear or damage, listing their part numbers and expected life.
Recommends basic service work to ensure a longer product life, including making test copies and checking general conditions.
Details cleaning procedures for various parts that should be performed during a service visit, such as the copyboard glass and contact sensor.
Provides essential guidelines for storing and handling the drum unit to prevent damage from environmental factors like light and humidity.
Provides a basic procedure for image adjustment, including initial checks, scanner side checks, and printer side checks.
Details the standards for image position and provides instructions for adjusting image margins for copying and ADF copying.
Describes how to check the fixing roller pressure (nip) and provides troubleshooting steps for fixing faults.
Lists electrical components and provides guidance on work procedures when replacing major parts like sensors and PCBs.
Provides a comprehensive guide to troubleshooting various image and operation faults, covering initial checks and specific problem resolutions.
Illustrates the arrangement of electrical parts, including PCBs, sensors, motors, and fans, with their respective functions.
Explains how to use the machine's service mode, detailing the various blocks and items available for checking and setting functions.
Outlines the methods for upgrading the machine or its accessories by downloading firmware or replacing ROM DIMMs.
Provides detailed steps for upgrading firmware via a PC using a USB driver and the Service Support Tool.
Details the procedure for downloading system software, including making connections via USB and selecting the appropriate model.
Explains how to download G3 multiport firmware, emphasizing the selection of G3FAX on the Unit Select screen.
Provides instructions for upgrading the Finisher-L1 accessory by downloading ROM via a downloader PCB.
Explains how to back up data from the SRAM on the image processor PCB using the Service Support Tool.
Presents a block diagram of the G3 Fax function, illustrating the interconnections between major components like PCBs and interfaces.
Details the functions of the Image Processor PCB, NCU PCB, and Modular PCB, covering communication control, memory, and line interfaces.
Describes the functional blocks of the network interface board, including its interface specifications and transmission functions.
Provides general instructions for disassembling and assembling the machine, emphasizing safety precautions and proper procedures.
Details the procedure for removing the hard disk drive, including screw removal and detaching the disk.
Provides instructions for removing the network interface board, including detaching the rear cover and USB cable.
Details the procedure for removing the printer board, including turning off power and detaching screws and connectors.
Explains how to access and use the machine's service mode for printer-related settings, including navigation through menus.
Lists the functions available within the service mode, such as PPG CHECK SUM, COLD RESET, and FEADER MENU options.
Describes the self-diagnostic program run by the printer unit upon power-on, indicating fault messages like warning messages and service call errors.
Lists common warning messages, their meanings, and the corresponding actions to take, such as memory overflow or disk full conditions.
Details normal error indications like invalid password or disk errors, along with the actions required to resolve them.
Lists service call errors, such as communication errors and internal component errors, providing actions like restarting or replacing parts.
Lists special tools required for servicing the board, including their tool numbers, appearance, and uses.
| Print Technology | Laser |
|---|---|
| Resolution | 600 x 600 dpi |
| Interface | USB 2.0 |
| Scanner Type | Flatbed |
| Print Speed | 16 ppm |
| Paper Capacity | 250 sheets |
| Copy Speed | 16 cpm |
| Memory | 32 MB |
| Functions | Print, Copy, Scan |
| Multiple Copy | Up to 99 copies |
| Scanning Resolution | 600 x 600 dpi |
| Paper Input | 250-sheet cassette |
| Paper Output | 100 sheets (face down) |
| Paper Size | A4, A5, B5 |
| Duplex Printing | No |
| Warranty | 1 year |
| Network Ready | No |