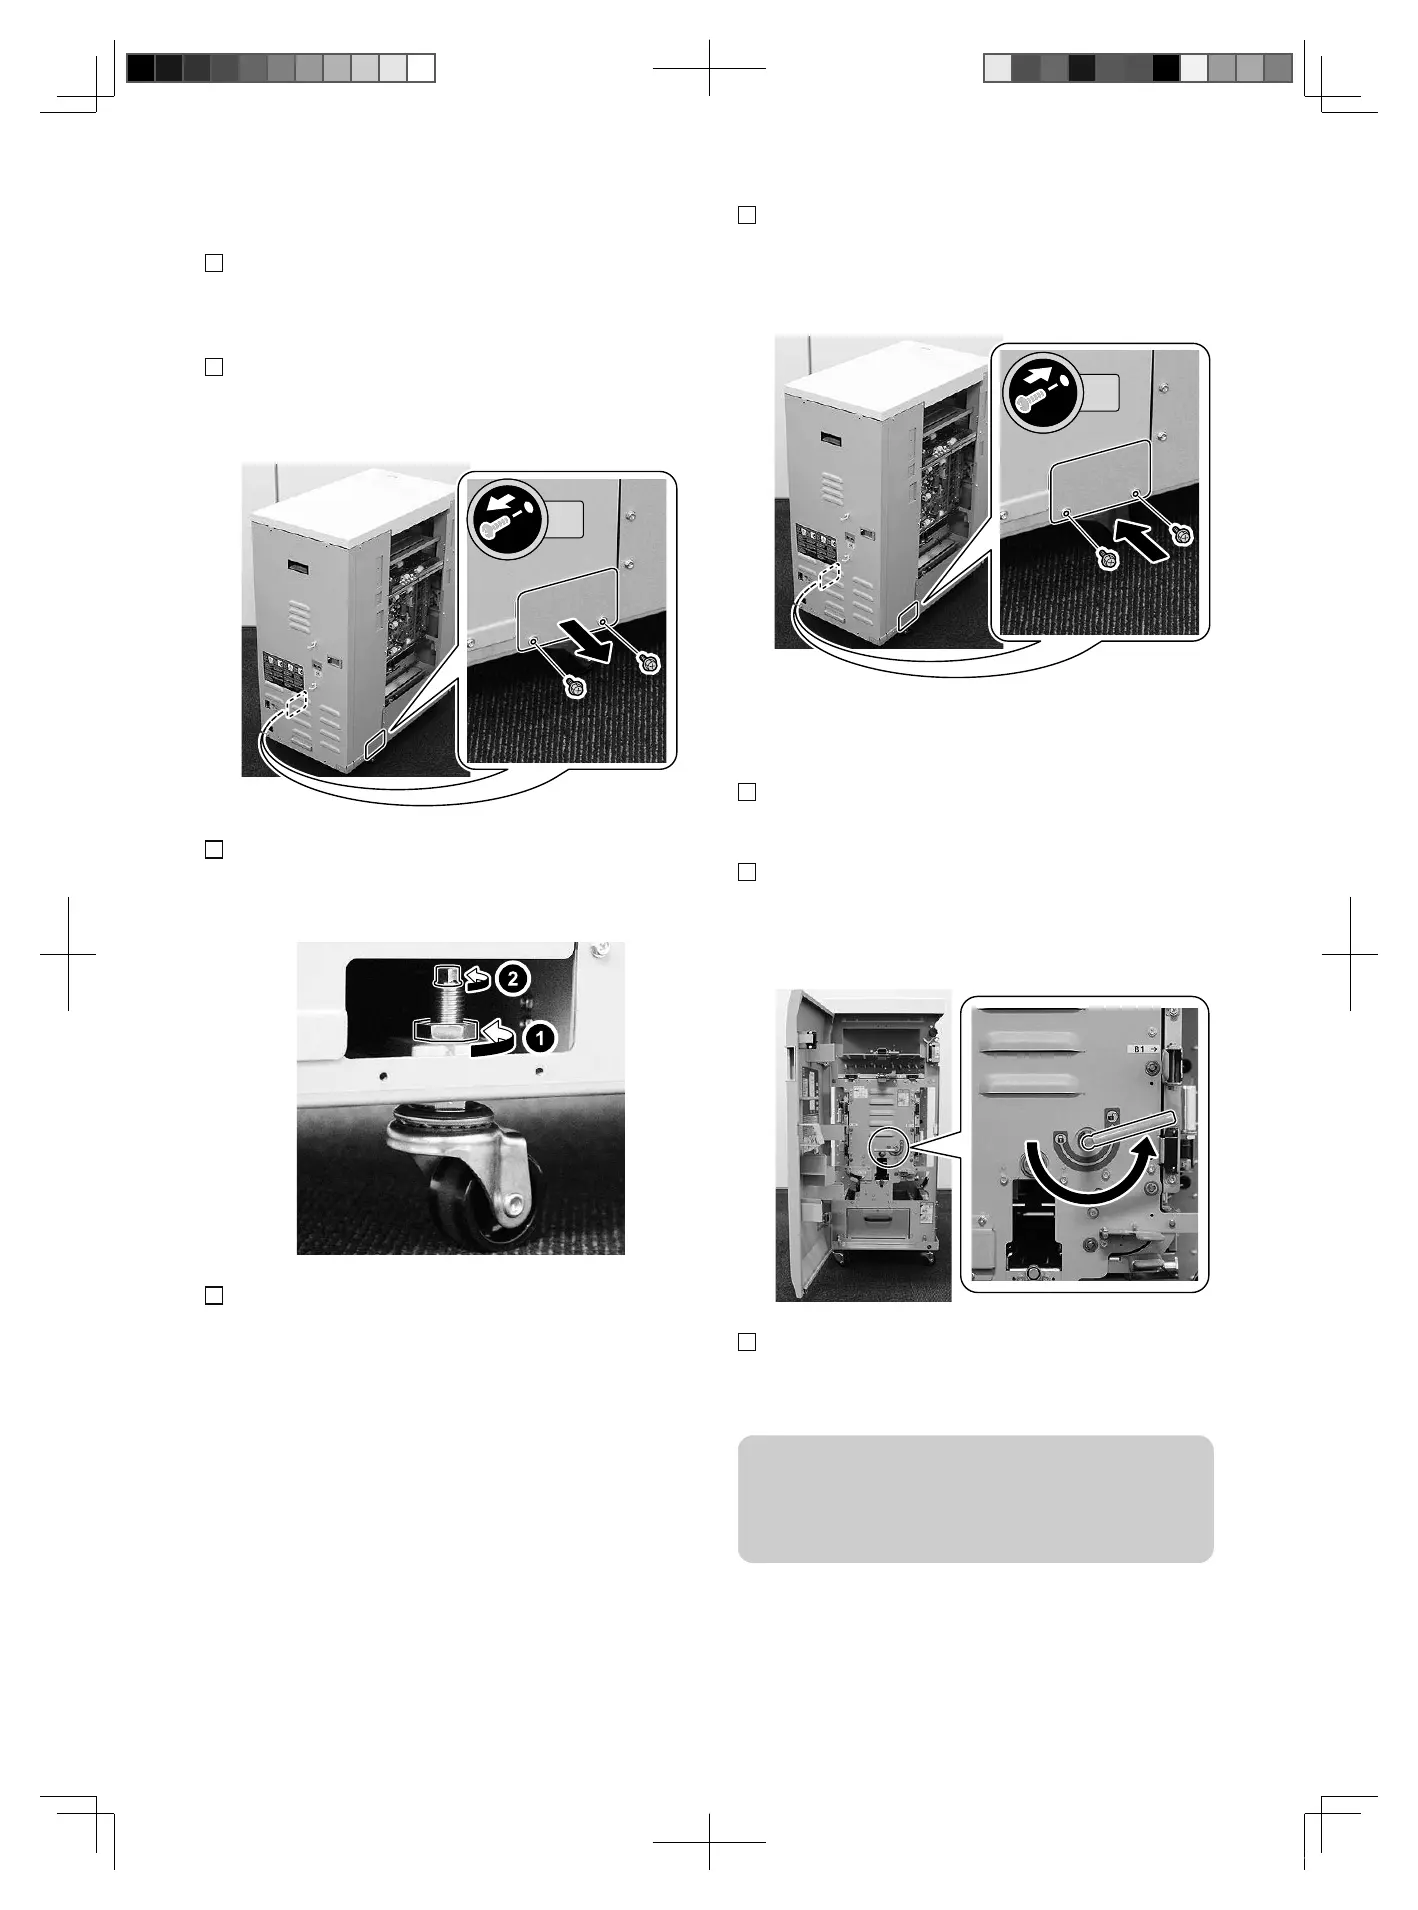
● Adjusting the Rear Casters
1. When making adjustments, disengage from upper
stream devices.
2. Remove the 2 Cover Plates (Left and Right).
• 2 Screws each
3. Adjust the rear casters in the same way as the front
casters.
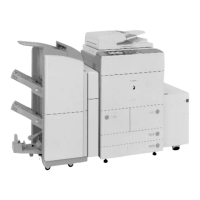
4. Connect the
machine with the upstream equipment.
5. Check the height again. If the height is appropriately
adjusted, tighten the 4 lock nuts (front and rear), and
close the Front Cover. Repeat adjustment until the
height is appropriately adjusted.
6. Return, the Cover Plates (Left and Right) to the
original positions.
• 2 Screws each
■ Installing the Punch Die
1. Open the Front Cover.
2. Hold the Die Lock Handle, and turn it in the direction
of the arrow to the unlock position shown on the
label.
3. Hold the die with both hands, and slowly insert it
until it stops.
CAUTION:
Do not touch the PCB on the rear side facing the end
of the
Punch Die.When inserting the Punch Die into the
equipment, be sure not to give a shock to the PCB.
1. Installation
11
閲 FT2-0208-030_20160510.pdf 11 2016/05/10 14:39:52