CHAPTER 2 STANDARDS AND ADJUSTMENTS
2-39
3. AE Adjustment
Perform this adjustment if you have replaced any of the following:
• DC controller PCB
• Composite power supply PCB (See p.2-37.)
• AE sensor PCB
• Scanning lamp
Making Adjustments
Before Starting the Work
• Obtain a newspaper with more or less even print. (Avoid ones with many photos or large
display text.)
• Obtain five sheets of white sheets of paper.
• Be sure that the intensity of the scanning lamp has been adjusted when you have replaced the
scanning lamp.
• Set the density correction switch (SW101) to the middle setting. If the machine is not
equipped with a density correction switch, set the density adjusting lever to the middle set-
ting.
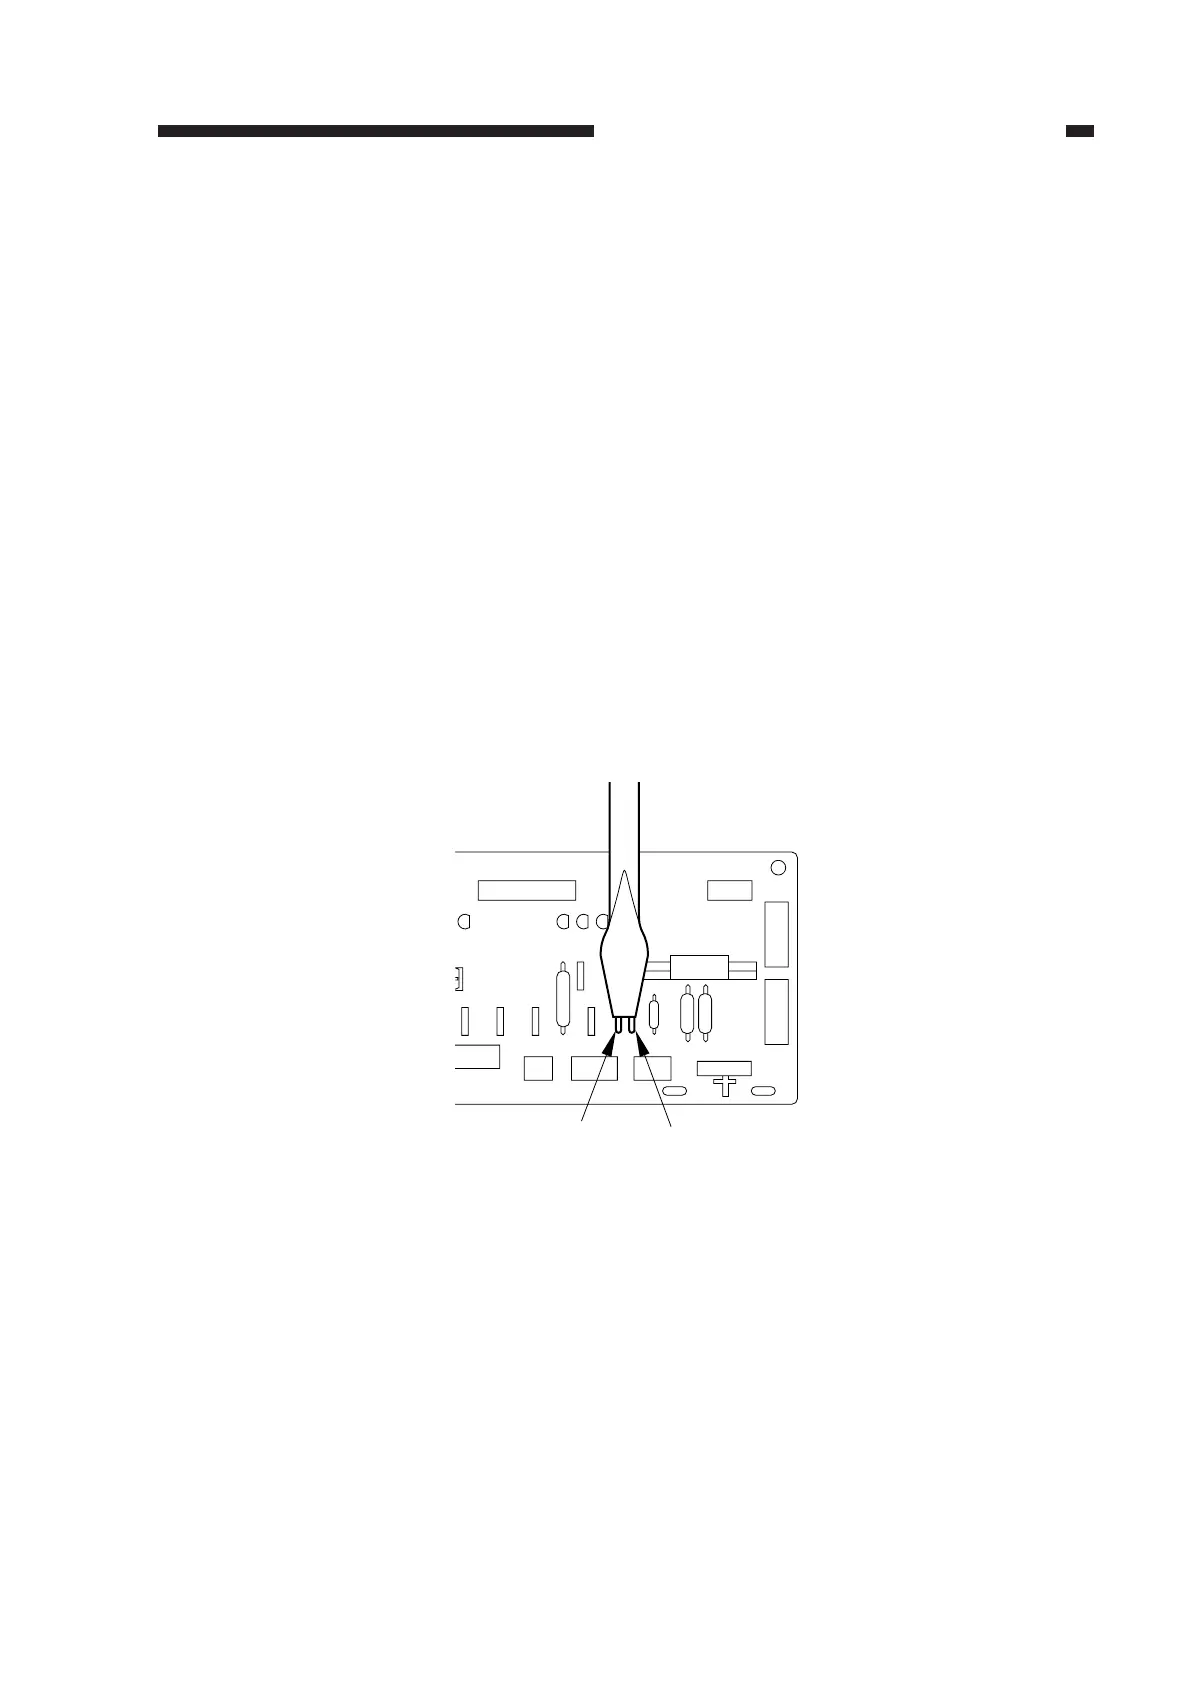
1) Short JP103 and JP104 on the DC controller PCB.
Figure 2-65
2) While keeping the condition in step 1), turn on the power.
• The scanning lamp will turn on, and the main motor (M1) will rotate.
3) Stop shorting JP103 and JP104.
JP104
JP103
SERVICE