52
Images taken with a Canon Compact Digital
Camera with the recording pixels set to L (Large)
can be printed as ID photos.
When a gold or silver cartridge is installed, ID
photos cannot be printed.
In the example on the left, [Long Side] has been
set to [30mm] and [Short Side] has been set to
[25mm] in Step 3.
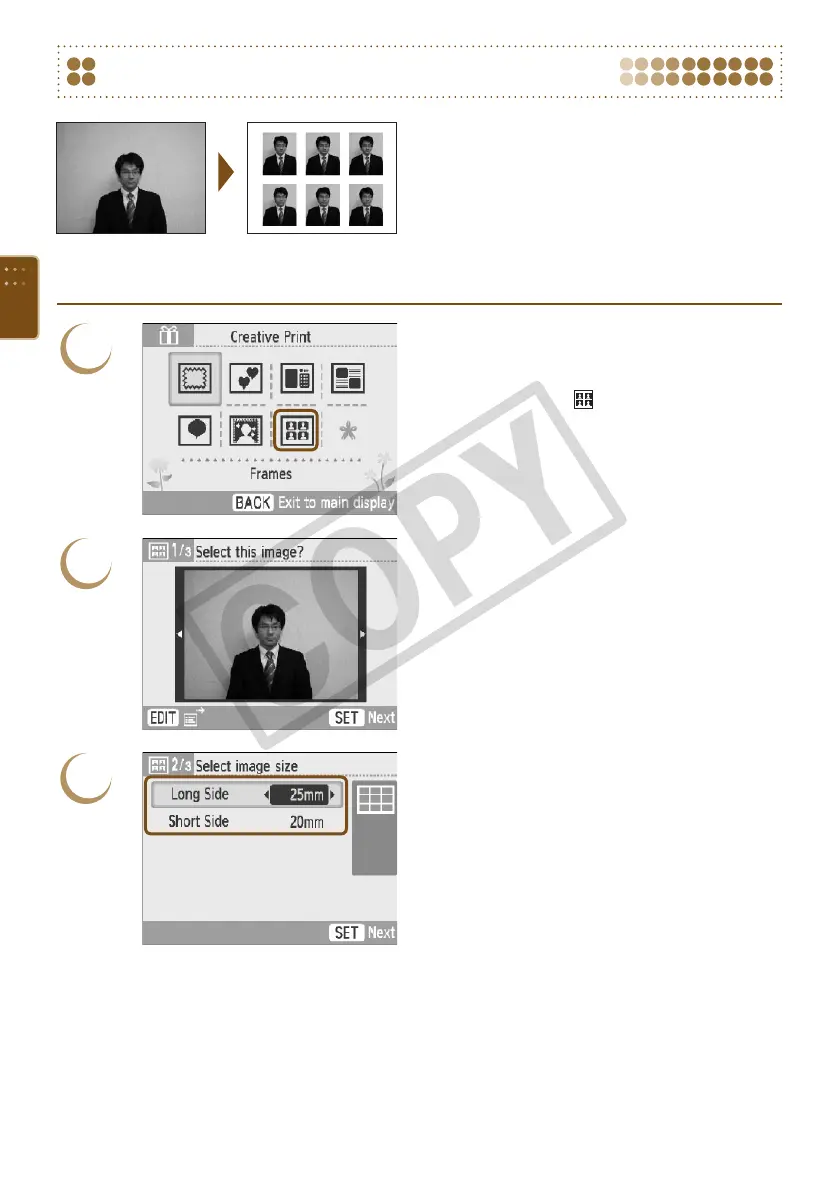
Printing an ID Photo
1
Display the ID photo screen.
Press the c button.
Press the udl r buttons, or turn the w
wheel to choose a (ID photo), then press the
o button.
2
Choose an image.
Press the l r buttons, or turn the w wheel to
choose an image, then press the o button.
You can search images using the jump function
(p. 27) by pressing the m(EDIT) button and
displaying the edit menu.
3
Choose the size of your ID photo.
Press the ud buttons to select an item, and
press the l r buttons or turn the w wheel to
choose the size of the image.
A preview of the output will be displayed on the
upper right of the screen.
Press the o button.
The trimming frame (a frame showing the part
of the image that will be printed) will appear on
the image.
 Loading...