EasyManuals Logo

Carbide 3D Shapeoko Proximity Switch Kit User Manual

Default Icon
42 pages
To Next Page IconTo Next Page
To Previous Page IconTo Previous Page
Page #32 background imageLoading...
Page #32 background image
support@carbide3d.com docs.carbide3d.com 10/02/2020 Version 1.0
32
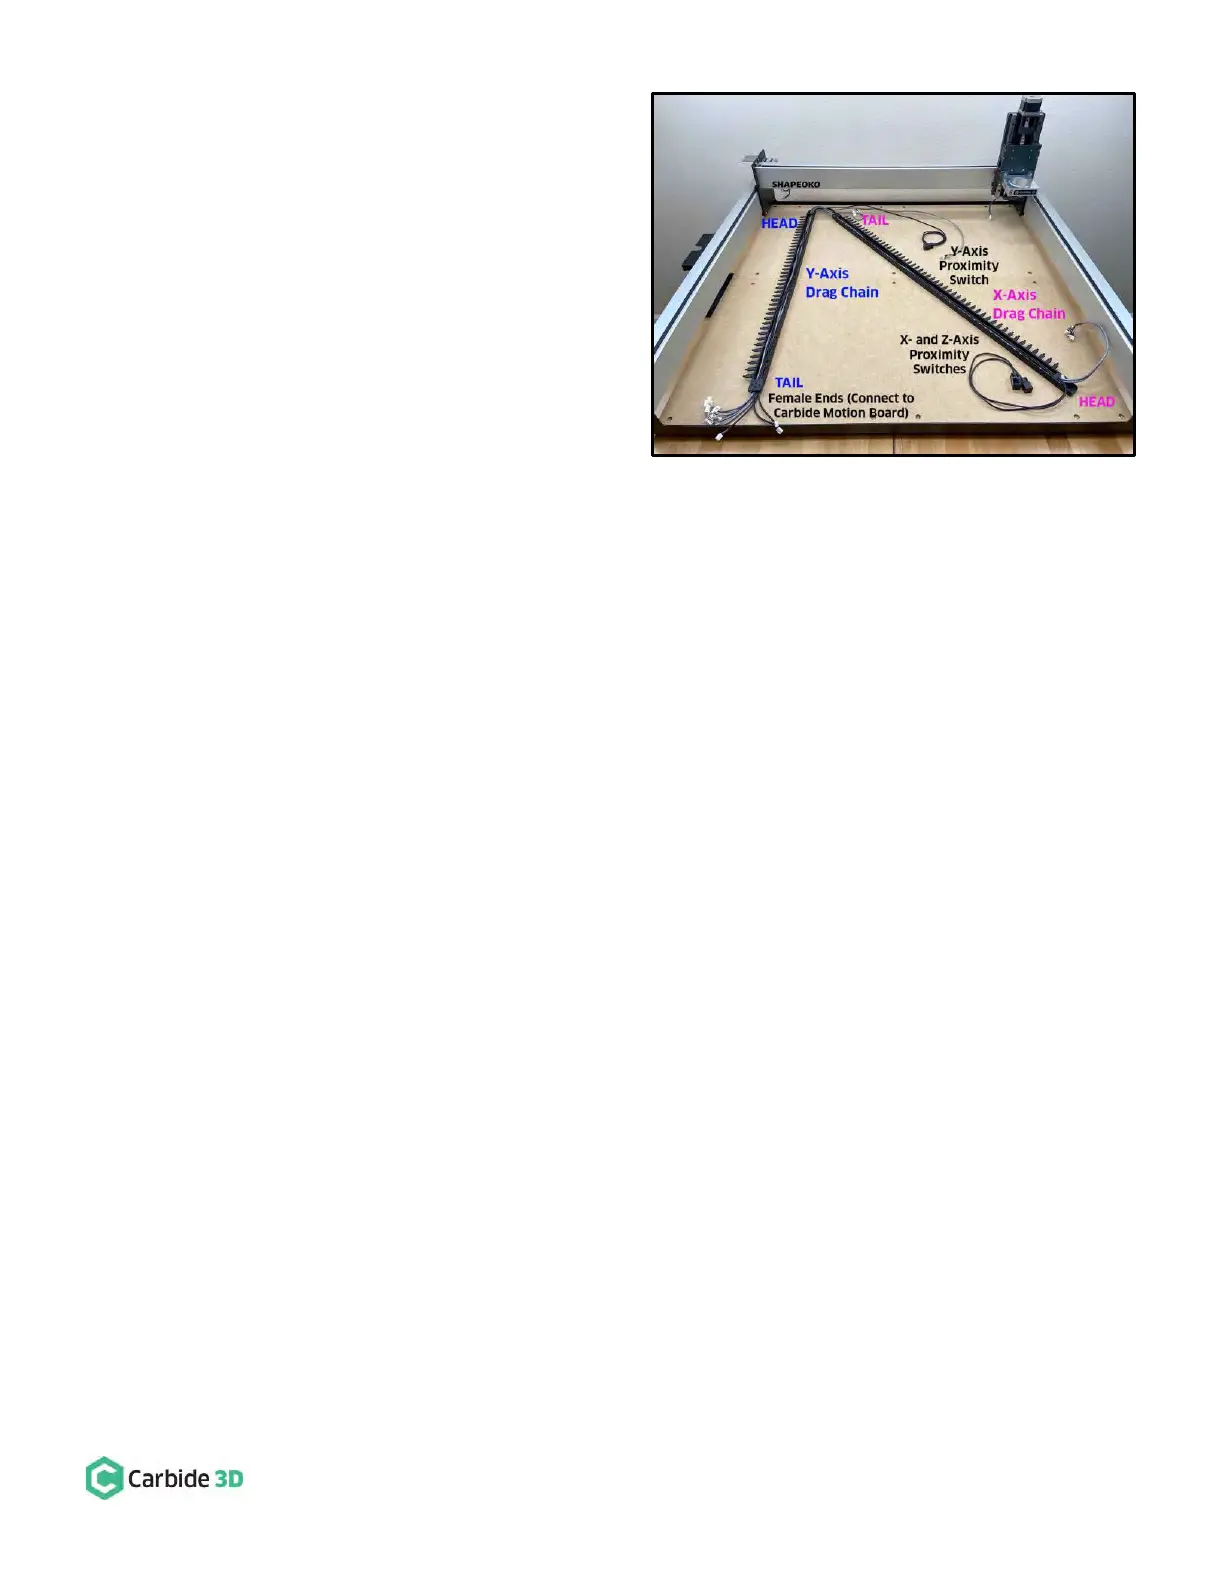
3. Insert the proximity switches into the drag chain.
See Fig. 32.
a. Insert the X- and Z-Axis proximity switch
cables through both the Y-Axis and X-Axis
portions of the drag chain.
b. Insert the Y-Axis proximity switch cable
through the Y-Axis drag chain ONLY.
4. Close up the drag chain. Do not install it onto the
rails just yet.
Figure 32

Questions and Answers:

Question and Answer IconNeed help?

Do you have a question about the Carbide 3D Shapeoko Proximity Switch Kit and is the answer not in the manual?

Carbide 3D Shapeoko Proximity Switch Kit Specifications

General IconGeneral
BrandCarbide 3D
ModelShapeoko Proximity Switch Kit
CategorySwitch
LanguageEnglish