support@carbide3d.com docs.carbide3d.com 10/02/2020 Version 1.0
Install the Drag Chain Tail Plates
Required Components:
The drag chain tail plates install to the top of the rail with
the long edge parallel to the rail. Plates will overhang the rail
by about
7
/
16
” so as not to obstruct the PEM nuts.
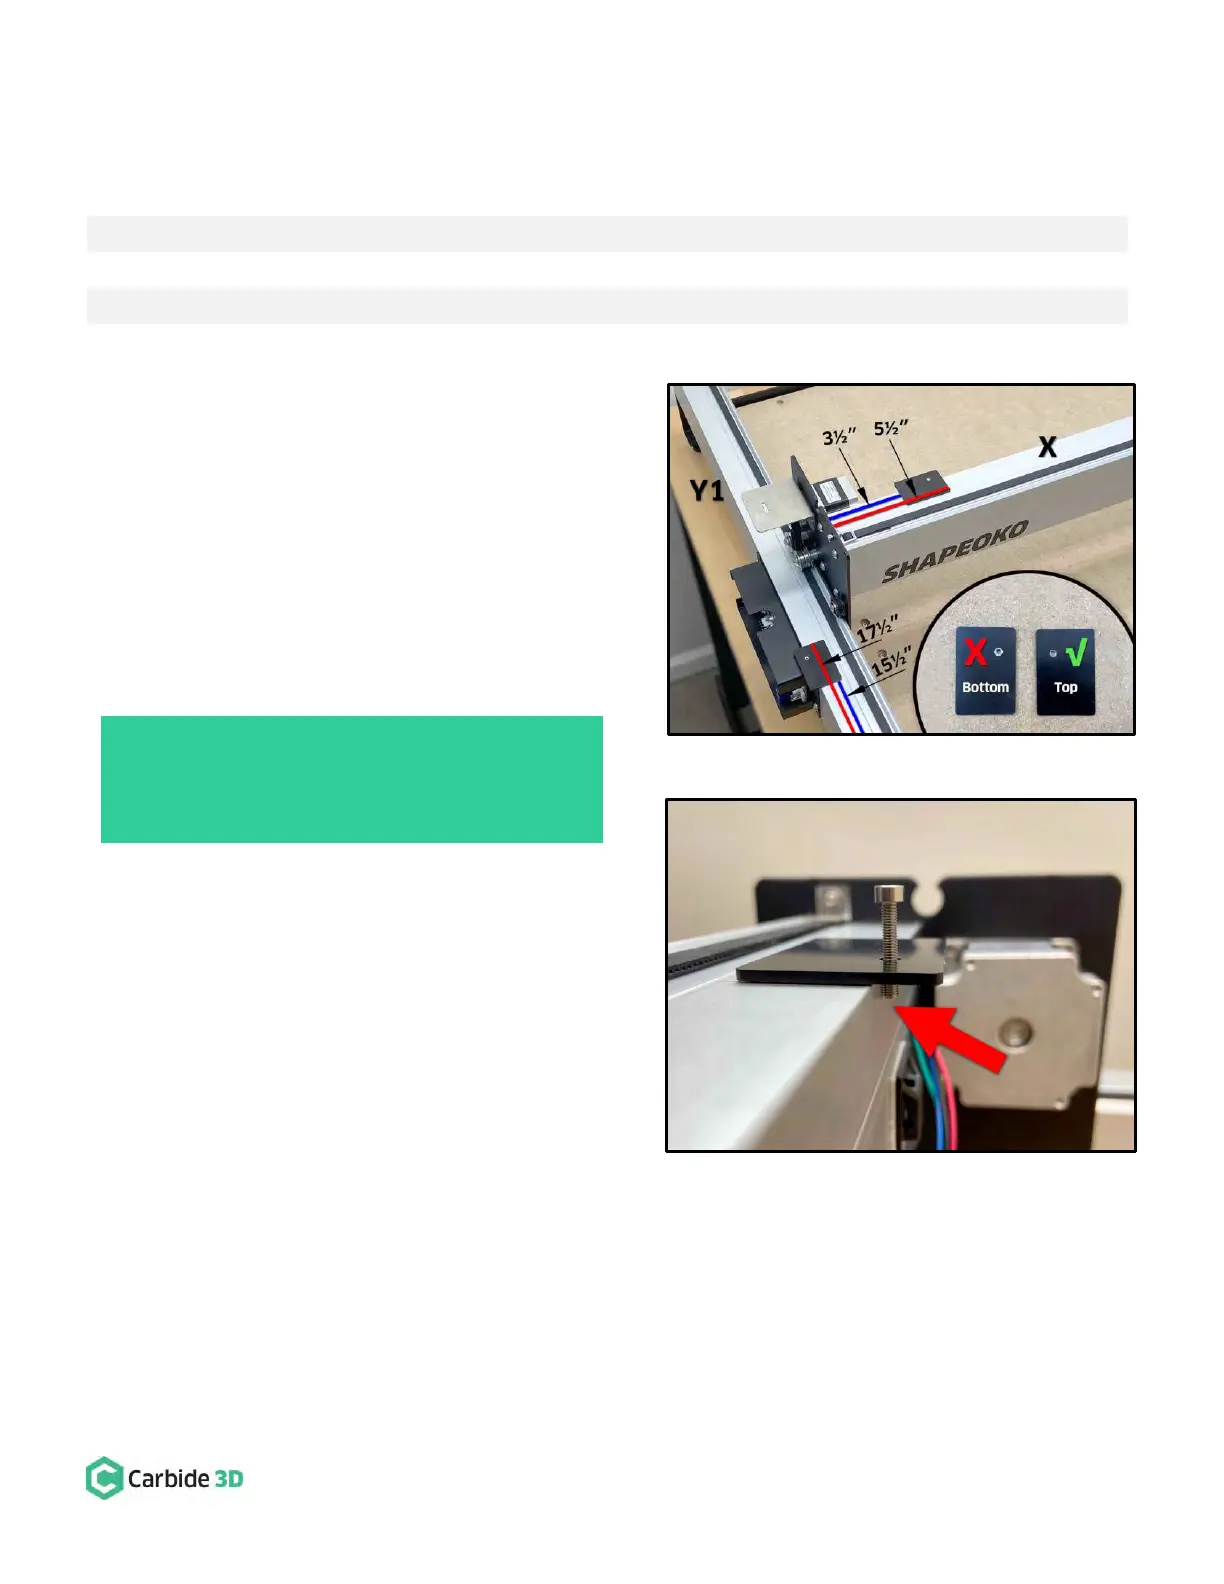
1. Attach one (1) tail plate to the X-rail. See Fig. 33.
a. Measure and mark 3 ½” and 5 ½” from the
Y1-carriage.
b. Clean the bottom of the tail plate AND the
rail between your marks with an alcohol
wipe. Allow the alcohol to evaporate.
c. Stick a piece of VHB tape along the back
edge of the X-rail between your marks.
d. Stick the tail plate between your marks,
with the PEM nut toward the Y2-side and
overhanging the back of the rail. Get the
PEM nut as close to the rail as you can
without obstructing it.
e. Press the plate to the rail for 30 seconds.
2. Attach one (1) tail plate to the Y1-rail. See Fig. 33.
a. Measure and mark 15 ½” and 17 ½” from
the front endplate.
b. Clean the bottom of the tail plate AND rail
between your marks with an alcohol wipe.
Allow the alcohol to evaporate.
c. Stick the VHB tape along the outside edge of the Y1-rail between your marks.
d. Stick the tail plate between your marks, with the PEM nut toward the rear endplate and overhanging
the outside of the rail. Get the PEM nut as close to the rail as you can without obstructing it.
e. Press the plate to the rail for 30 seconds.
PRO TIP: Screw a M3×18mm SHCS 2–3mm into the
plate’s PEM nut. The protruding screw will help you
get the nut as close to the rail as possible without
obstructing it. See Fig 34.