Page 16
! Warning:
Programming the advanced settings of this operator must only
be undertaken by fully trained and qualified personnel.
Please contact your dealer for details.
MENU OVERVIEW ADVANCED SETTINGS:
a Add Beam Break
b Set maximum opening force
c Set maximum closing force
d Set offset automatic learned force limitation
e Set start-up phase
Menu a
ADD BEAM BREAK *2
Operator is in normal operating mode
1. Press % for 10 seconds until LED S starts to blink rapidly and
all others are illuminated.
Note: After 2 seconds LED 2 starts to blink.
Keep pressing % for 8 more seconds until LED 1 blinks rapidly.
2. A: Press & if a beam break is to be installed (LED 1 illuminated)
B: Press / if no beam break is to be installed (LED 1 blinks rapidly)
3. Press % to store settings and go to Menu b
* Beam break is an optional accessory
Menu b
S
ET MAXIMUM OPENING FORCE 2 AND 6
Whilst your new operator has automatic force learning and maximum force setting it may be
required to increase the maximum force.
1. LED S and LED H blink and all others are illuminated.
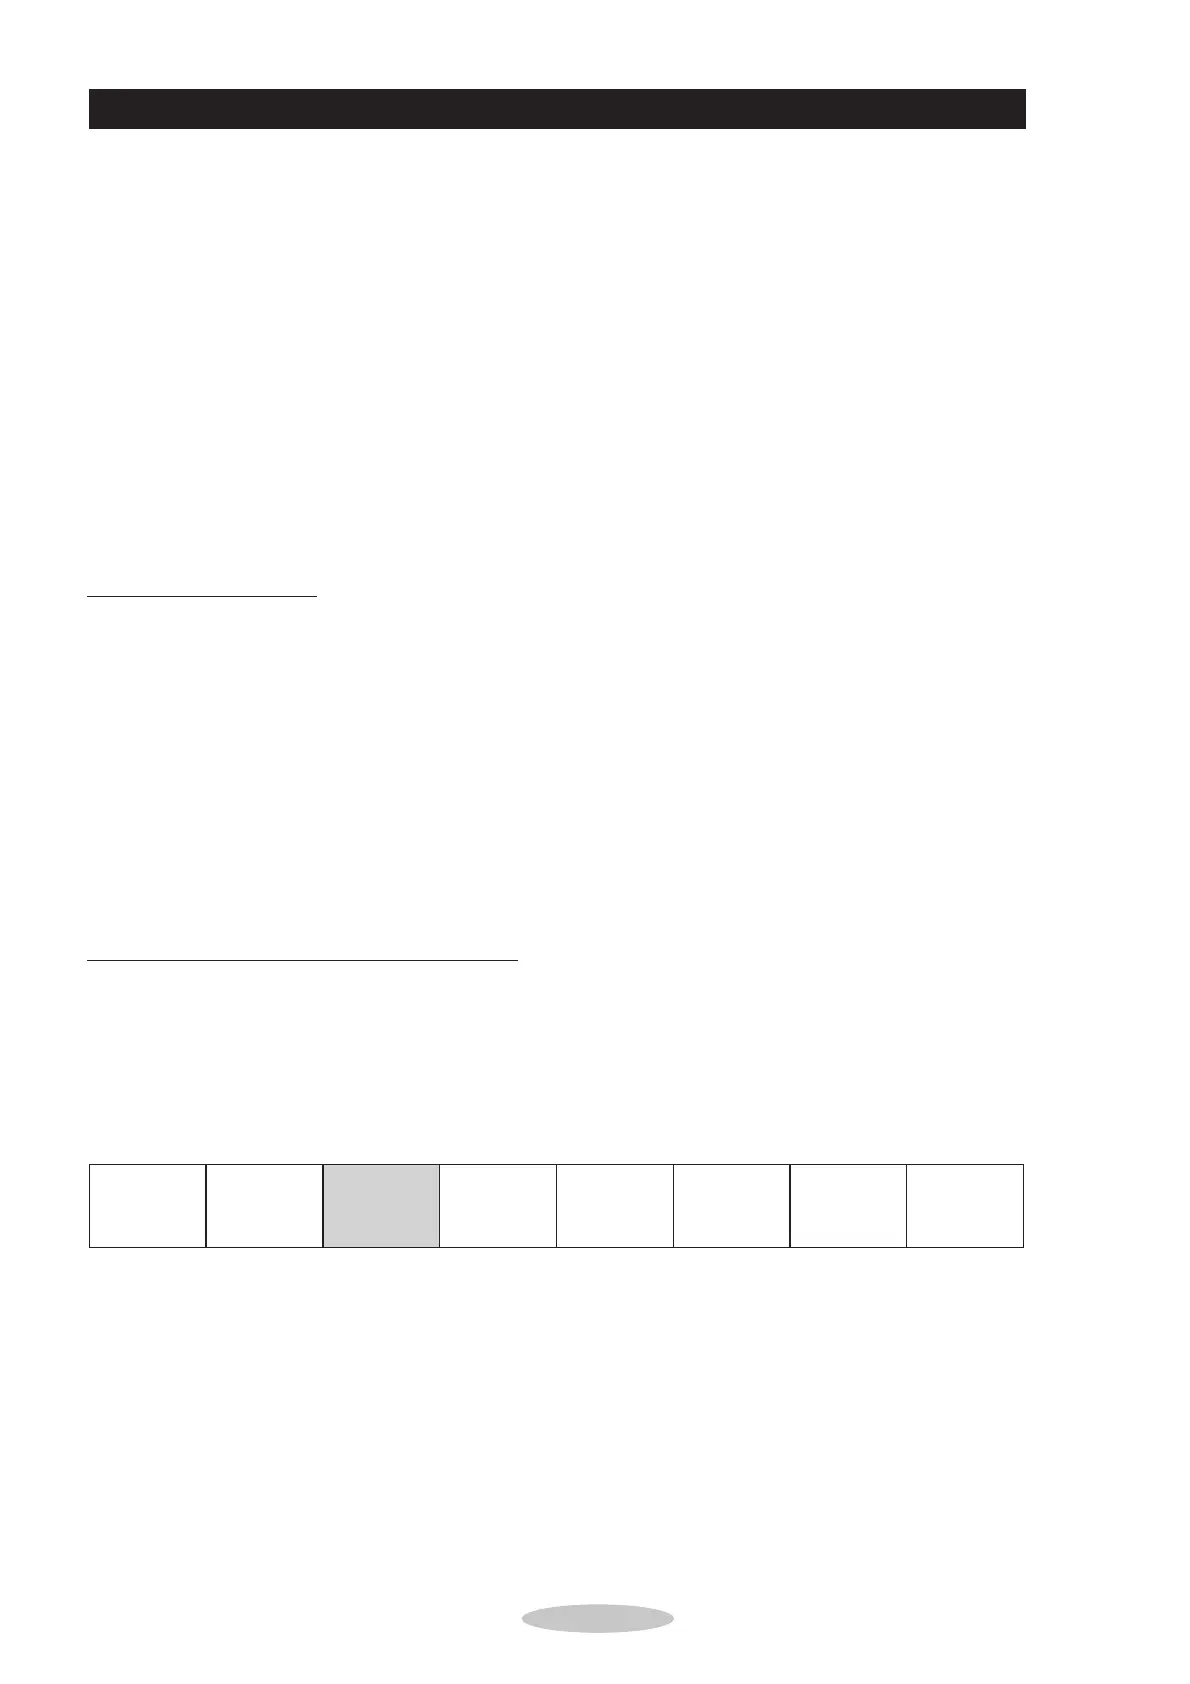
2. By pressing & and / set the desired maximum lifting force.
There are 8 settings; the blinking LED represents 1/8 and the illuminated LED 2/8 of
maximum total force.
3. Once maximum opening force is set press % to store and go to Menu c.
! Attention: Set force as sensitive as possible (max. 150 N at closing edge)
IQ
UW
ZE
TR
8/8
KQ
UW
ZE
TR
7/8
8Q
7W
ZE
TR
6/8
8Q
7W
HE
TR
5/8
8Q
7W
6E
5R
4/8
8Q
7W
6E
5F
3/8
8Q
7W
63
54
2/8
8Q
7S
63
54
1/8
ADVANCED SETTINGS: