Page 17
Menu b
S
ET WARNING
PHASE
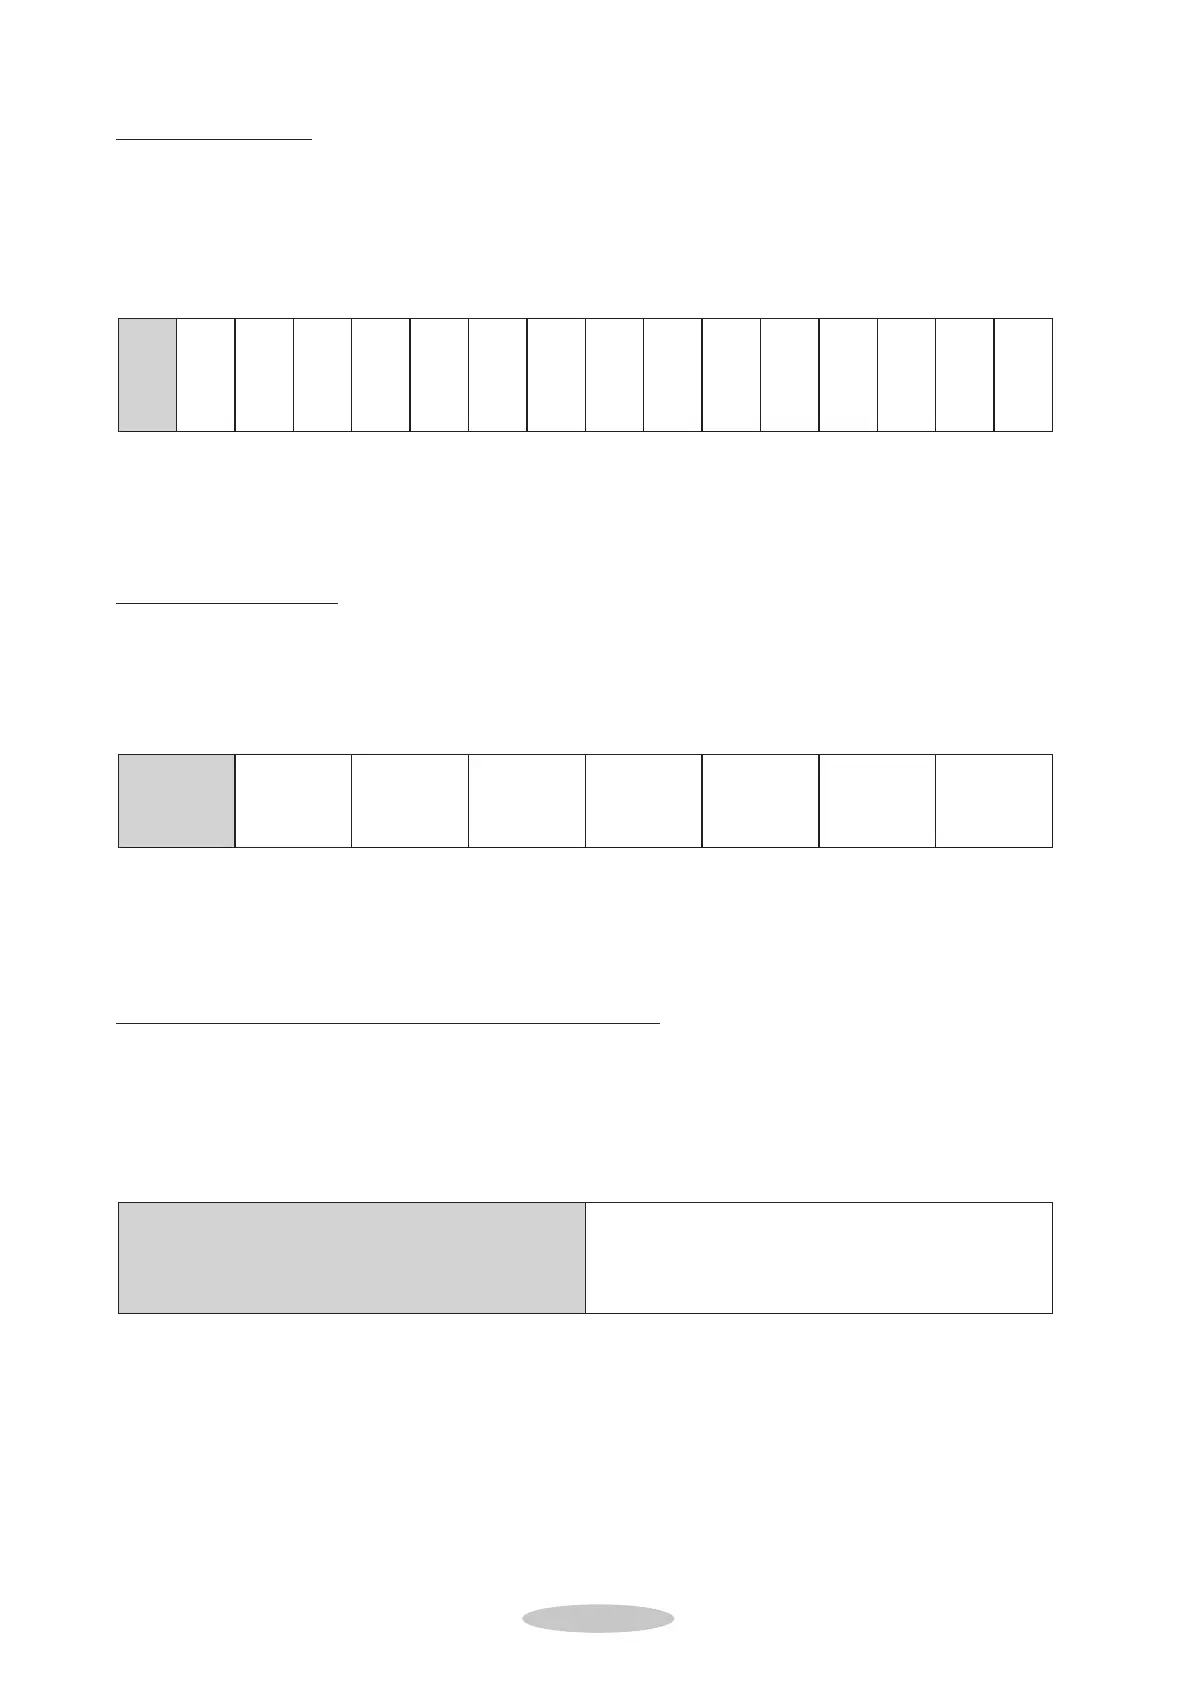
After having programmed the automatic timer function LED S will blink.
1. Make sure LED S is blinking and all others are illuminated
2. Use & and / to change the warning phase
minimum phase: 2 seconds
maximum phase: 70 seconds
3. Press % to store and go to Menu c.
Menu c
S
ET START
-UP WARNING
1. Make sure LED D is blinking and all others are illuminated.
2. Use & and / to change the start-up warning phase
minimum phase: 0 seconds
maximum phase: 7 seconds
3. Press % to store and go to Menu d.
Menu d
S
ET DOOR TO CLOSE AFTER DRIVING THROUGH BEAM BREAK
1. Make sure LED F is blinking and all others are illuminated.
2. Use & and / to choose the required setting:
A. LED A blinking: Door will close after set door open period
B. LED Q illuminated: Door will close immediately after driving through the
Beam Break
3. Press % to store and to finish setting up the automatic closing feature.
The LEDs will automatically turn off starting at LED 8 and ending at LED 1.
Operator is now in operational (normal) mode (recognizable by illuminated LED I)
and possible LED W (door fully open) or LED R (door fully closed).
8Q
72
63
54
Door will close immediately after driving through
the Optical Sensor
8A
72
63
54
Door will close after set door open period
8Q
7W
6E
5R
7 seconds
8Q
7W
6E
5F
6 seconds
8Q
7W
6E
54
5 seconds
8Q
7W
6D
54
4 seconds
8Q
7W
63
54
3 seconds
8Q
7S
63
54
2 seconds
8Q
72
63
54
1 seconds
8A
72
63
54
0 seconds
IQ
UW
ZE
TR
70
seconds
KQ
UW
ZE
TR
65
seconds
8Q
UW
ZE
TR
60
seconds
8Q
JW
ZE
TR
55
seconds
8Q
7W
ZE
TR
50
seconds
8Q
7W
HE
TR
45
seconds
8Q
7W
6E
TR
40
seconds
8Q
7W
6E
GR
35
seconds
8Q
7W
6E
5R
30
seconds
8Q
7W
6E
5F
25
seconds
8Q
7W
6E
54
20
seconds
8Q
7W
6D
54
15
seconds
8Q
7W
63
54
10
seconds
8Q
7S
63
54
5
seconds
8Q
72
63
54
2
seconds
8A
72
63
54
timer
dectivated