EasyManua.ls Logo

Cardo Systems PACKTALK SKI User Manual

Cardo Systems PACKTALK SKI
2 pages
To Next Page IconTo Next Page
Page #1 background imageLoading...
Page #1 background image
Installation Guide
PACKTALK SKI
CONTENTS
CLEANING
PAD
CLEANING
PAD
MOUNTING WITH A GLUE PLATE
MONTAGE MIT KLEBEPLATTE
MONTAGE AVEC UNE PLAQUE COLLÉE
OPTION A
CLEANING
PAD
4.
1.
2.
3.
5. 6.
Die Rückplatte wieder in die Klebeplatte schieben
Faites glisser la plaque arrière en position sur la plaque de colle
Clean the area with the alcohol pad Press for 60 seconds
Press small coin into opening of cradle, release clip
60 Sekunden lang drücken
Kleine Münze in die Önung der Halterung drücken, Clip freigeben
Appuyer sur la petite piece dans l’ouverture de la plaque, relâcher la pince
Fläche mit Alkoholtuch reinigen
Nettoyez la zone avec le tampon d’alcool
B C E
60
seconds
MOUNTING WITH A CLAMP
MONTAGE MIT KLEMME
MONTAGE AVEC UNE PINCE
OPTION B
E
1.
2.
Push the metal clip between the
helmet’s outer shell and inner padding
Den Metallclip zwischen die Außenschale und Innenpolsterung des
Helms schieben
Poussez le clip métallique entre la coque extérieure du casque et le
rembourrage intérieur
Slide the back plate into position on the glue plate
VELCRO
VELCRO
CLEANING
PAD
CLEANING
PAD
A B C ED
Appuyez pendant 60 secondes
communication in motion
Question and Answer IconNeed help?

Do you have a question about the Cardo Systems PACKTALK SKI and is the answer not in the manual?

Cardo Systems PACKTALK SKI Specifications

General IconGeneral
BrandCardo Systems
ModelPACKTALK SKI
CategoryHeadsets
LanguageEnglish

Summary

Option A: Mounting with a Glue Plate

Cradle Insertion and Clip Release

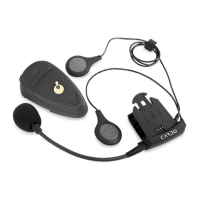
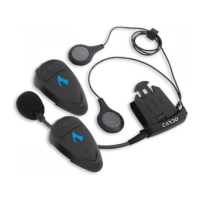
Secure the cradle by inserting a coin into the opening and releasing the clip.

Surface Cleaning for Adhesion

Clean the mounting area with an alcohol pad to ensure proper glue adhesion.

Back Plate Placement

Slide the back plate into position on the glue plate to complete the mount.

Option B: Mounting with a Clamp

Metal Clip Insertion

Push the metal clip between the helmet's outer shell and inner padding.

Positioning the Microphone

Microphone Bending

Bend the microphone to achieve the desired position for optimal audio capture.

Placing the Speakers

Speakers A Placement

Plug in and push speakers through inner padding, then secure Velcro pads to helmet.

Speakers B Placement

Place speakers inside inner padding and push back padding to secure.

Unit Installation and Removal

Inserting the Unit

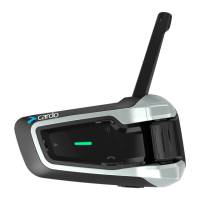
Instructions for inserting the main device unit into its housing.

Removing the Unit

Instructions for safely removing the main device unit from its housing.

Removing the Glue

Guide on how to remove adhesive residue after detaching components.
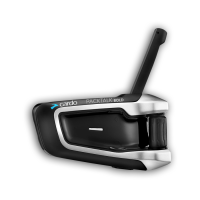
Related product manuals