44
ENG
c.pCO sistema +0300057EN rel. 1.2 - 29.05.2017
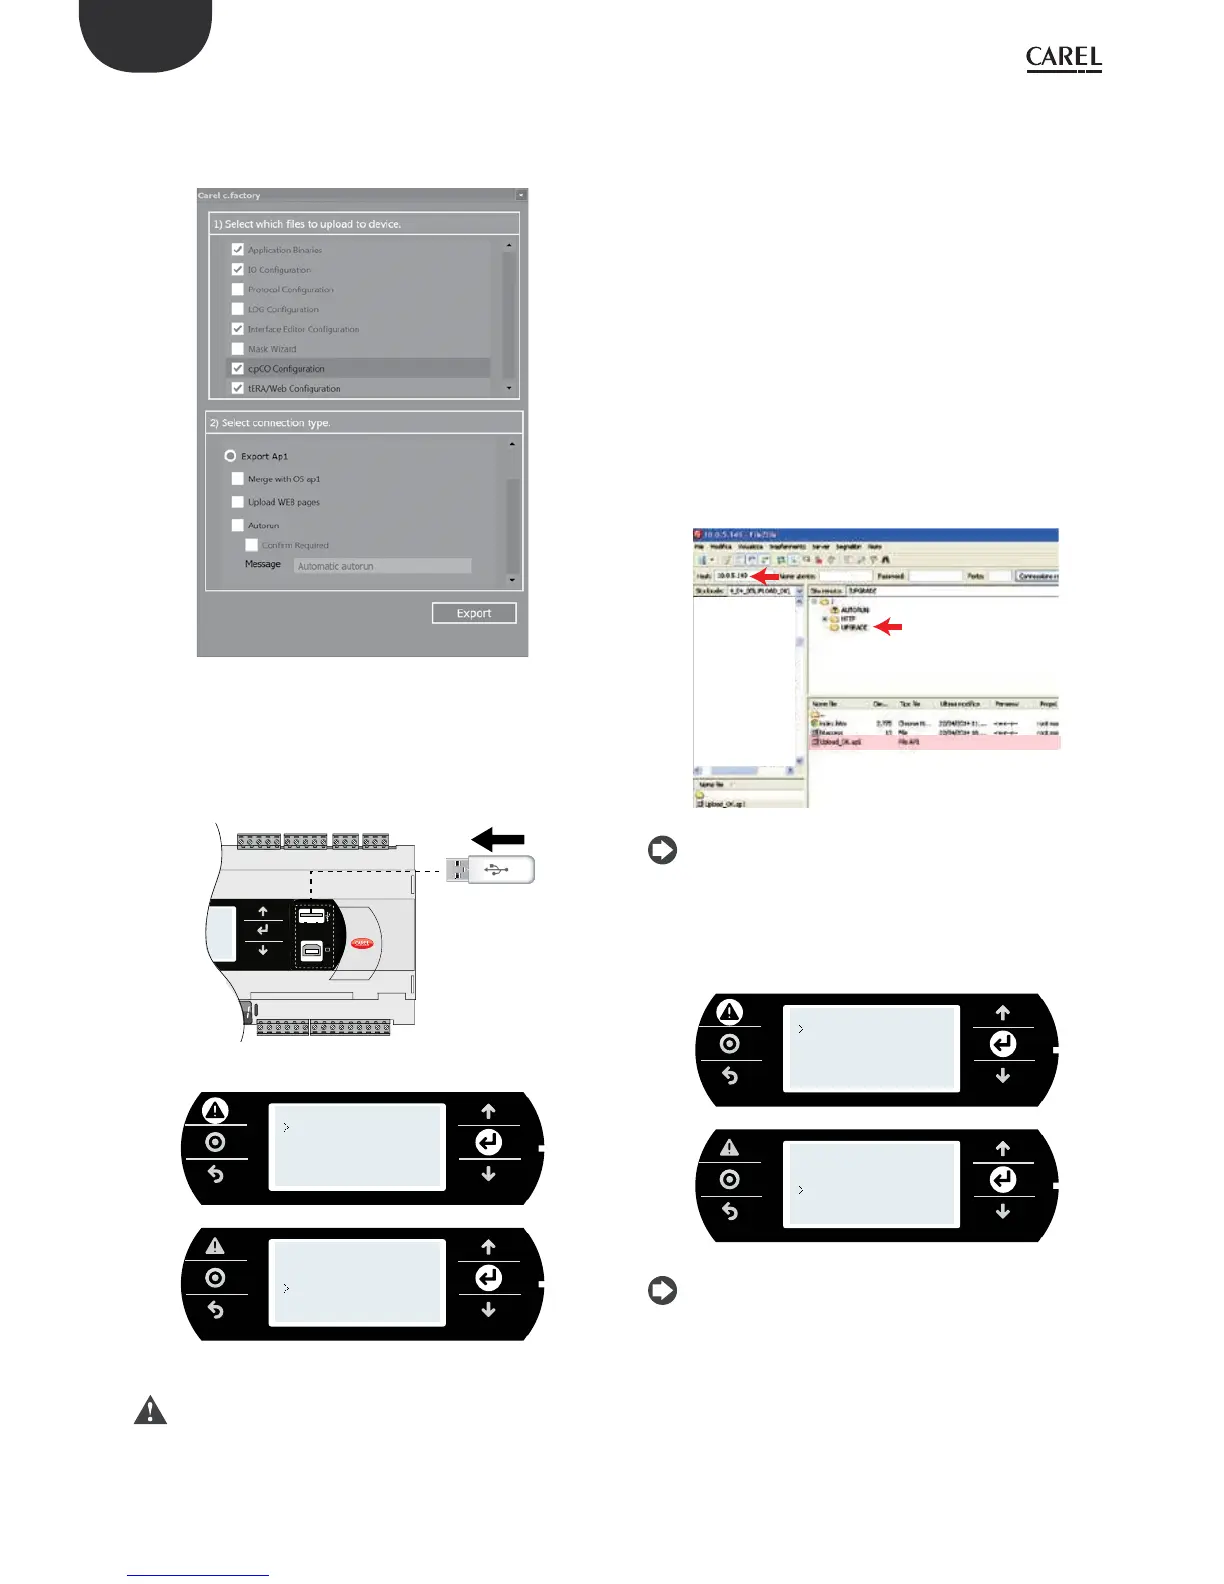
2. Select the les to be loaded onto the controller and click ”Export Ap1”. In
the application package it is possible to include also:
• the Operating System, selecting the specic path;
• the web pages for the c.pCO web server functionality (see Chapter 10).
Fig. 6.l
3. Click “Export” and save the le to a ash drive, under a directory called
“UPGRADE”.
4. Plug the ash drive into the Host USB port and enter the system
menu (see Chapter 7). On the screen, select UPGRADE and then the
application program to be loaded and conrm by pressing enter.
USB key
A
Fig. 6.m
INFORMATION
SETTINGS
APPLICATION
UPGRADE
LOGGER
DIAGNOSTICS
INFORMATION
SETTINGS
APPLICATION
UPGRADE
LOGGER
DIAGNOSTICS
Important:
• Before updating the c.pCO controller via USB connection, check in
the system menu that the Host USB port is enabled (Settings --> USB
Settings --> Pen drive, see Chapter 7).
• Only use ash drives with FAT le system.
• Do not use both USB ports on the controller at the same time.
• Do not use mass storage peripherals that have a current draw more
than 500 mA.
Update with le transfer via FTP
The c.pCO family controllers tted with Ethernet port include an FTP
server that provides access to the public partition of the le system.
Files and directories in this partition can be read, modied, created and
deleted. FTP can also be used to transfer an .ap1 le, for example to
update the image of the operating system or the application program.
This is done using an FTP client, for example “FileZilla”.
To protect the contents of the public le system against unauthorised
access, dierent users can be created, assigning each a dierent access
prole, dedicated to each service and adapted to the individual directory
(see Chapter 9). To update via FTP:
1. Open an FTP client (e.g. FileZilla). Enter the IP address of the c.pCO
controller and the access credentials (default user “anonymous”, no
password).
2. Drag & drop the software update le from the directory on the
computer to the “UPGRADE” directory on the c.pCO controller.
Fig. 6.n
Nota: Please use following settings in Filezilla:
• Edit->Settings->Connection-> set timeout in seconds = 0
• Edit -> Settings -> Transfers -> set maximum simultaneous transfers to 1
3. Access the system menu on the c.pCO and select “UPGRADE” (see
Chapter 7).
INFORMATION
SETTINGS
APPLICATION
UPGRADE
LOGGER
DIAGNOSTICS
INFORMATION
SETTINGS
APPLICATION
UPGRADE
LOGGER
DIAGNOSTICS
Note: when having loaded the update le to the “UPGRADE”
directory via FTP, the update procedure can also be started using the
virtual terminal (see paragraph 10.3).
Update via tERA cloud service.
See paragraph 10.6.
 Loading...