Code +030220215- rel. 1.4 – 25.04.2007-
13
Both types of transducers use the SPKC****** 3-wire
cable with Packard co-moulded connector. The ratiometric
transducer uses all and three wires, the 4-20 mA transducer only uses two (the green wire is not used).
Each pressure transducer is supplied with a different range of measurement. The parameters corresponding to the
minimum and maximum pressure of the transducer used then need to be set.
The range that is most suitable for the application must be selected based on the following parameters:
• measurement precision
: improves if the range of evaporation pressure of the utility is in the centre of the
range of measurement of the transducer.
• high pressure alarm
: to avoid the probe alarm being generated, even when the utility is off for extended
periods, the pressure must reach lower values than the maximum measurable range.
• maximum limit:
each transducer has a maximum limit beyond which it may be damaged. This must never
be reached.
• explosion limit:
each transducer has an explosion limit beyond which the safety of the installation and the
probe is not guaranteed. This must never be reached.
In standard applications with HCFC and HFC refrigerants, the following ranges are suggested:
ratiometric code SPKT0013R0 (from -1 to 9.3 barg)
4-20 mA code SPKT0011C0 (from 0 to 10 barg).
To improve the measurement precision, transducers with a reduced range can be used:
• ratiometric code SPKT0053R0 (from -1 to 4.2 barg);
• 4-20 mA code SPKT0021C0 (from -0.5 to 7 barg).
In this case, however, broken/disconnected alarms may be signalled, during the periods in which control is
not active. When the unit is off, in fact, the pressure at the evaporator outlet may exceed the maximum
measurement of the transducer, due to the balancing of the pressure in the refrigerant circuit; in this case, the driver
will signal a probe fault alarm.
5. Electrical connections
5.1 Connecting the valve to the driver
The following operations are required for the connection of the valve to the driver:
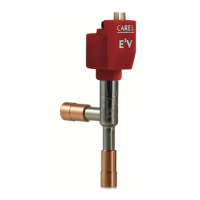
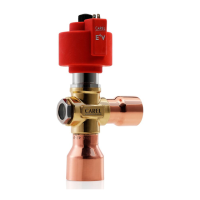
A) Completely insert the stator into the valve body and tighten the locking nut. Never leave the stator in place
without the locking nut or with the nut partially unscrewed, as water may infiltrate inside.
B) Fit the cable with the co-moulded IP67 connector code E2VCAB**, connecting the connector to the stator and
fastening it carefully with the screw provided. IP67 protection is not guaranteed if the screw is not properly
secured.
A shielded cable code E2VCABS* is also available where necessary.
Pay special attention to the polarity of the connectors: contact no. 4, which on the stator is facing the valve
body, is wider than the other three. Do not forcefully insert the connector unless you are sure the orientation
is correct. If the orientation is incorrect, the valve will not be able to move correctly.
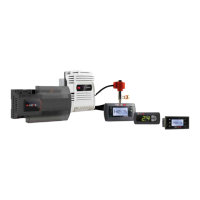
Bbis) Alternatively, a standard DIN 43650 B connector code E2VCON** can be used, wiring the 4 poles to a 4-
wire AWG 18-22 cable (0.5-1 mm
2
) with an outside diameter of 4-6 mm to ensure the seal of the gasket on
the cable gland and with a maximum length of 10 m. Note the colours used for the 4 poles, so that when
connecting the cable to the driver, the numbering on the connector corresponds to the numbering on the
driver. Important:
contact no. 4 on the connector is usually marked with the earth symbol. In this case, the
corresponding wire must not be earthed, but rather connected, just like the other wires, to the corresponding
terminal (4) on the driver.
C) Finally connect the wires on the other end of the cable to the terminals on the driver, carefully following the
instructions shown on the driver instruction sheet, and observing the correct sequence of the colours. If
connected incorrectly, the valve may not move or may move in reverse compared to the direction controlled
by the driver.
Fig. 5.a
Fig. 5.b
installation
 Loading...