11
GB
easy way ARIA +030220841 - rel. 1.0 - 26.10.2007
for around 20 seconds
The instrument is ready for the use.
The transmission channel has been selected and will be sent to the
repeaters, sensors and terminals during the binding phase.
Important:
If the sequence is not as indicated, reinitialise the device (see paragraph •
3.5)
If the instrument is reinitialised, all the instruments associated with it •
will be disconnected and will need to be connected again.
Terminal
Perform the following steps for the correct connection to an existing
network.
Power up the terminal by removing the insulating tab from the battery •
compartment;
Check that the display comes on and the text OFF is shown;•
Press the “ON/OFF” button.•
Check that the symbol (antenna) is o . This means that the instrument •
is ready to be connected to a new network; Otherwise, it means that
the device has been previously been associated and needs to be
reinitialised. (see paragraph 3.5)
Access the parameters menu (see paragraph 4.5)•
Enter the password (22 default) for parameter loc 10.•
Check that the instrument is not connected to any network, by making •
sure that parameter loc 12= OFF.
Enter the desired CAREL network address for the parameter loc09;•
par. description min max def UOM type index R/W notes
loc 9 Supervisor address of the device 16 199 16 - I 4 R/W
R only from
supervisor
loc 10 Password to access the parameters 0 999 22 - - - -
loc 12
Exit the corresponding network
0/OFF Device associated
1/ON Device disassociated
OFF ON OFF - - - -
password
access
Tab. 3.b
Note:
The network address (loc 9) cannot be changed without rst having •
entered the password (loc 10).
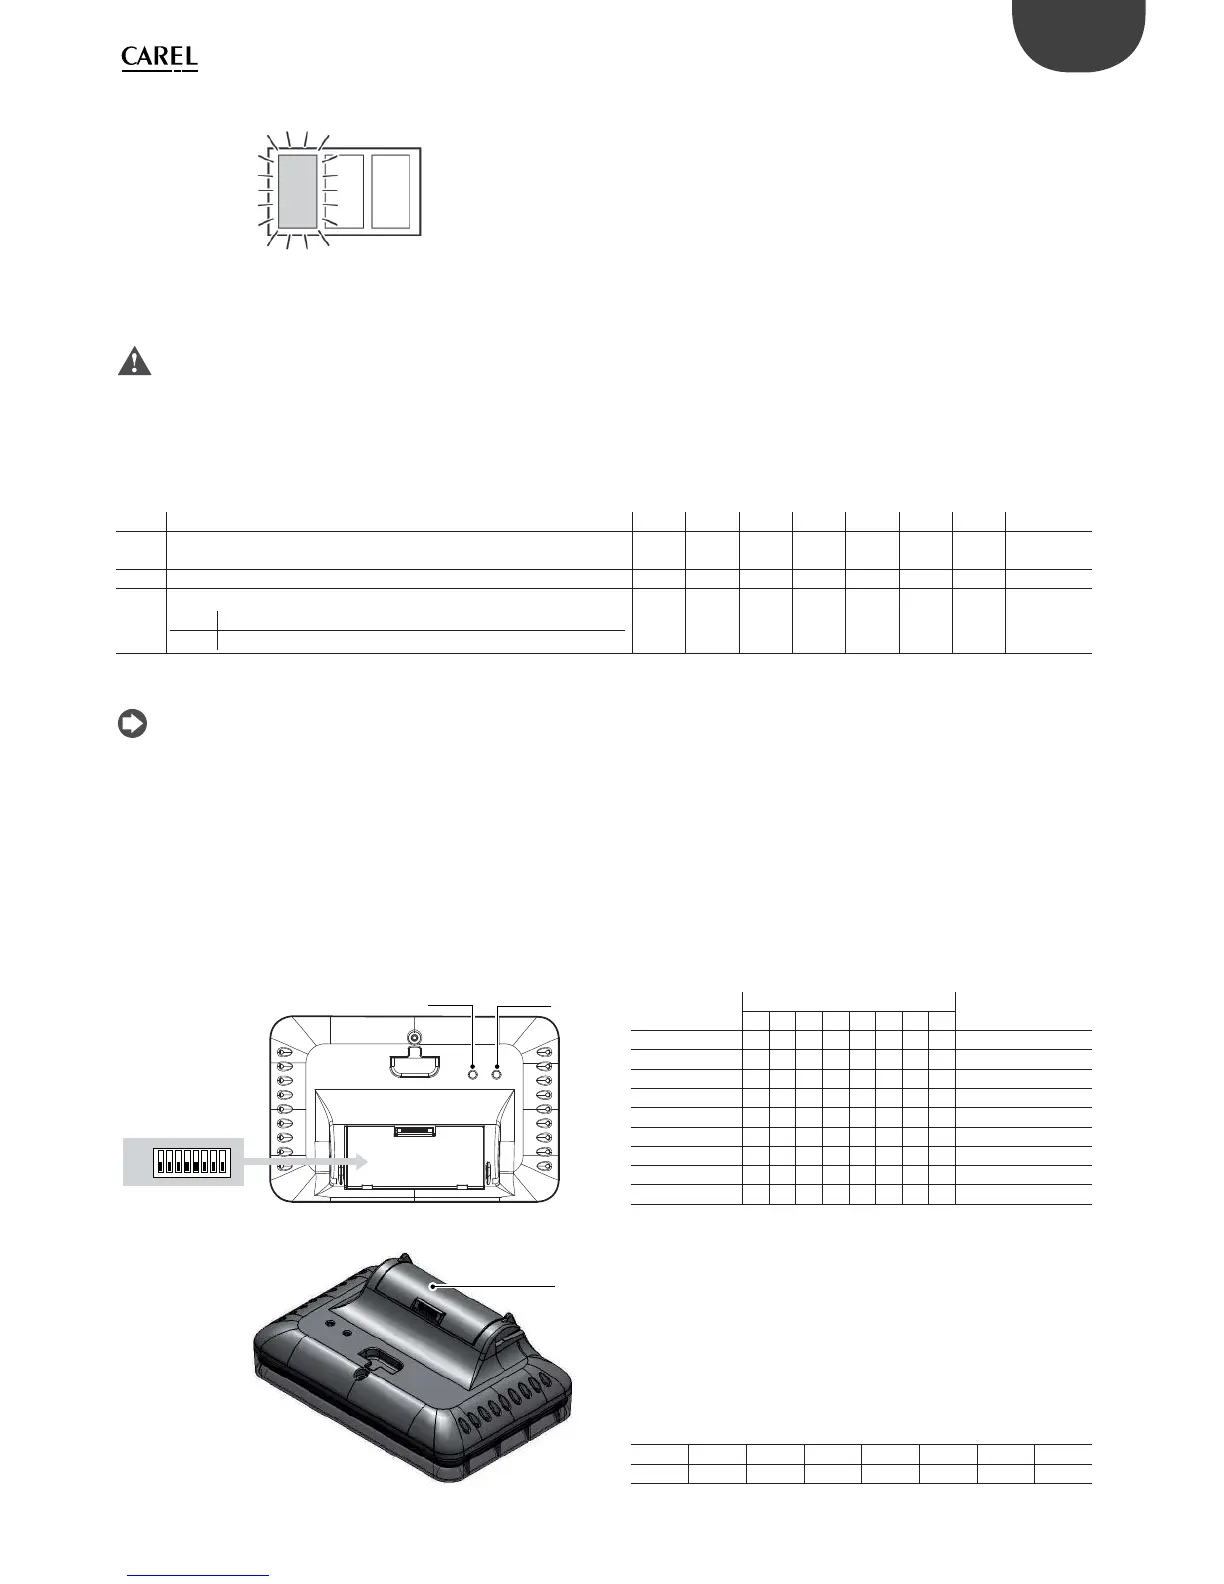
Sensor
Open the battery compartment and set the Desired CAREL network
address using the 8 dipswitches (0 = OFF; 1 = ON), as shown in the table.
Vano batteria
Vano batteria
Led L1 Tasto T1
OFF
ON
Fig. 3.c
CAREL address dipswitch notes
12345678
0...15 X X XXXXXXAdd. not allowed (*)
16 00001000
17 10001000
18 01001000
19 11001000
20 00101000
….
199 11100011
200..256 X X XXXXXXAdd. not allowed (*)
Tab. 3.c
(*) The address can be set but the device will not be able to connect to
the access point. When pressing the button the LED will ash quickly a
number of times to indicate that the address is not valid.
EXAMPLE: to set the address 157 for the sensor:
Use a calculator to decode address 157:
Decimal: 157•
Conversion to binary notation: (MSB) 10011101 (LSB)•
Reverse the string (10111001) and set dipswitches from 1 to 8.•
dipswitch
12345678
10111001

 Loading...