8
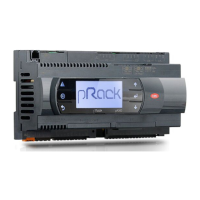
Fig. 3.d
GND
Rx/Tx+
Rx/Tx-
G0
G0
G
G
24 Vac ±15 %
ENGLISH
µAD +030220465 - rel. 1.1 - 15.12.2010
2.3 Power supply connections
Warning:
• The power supply terminals of the µAD are called G and G0. The connection takes place by
means of the 2-way screw clamps fi xed onto the back of the instrument.
• The electric connections must be carried out exclusively by a qualifi ed electrician.
• It is compulsory to install a 250 mAT fuse between the power supply and the terminal G. The
µAD does not have an internal protection fuse.
• If earthing of a power supply terminal is requested, the G0 terminal must be earthed (and NOT the G
terminal), both for the µAD and any other devices present.
• A different power supply voltage to that prescribed can seriously damage the system.
• Whenever the appliance should be used in a way that is not specifi ed by the manufacturer, the envisio-
ned protection of the appliance could be jeopardised.
Attention:
• µAD e µC
2
/µC
2
SE must be connected with the same type of power supply (direct or alternating
current). Check in the µC
2
/µC
2
SE user manual if direct current is allowed.
• Use a 4 VA or larger class 2 safety transformer. The feeder or power supply transformer used must
guarantee double or reinforced isolation between the dangerous voltage network and the terminal.
• If the transformer or feeder used for the µAD is the same that also feeds the control connected by
means of the serial line (µC
2
), then the µAD G0 terminal must be connected to the µC
2
G0 terminal.
• Use tag boards that are suitable for the clamps in use.
Power supply connections:
In order to connect the µAD power supply, proceed as follows:
• introduce the cables into the rear shell through the central hole;
• install the tag boards on the power supply cables;
• fi x the cables to the power supply clamps G and G0 (fi g. 3.d).
• close the instrument, paying attention that the pins on the board are introduced into the correspon-
ding clamps and that the cables do not obstruct the operation.
 Loading...