EN
www.carlisleft.com 77-3345 R1.1 (06/2022)
40 / 62
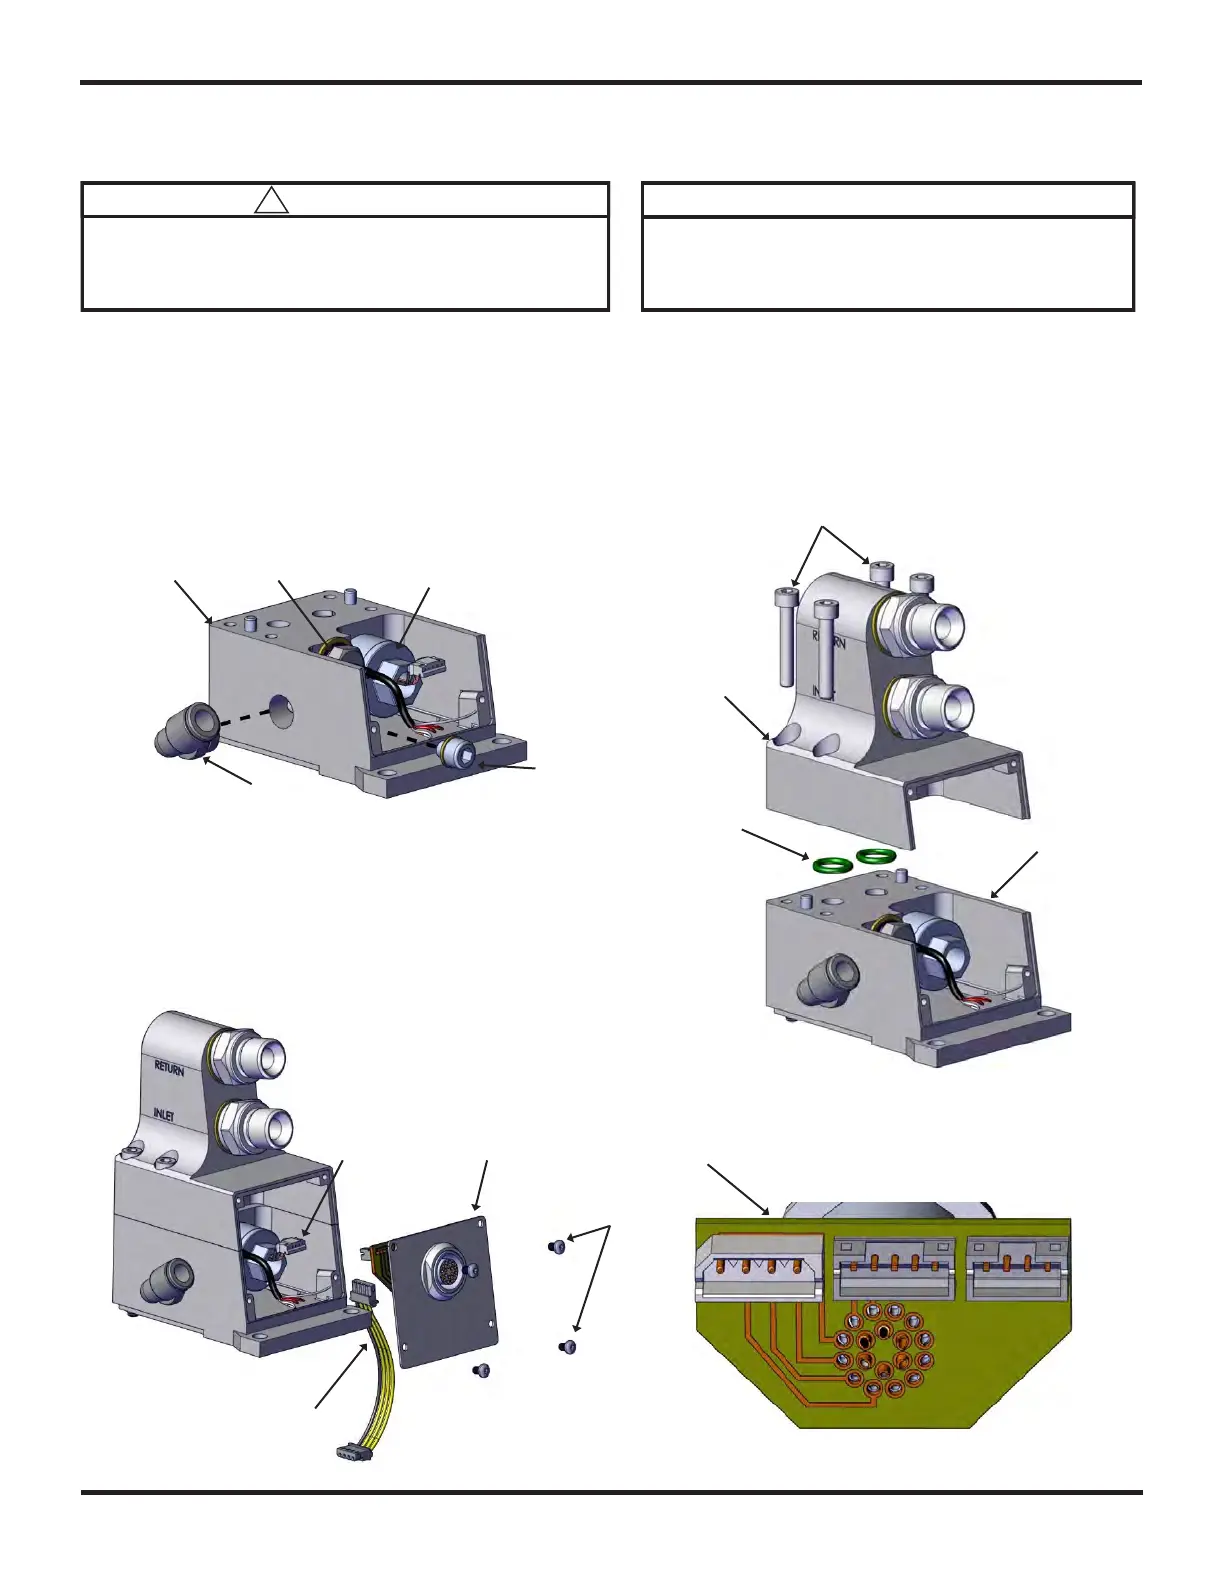
6. Assembly instructions:
The assembly of the applicator starts with the connection housing. In case they have been removed,
reattach the pressure (1) and temperature (2) sensors to the lower connection housing (3), the pressure
sensor (1) should be tightened to 10 Nm and the temperature sensor (2) to 20 Nm, as well as the plug (4)
and the push in elbow coupling (5).
Place the O-rings (6) in place in the upper connection housing (7) and using the four screws (8) fasten it to
the lower connection housing (3).
Connect all the internal cables, for the pressure and temperature
sensor (9) should the applicator have it and the cable bridge for
the solenoids (10), to the connector (11). When all the cables
have been properly connected fasten the connector and plate
(12) onto the connection housing using the four screws (13).
Before assembly, make sure all spare parts are available (new in
unopened package if so delivered), other parts thoroughly cleaned.
It is recommended to use the special tools kit for the E420, see page
16.
NOTE
5
1 [10 Nm]
4
2 [20 Nm] 3
3
6
7
8 [6,5 Nm]
9
10
11
12
13
Ensure a proper work bench with a vice with “soft jaws”. Suitable
lubricant and thread locking compound should also be available.
Recommended tightening torques:
Pressure sensor 10 Nm
Temperature sensor 20 Nm
CAUTION
!